如何建设一间凶宅

粉丝37获赞1815
相关视频
 02:53查看AI文稿AI文稿
你知道这凶宅是怎么形成的吗?说怀家镇有户姓马的人家,家中出现了怪事,说夜里外边是抛砖致瓦, 有时候还有人哭泣不止,又时不时的突然之间冒出鬼火来。这样闹了一年多。这马家人呐,是人心慌慌,请了个术士消灾且难,也不见应验。 无奈之下,这马家人呐,全家在别墅买了新宅,就搬了新家,此处就荒废着,也没人敢去。这天来了一位老先生,说自己不信会有这等怪事,便要买下这宅宅子一探究竟。 这马家人想都没想,就半买半送的给了他们。这老先生胆也大, 选了个好日子就搬了进去。这宅院竟然安安静静,再没有发生任何的异常。 很多人都说啊,这老先生是个老神仙呐,应该是他德高望重,能镇住这些邪罪。于是啊,大家都纷纷邀请这位老先生到自家去教书,对他是十分的敬重。 一天夜里,正巧有个人要到老先生家,给他送点薄礼,想让他的自家雪浇自己的娃娃。没成想,发现了几个盗贼进了老先生的家。这人连忙跑回镇子去敲锣打鼓,让大家都前来救这位老先生于水火。 于是众人都操起了铁锹菜刀,悄悄聚在老先生的家院墙下。刚想冲进去救人,却 却不想里边传出来争吵的声音,只听那道真喊着你这个老不死的啊,为了低价买这所房子,雇我们兄弟几个,日日夜夜不眠不休的在这里装神弄鬼,如今这几个银子就想打发我们没门,哼! 大家听完是一惊啊,原来这老头是这等下座之人,枉我们这么敬重于他, 正当大家气的牙根直痒痒的时候,就请里边一阵混乱,那老头啊的一声,就被盗贼把刀给杀了, 出人命了。咱们报官吧。报什么官呐,他只是自作自受。走走走,回家去。众人纷纷就回了家。多日后啊,这老 老头依然没有人为其收尸。从此以后,这宅子变成了真正的凶宅呀。 正道是机关算尽太聪明,哪知道报应招张是真灵啊。劝后人阳光大道踏实行,是走正道,路途坦荡心安宁啊。
76敬学 说 02:04查看AI文稿AI文稿
我家的院子里藏着一个废弃的防空洞,我准备把这个像鬼屋一样的山洞改造成洞穴风。卧室。经过了拆墙砸窗砸过洞穴之后,为了方便后面的施工改造,先把垃圾清理出来。本以为东西不多,很好打扫,但是山洞里到处潜伏着危险, 藏着各种各样的小动物。最后应扛着清理了三十袋垃圾,差不多一吨重。紧接着要把墙皮铲掉。墙面不知道是什么材质,清理起来很是费劲。一直跟表弟清理了大半天的时间,闪动又边抵无存。瞎讲,洞里的热血裸露也是 长时间的,奉化已经捉弄的很厉害。我准备给他们全部集成墙,然后在上面做出灰泥。本想着把砖头记下来,但没想到的事情发生了。通往山洞的楼梯又窄又陡,一趟一趟的运很费劲。于是我这个聪明的大表弟想了个办法,一桶一桶掉下。 但是事实证明好像并不靠谱。又经过各种尝试后,最后我们还是选择了徒手搬砖。由于之前改造海岛砌的砖都不牢固,这一次我做足了功课,所美观部署起码是非常结实了这面墙。为了增加层次感,我们准备预留一个树槽。最近发现了这款家居装修宝藏 app, 一下子就相中了这种玻璃展示柜,后面也会做一个。跟表弟一直忙活到大半夜,一面墙才刚刚出行,说实话,有些实在干不动了,我不想干了。于是乎,我们联系了熟悉的工程队长, 先把岩石做好防水,然后开始砌墙。不得不说,工人累强的速度简直就像起飞。之前经常有网友吐槽,让我赶紧找个设计师,这次我特意在中小帮上预约了好几位,而且提现在上面看了很多装修 案例和设计灵感,大家也可以去上面找找合适的创意。去掉一半砖头不够了,但是买的量太少,老板不给配送,只好自己一点一点出去拉砖。场面累完之后全部冲进抹灰,让墙体 更加结实。防空洞的上下两部分落差太大。后面用树脂胶做一个河流楼梯,先让工人师傅帮忙砌出个模型。折腾了好几天的时间,我终于在汕头里又累出一座房。但是下一步的水电改造我真的毫无头绪。
10.6万海边有座房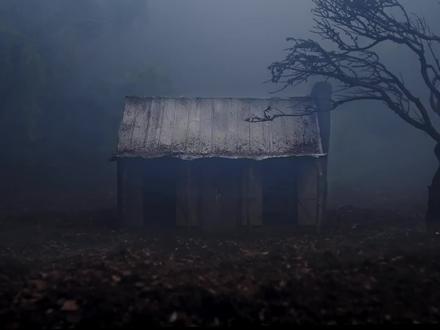 13:54查看AI文稿AI文稿
hey, guys, today's project is sticking with the halloween theme and i'm making my interpretation of the evil dead cabin this cabin is pretty notorious in it would be a lot of fun to try and make my own version of it and then make a scene to film it in this is also the very first time that i've ever made the entire exterior of a building i've only ever done a single wall or something like that so i'm trying to make out the whole frame with foam board i designed a little bit of what i thought i'd want in my three modeling program on my ipad and then i just started cutting out the pieces that i needed and gluing them together i decided so that i'd have more options of how i could light it in the end i wanted to make the cabin in two parts this is the first half of the cabin and then there's an obvious added extension to the back of it the movie and so i'm making these in two separate parts leaving the back of the front part open so that i could add lights to it and for those wondering this is a actually in one twenty fourth scale it's the first time i've done one twenty fourth scale as well and it's really because obviously entire buildings are much larger than single rooms like i'm used to so my plan was to get the structure complete with the foam board and in primate and then start to cut all kinds of little pieces of bosso wood to use as individual planks of wood for the walls the deck and the windows and doors this did take quite a long time because i had to go in and see exactly what length i needed to reach wall and each part of the wall but i like how balsa would really just has this perfect wood texture because it is real wood and i like how it's easily stained with different paints and the grain still shows through a little bit here i'm starting to frame out the windows with some more boss of wood pieces i really kept this simple the cabin itself is pretty simple and knowing this is the first exterior i've ever done i wanted to make my job a little easier and even with that i was getting crunched for time for this project and had to speed things up a little bit in the end, these pieces are going over the windows like they were boarded up from the inside like in the movie so this is the very back of the cabin and to be honest i'm not sure you're even going to see this in my finished shots i don't think i'm going to film it from this angle, but i wanted to at least complete it most of the way so that i had a finished piece now here is where this kind of portion of the wall has just been busted through and broken and so i broke a lot of these pieces of what at the end and glued them on so that there's going to be this massive hole that has live edge broken pieces on it once i was all done i started priming everything and began the process of painting some individual planks different shades of brown and orange colors so that when i started using washes over top of that there would be some variance, but it wouldn't stick out too much i used this piece of poster board to individually paint each one with my airbush and i really didn't pick out that many i could have done a lot more to get more variety, but i think it worked i really like how well the balsa would takes washes like this, but they do dry pretty faint so you have to do multiple layers, sometimes and build up the effect and and at some point i think i do use a matte varnish over everything so that it stops seeping into the wood and then i can really put paint on it that will make a bigger effect so start to age the wood i used a gray paint and started dabbing it in places and then would knock it back with a paper towel, so that it wouldn't be too obvious and i did that with a brown color as well and maybe even in one other color just to start building up different variances and make it look like it's been aged over time so for the roofing it looked like it was a tin roof and so i decided to make a template and use aluminum foil to make the roof i'm not going to go into detail of how i made this template and how i'm using it here but i will be showing all of it into tutorial on my patreon this month so if you like this technique and want to learn how to do it you can join my patreon at the video tutorials here and you'd also get the tutorials that i've posted on there for the last couple months as well, but as you can see using the template and pressing the tin foil over it created this pattern that makes it look like it has the grooves and things like the metal roofing so i'm just priming it and then i used a brighter greyish color to go back over that primer to make it look like fresh tin roof i had read online somewhere that uhu glue was really great for sticking aluminum foil to things and since i've never tried it i decided to pick up some and it worked really great for this will say though the glue has a very strong smell and i made sure to use a respirator when i was working with it i really liked how the aluminum foil ended up looking and i think it's a great technique to try out the only downside is obviously the illuminator foil is fragile but once you glue it down the parts that are glued seemed really solid so now i glued some pieces together for our door and these are window shutters the front door has some destruction going on and so i drilled a couple holes through it and use pliers to really rip some of those pieces out and i liked how the wood underneath was still fresh and it looked like it had just been broken these are little pieces that i'm rusting up to use as hinges for the door and the window shoulders time to make the small overhanging porch i decided to just cut a piece of matte board out and glue that in place and then i began to add little sticks to use as supports to begin dirtying up the roof i started dropping from a brush some of my brown pigment powder and sprayed that with some water down isoproba alcohol to kind of set it so at this point i realized i still needed to make a chimney and so i took this piece of wood wrapped it in some tin foil and started adding super scopey oven baked clay all around it after air was done baking i started adding this texture paste to it to give it a little more of a texture i didn't feel like trying to do that all with the clay and this worked out really well as just a layer of texture that i could paint over i decided to try and paint this fairly quickly i used this bluish gray color first then i used a tan color and use some washes on top of those to tie it in and make it kind of just look like a dirty old chimney started using pigment patterns on different areas of the model now to really start aging it even further and also use some very water down paints to just make streaking marks on some of the surfaces like the door and some of the window shutters the tin roof was really wanting some rust and rusting kind of streaks so i started doing rust colored streaks and rust pigment powders in different areas to make it look like it has been there for a little while and is definitely rusting now this step really started to transform the piece and it's again just some dead leaves from my backyard that i ground up in a cheap small coffee grinder and i'm just spreading that around using some water down pva glue to stick it in place i love how good these little leaves look on this type of scale and because it's a cabin in the woods i use some fine green flocking to look like moss and build up of growth on the roof in areas so now you get to see how absolutely terrible these giant trees are that i made for the deep background i used the same sticks from my last video and added some very cheap foliage to it i also added this dead tree in the front and started putting dirt all over the place the ground up leaves really worked awesome here as well now with everything full of fog i think we're ready for the final shots if you like this video hit the thumbs up and subscribe so you can see my next projects and be sure to check out my patreon page if you want to see any more for me and my future projects a huge thank you to all my patrons who do currently support me it is not cheap to build all these projects and every little bit helps a ton i'll see you guys next time。
2233YouTube精选 01:09
01:09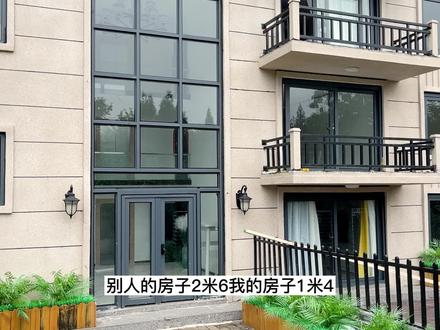 01:19查看AI文稿AI文稿
别人的房子两米六,我的房子一米四。哎哎哎,别怕,不是棺材,但是今天我给大家做个鬼屋, 坐着坐着都能把我自己给吓死。我坐的也太恐怖了,太太恐怖了太恐怖了! deep night 就是要有深夜的样子,搓个深蓝色,这氛围感,小屋氛围感就拉满了。 哎呦,看出来了,聪明没错了,就是黏土化。以我房奴的尿性,鬼屋也得是别墅级别的黄土地安排上吸血鬼也必须是面朝黄土背朝天。这南瓜也得有呀,整几个南瓜看门,你家有门卫大爷,我家有门卫大瓜。 鬼鬼咋叫来着?你以为这是墓碑,其实这是鬼屋门牌。我就想知道除了河南局部地区,还有哪把蝙蝠也叫野 辩护呢?其实表起来才是他的完整形态。句子借给一楼大牛呢,就只好用手拉,知道啥是小刀流不?你看我一点点拉开他,这咋那么浪费一根麻麻赖赖,一点也不圆润,让我盘他, 哎。这次万圣节到底有多少可爱鬼能评论区扣一给我看看。哈哈哈哈哈哈哈哈哈哈。
1.1万三楼能能的宅生活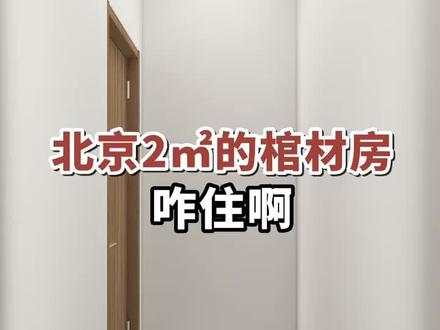 00:26查看AI文稿AI文稿
北京两平米的棺材房咋住啊?花十万买了个棺材房,就两平,咋住啊?一、进门做洗手池,马桶花洒,回家就能上厕所洗澡。 二、另一侧靠墙装网板,上面放棉被,下面挂衣服。三、下面定制榻榻米床,打开床尾折叠板,就能舒适睡觉。最后收起床垫,工作吃饭都可以,完美。
2210齐煜设计家 03:33查看AI文稿AI文稿
你知道凶宅是怎么来的吗?话说这刘家庄有个刘员外啊,他的房子是非常的漂亮啊。有一天夜里,午夜时分, 突然门外传来了砰砰砰敲门声。刘员外是出门一看呐,外面是啥也没有啊,又回来睡觉。然后外面 又传了窍门声,刘员外开门一看,外面还是啥也没有。就这样啊,一夜他也没睡好。第二天夜里呀,午夜时分呐,外面又传来了女子的哭声。刘员外呀,这开门一看, 哈哈哈,还是一个人也没有回来呀。关上门没多久,又传来了女子的哭声啊。刘员外呀,出去一看,是又啥人也没有啊,他是一夜没睡着。第二天天刚亮,这刘员外呀, 就去请个道长回来做商法事啊,可是一点事也没管。夜里呀,外面是接着闹啊。就这样过去了一个月,给刘员外整的呀,这心力交瘁呀,实在受不了了,就搬了出去呀, 想把这房子给卖出去。附近的人呐,都知道这座宅子是凶宅,贵贱,没人敢买。又过了一个多月,把这位 读书人一样极低的价钱买了这座宅子。那邻居们呢,都想这个读书人呢,待不了几天,真的被吓跑了。 没想到读书人住进去啊,是啥事也没有。这回大家都想啊,这个读书人肯定是啊,德高望重,这学识渊博呀,还镇住了凶宅呀,就纷纷的请这读书人来家里 教自己孩子啊,学习。有一天夜里,小王去读书,人家刚到院子的时候,看见了几个蒙面大汉,唰唰唰,是翻墙而入啊, 小安新娘坏菜了。这回呀,来坏人了,赶紧的回去找人帮忙。乡亲们呐, 带着骄傲出联来到了房子外面,刚想进去啊,就听见里面呢争吵起来了。你这个人真是坏人呐,让我们几个装神弄鬼帮你骗来了房子,你却呀给我们这么一点钱,今天呢,我就杀了你 啊!接着这个宅子里面就安静了下来呀,赶紧的去报官,快点有人杀人了,报什么官,这个人呢,该杀。大家不用管他,各自回去吧。就这样 过了好长的时间呢,也没人给这书生给收拾,最后就这老来,这真变成了凶宅。劝世人阳光大道 踏实行,路途坦荡啊,心安宁。大家好,我是大哥,有喜欢我的请关注我,咱们下回见。
 01:26查看AI文稿AI文稿
我在最新的一个方案里面设计了一个密室,要穿过主卧和主卫才能到达主人,可以永远不让外人知道这个房间的存在。这个房间六平米,没有窗户,作用就是用来独处。 有些人会有奇怪的爱好,尤其是男性,比如独自钓鱼,比如一个人漫无目的的开车,又比如我自己就喜欢一个人爬野山。我想这些爱好的核心目的都是独处,躲开一切社会影响。 但这些爱好的时间成本都挺高的,有没有办法在家就可以独处呢?所以我就设计了这么一个黑房间,很小,很安全,很私密。你可以 在这里把门一锁,没有声音,也没有光线。你可以什么都不做,连你老婆都不知道你在哪里,在干什么。我想很多人都有这种心理需求吧。 我在办公室就有这么一间房,黑乎乎的,窗户都被封死,有一张小床。当我很累的时候,我就躺在这张床上,享受极致的黑暗和静谧。 只需要十分钟左右,我就能恢复精力,那种感觉是非常非常治愈的。
479新民居美学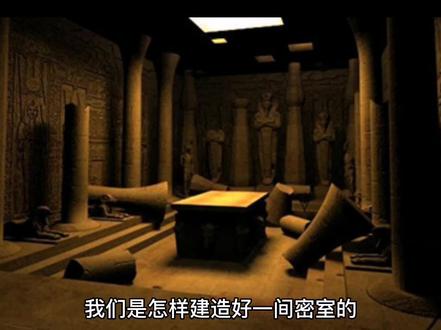 01:37查看AI文稿AI文稿
我们是怎样建造好一间密室的? no no! 大家好!今天物影们又来给大家分享小知识了。 我们物隐门在九年的密室建造探索过程中,摸索出了不少建造的一些方法以及技巧,在密室这条道路上是越发的有经验,越发的专业。那么我们今天就来说说我们是如何建造好一密室的。 首先我们在前期就要跟我们的甲方对接好,找到他们所需要的各种要求以及他们的标准进行一个对接。然后我们会在前期进行一个设计图纸,深化图纸的一个准备工作。 然后我们每天都会进行一个语音的沟通,力求在前期不出任何差错,保证在后期施工进行中能够完美的进行一个建造。然后在建造过程中,我们每天都会有一个晨会, 是基于我们现场工作人员的一个工作总结以及一个工作计划。这对于我们的项目是非常有帮助的,因为一般来说只有专业的建造团队才会有这些看起来比较反复的工作过程。 但是这一切的一切都是为了保障我们的工作安全,以及能够在工期到来之前完成整个密室的建造工作。在中期以及后期,我们会请来专业的 墙绘师以及我们自己公司的机关师来对面进行一个绘制以及对机关进行一个调试的这样一个工作。 后续我们会跟甲方进行一个对接,以及对整体的一个剧情进行一个体验。最后的最后就是投入运营了。今天我们的小知识就分享到这里,那我们下期再见。
 02:11
02:11 03:52查看AI文稿AI文稿
还记得小独栋最开始的那个像鬼屋一样的卫生间吗?我都我都没进去。我都不敢下去。我去了做噩梦。终于轮到改造他了,这得大改。之前先是请师傅把瓷砖全砸了,又铺了客厅同款地砖。现在他又长这个样子了,只剩墙面没处理。 由于他实在是太小,转个身的功夫就没了,所以我不打算贴瓷砖,怕贴了更小。买了点跟客厅颜色差不多的威水泥,抹的薄,视觉上还能跟客厅连起来。三百块钱。这一堆够抹三十平。咱国际庄没有专门抹威水泥的师傅,就请了个抹腻子的,操作起来应该也差不多吧。抹水泥之前先上两边底, 然后就该研究他了。看起来也就是白色的呀,这不黄呀。就在我怀疑是不是发错货了的时候,加水搅了搅,变黄绿色了。好绿啊。这是上墙浅了点,但是还是有点翻车。并且我 买的三十平米不够用,只把墙面抹了一遍。你别刷完了。这个颜色真的是太过分了,真的好绿,还不平整,我都要哭了。我也只涂了一遍。所以他这有这么多坑坑吗?还得再涂一遍呗。肯定的呀, 脸上也没有刷,这里有点抹。所以赶紧又问了商家颜色的问题,说是亮亮就好了。第二天一看,颜色果然浅了很多,跟客厅墙进差不多一个色了。即将流出来的眼泪又憋回去了。只是新的为水泥邮过来,还得三天三十。 我先给小洞口按个窗户吧,就剩最后一块玻璃了,正好能把洞口盖住。用上次做掐死发廊匣子剩的材料,再做一面花窗,做两个框,让他可以开合通风。每丁胶粘好后,再用钉枪固定一下。内框的边都按上专门卡玻璃的木条。涂上玻璃胶后把玻璃放上去就行了。 下色之前边上先沾点装饰木条好了,不刷漆。这个木头的颜色就挺特别的。找了张图,还是画两个图,这幅感觉跟这个框很搭,光顾着好看了。这幅细节实在是太多了, 先从哪开始?嗯呢,还是先从中间来吧。这幅的形状没有规律,还很碎,我的拜师大法都不好使了,要不断的调整形态。这线条多的我都不知道自己掐了点啥,还想这只小鸟啊, 一条条的太多了。这线。这幅的点睛之笔就是这只鸟了,要把它整的栩栩如生。最后这幅一共用了二十个小时,这密的都看不出来哪是叶子哪是花,但是效果非一般的好,很精致。终于该点蓝了,线条太密了,要一点点点。叶子还是用的墨绿和草绿, 花苞颜色暗。图上的用的棕红和浅绿晕染花瓣自己用乳黄和橙色调了一个。小鸟的颜色也得调一下,不调的。这个蓝好好看呐。这个蓝灰色一上去就很清新了。肚子用的白色。不错不错,稳定发挥很好看。 a two 新买的威水泥终于到了,这回把楼梯鞋面和顶上也抹了,墙上抹了第二遍。抹完两边的效果比一遍好多了,就是还是一冷一冷的。师傅没时间给我打磨了,就慢慢来蹭就行了, 只能自己上了。这衣服又跟我受罪。全副武装好,先小试一下,真的蹭蹭就没了。哎,就一小块地玩玩,还是挺治愈的, 大面积磨起来,那叫一个尘土飞扬啊,顶上也得磨。举着这个机器,我手都快要废掉了。俩小时以后,我现在是个雪人了,落了一身灰,还呛 了两口,比铲墙皮还过分。再好在面平了,终于有温水泥的效果了。为了防水和好清洁,还得刷两遍清漆。没想到一刷上去,颜色比刚才又深了,而且还是亮面的,干了也还是这个状态。这个抹温水泥的过程,我都想唱一首,看我七十二变了。那也没办法,就 只能这样了。亮面就亮面吧,我先把我的掐丝反狼小花窗按上去,按上荷叶就可以开合了。我的天呐,偷光看决绝子,太忠骨优雅了。下一步就是给卫生间放家去了,嘿嘿。
59.3万高瓦斯 01:01查看AI文稿AI文稿
如果想要自己建造地保,有哪些点需要注意?末日危机意识逐渐增加,想造地保又害怕荷包不够,自己动手也不懂专业知识,那这几条建议快拿笔记下来。一定要选防爆器密门,可以将有毒气体挡在门外,彻底隔绝室外污染, 否则室内不密封,即使开启空气过滤也无法隔绝污染毒气。设计沐浴消息间,如果沾染了放射性尘埃进入地保内,会污染地保 以及危及他人。设计一条进入和离开程序需要严格遵守,拥有两个以上的逃生通道,避免一个入口被堵死,最大程度避免外部污染。进入地保进入和离开都需要检查内外门密封度,检查电力系统、水净化系统、 超压排气阀、滤毒换气系统等等,确保一切设备都正确安装并正常运行。当然,选择成品仓地保 会帮你大大的节约麻烦。内部专业设备齐全,专业人防设计定制,良好的危机意识会让你在末日来临前拥有宝藏地宝,在末日安全生存。
1474生存堡垒


