安全注意事项一、严禁空放 未搭建时切勿空拉弓弦,更不可空放弓弦。二、公物对人上箭后, 箭头只能指向把面方向,切勿向四周指向他人。三、统一拔剑 当你已射完自己手上的剑时,而其他人仍在射箭时,切勿独自先行上前拔剑。 应等众人均结束射箭后,再统一上前拔剑。射箭流程教学 一、站姿与把面呈九十度,侧身站立,双脚横跨黄色起射线,两边与肩同宽,保持身体直立,自然放松。 二、握弓搭箭用左手拿弓,虎口对准推靶凹进去的位置,大鱼际贴紧推靶,轻轻握住弓靶, 右手拿剑。注意三片剑雨中颜色不一样 的主语,面向自己的方向, 将剑从弓弦右边穿过, 搭在箭台上,箭尾对准弓弦,卡箭点位置,用力卡紧右手中间。三只手指勾弦,食指在箭上,中指、无名指在箭下。三、举弓拉弓瞄准, 轻微前推后拉,转头看,把左手伸直,将弓举高至右手,高度与眼睛齐平,右手往后拉弦, 直至食指贴紧下颌位置。 闭左眼,睁右眼,右眼视线通过描 瞄准器准心对准靶心位置,松开右手手指进行发射。四、拔剑 切勿站在剑之后方,直接用手抓剑将其拔出。后方无人时,应站在剑之侧面, 一只手按住把面,另一只手切记抓住剑之尾部或是中部, 而应抓住剑之根部,将其往外拔出。
粉丝921获赞6203
相关视频
 01:50查看AI文稿AI文稿
在射箭运动中,背部力量起着至关重要的作用,它不仅可以帮助你减少肩部的损伤,还可以帮助你发射的更为准确。下面由专业的康复师教你三个动作,增强你的背部力量。 第一个动作,弹力带上举训练,双手拉住弹力带的两侧,用右脚踩住进行上举训练。 注意肩胛骨不要上抬,肩膀不要抬起。 这个动作每组十个,共计两组。 第二个动作,外旋肌训练,双手前臂套住弹力圈,前屈九十, 进行外旋击训练。 这个动作每组十个,共计两组。第三个动作,俯身划船训练,双手拿住四磅的哑铃,双脚自然站立位微蹲 进行划船训练。 这个动作每组十个,共计两组。你还有什么运动?生活中的小问题,评论区留言告诉我,一个小妙招帮你解决,记得点赞哦!
921KOBE 00:36查看AI文稿AI文稿
学习射电的步骤一、带逆,二、上箭。 三、持弓勾弦四、转头准备姿势五、鞠躬。 六、拉弦。七、抗威固定八、力量转移。九、瞄准,十、放箭,十、一回响。
442漫心射箭体育俱乐部官方号 01:31查看AI文稿AI文稿
射箭项目最基础的专项力量,哈喽大家好,我是李嘉伦,今天这期视频跟大家分享一下射箭体能训练部分的知识,有关射箭体能训练呢,今天跟大家讲两个动作, 第一个动作呢是哑铃或者是弹力带的直体侧平举,这个动作大家很常见啊,也会经常去做, 那么关于这个动作锻炼到的肌肉部位和对射箭的一些帮助是什么?今天跟大家去简单聊一聊。首先呢,他锻炼的是我们三角肌的中束啊,三角肌呢分为三个部分,一个是前束、中束与后束啊,三部分组成三角肌。 那么锻炼三角肌中束对射箭的帮助又是什么?就是在我们鞠躬预拉到靠位加力的过程中,他起到一个相对稳定的一个作用,当然他只是稳定肌群的其中一部分,还包 包括小肌群呢,前束啊后束都会参与用力,包括在压力稳定的这个过程中,三角肌的中束起到很大一部分作用。那么第二个动作呢,就是哑铃或者弹力带的前平举,就是做这个动作, 这个动作练习到的是我们三角肌的前束。三角肌前束的作用呢,是在我们鞠躬的过程中的胳膊是以身体向前 带有一定角度的,那么同时用到的肌肉呢,就是三角肌的中束与三角肌的前束,这两块肌肉把弓举起来,在压力的过程中同样也起到一定的稳定作用。所以说侧平举前平举是射箭项目最基础的专项力量,你学会了吗?
899射箭-李佳伦 01:08查看AI文稿AI文稿
一、站位,射手站在起射线上,左肩对目标把位,左手持弓,两脚开立,与肩同宽, 身体的重量均匀地落在双脚上,并且身体微向前倾。二、搭箭,把箭搭在箭台上, 单色主语毛向自己。箭尾槽扣在弓弦箭扣上。三、扣弦,右手以食指、中指及无名指扣弦, 食指置于剑尾上方,中指及无名指置于剑尾下方。四、预拉,射手举弓时,左臂下沉,肘内旋,用左手虎口推弓并固定好。五、开弓,射手以左肩推右肩拉的力将弓拉开,并继续拉至 右手虎口靠位,下颌。六、瞄准,射手在开弓的过程中,同时将眼准星和靶上的瞄点连成一线。七、拖弦,待开弓瞄准后,右肩继续加力,同时扣弦的右手三指迅速张开,箭即射出。
 03:20查看AI文稿AI文稿
离安离安射啊!手第一步第一步使剑啊,然后后手推出去,风不能绊下来,抬起来好不好? 第一步速度,拔剑的速度 慢点 好,开始好。第二个你看啊,手刚才不是充电吗?对不对?是不是好?摸到这样子对不对?摸这样子就是你这个变了。握拳握拳, 不要犹豫,变完拇指就推出去 拉钩 好, 直接抬起来,挣完钱的时候直接推出去,变成拇指,直接就开工了,明白吗?第三步就是第三步啊,把头拿满,前面两步是一样的,前面两步已经练了。好吧,中间的区别迅速变成拇指 面积上迅速的开工。沙发 对六个字好记吗?其实一下就是六个字啊。用完钱之后满开工资再见。 把工妈妈快速搬进快递,做到好不好?来太多了啊。又开又开工出来了。刚刚才说好喊出来 好好好好 哼哼哎,好很多。哼,谁错了,哼哼。
6123云义骑射-李云义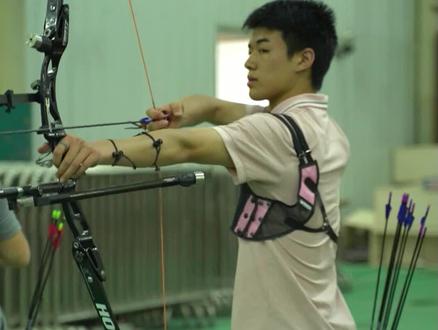 00:42查看AI文稿AI文稿
四十秒教你学会射箭,首先就是双脚与肩同宽,彻底推向反面站立,不要外拔也不要内拔。拉弓手一定要伸直,头举起来要压好肩带。拉弓的时候用后面这三根手指,食指、中指、无名指,第一指关节扣住这根弦,打靠。 用你的右眼看瞄准器上这一个点,然后再看你的八面,从瞄准的区域形成一个三点一线,看好之后后头依然沙发,很多人沙发的动作其实不对的, 正确的发力方式是用你的后背与发力,那错误的是用你的血,用个小臂和大臂的力量。这个撒泡是一个很关键的动作要领,在你打完之后,会有一个轻松的撒上你的剑飞进去,才会更精准的落上把面。
3892运动成都 01:45查看AI文稿AI文稿
一分钟学会竞技反曲功一、站位现在主流的站位有两种,第一种是平行式,第二种是开放式,一般建议用平行式。平行式站位,双脚与肩同宽,身体侧面朝向靶子, 不要内八也不要外八。二、搭建,搭建时看清楚建语方向,主语,也就是单独的一片建语,搭建时主语面朝宫窗,外语宫旋 垂直。三、勾弦勾弦禁忌反曲功一般采用地中海式。三指勾弦,食指在上,中指和无名指在下,这三只手指用第一指关节勾弦。 推弓,推弓的受力点在生命线左侧这片区域,持弓手需握弓把,推弓时不要用力握弓。 开弓前手伸直,双手平行向上鞠躬,完成转肘沉肩后进行越开弓动作。一般开弓百分之五十到百分之七十,再相对缓慢进行后段的开弓与靠位 到位,头部保持不动,上弓弦靠鼻尖和嘴唇偏外侧,下弓弦靠胸,食指靠紧下颚骨,拇指靠紧脖子后手肘保持略微抬高。呼吸沙发 持弓手保持前推用力,利用后背夹力,后手向后滑脱。撒放,注意手指撒放时要快速干脆,撒放后保持动作停留。你学会了吗?
426酷击射箭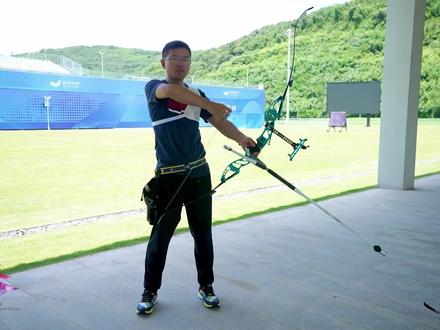 03:17查看AI文稿AI文稿
动力正确才能说做出一个正确的撒放,那么在撒放的过程中呢,首先我们拉开弓,拉开弓以后,当你瞄准完,最后放松手臂,在同一条水平线上要做撒放的时候,记住我们的手指有两种肌肉,一种呢称之为屈指肌, 一种呢称之为伸直肌啊,屈指肌用力,手指弯曲,伸直肌用力,手指而就直了。那么这两种肌肉我们其实在射箭整个过程中使用到了一种屈指肌,就是说你在勾线的时候用力好,放箭的时候放松,而不是放箭的时候你去伸手指, 伸手指这个放电动作是错误的,是很重要的一个点,这是非常重要的一个点,大部分的新手在练习的时候都不会注意到这个问题,习惯一旦养成非常难改,所以在我们前期的时候,养成习惯 的时候,勾弦好,放箭放松,勾弦放箭好放松啊,千万不要用力伸直,用力伸直,一旦伸直以后非常麻烦。再来讲一下呢,一个开弓发力的一个练习,很多初学者可能会遇到啊,呃,射完一些箭肢以后,呃,用力部位不对啊,肩膀酸啊,三角肌酸啊, 当然酸痛不是不正常啊,前期练习的时候都会有只有酸痛的情况,但是关键是部位一定要对。那么在前期练习的时候呢,我们可以在弓上绑一根皮筋, 那么这根皮筋可以稍作长一点啊,自己可以调整。把皮筋呢,套在我们的后手的大臂的这个肘后边,套上了以后呢,把它套上,套上了以后呢,你开工的过程中,哎,用后臂开,用后臂开,用后臂开,这样手指不用去练习,靠这个挂在这个肘肘后边的这根皮筋啊,去练习,我 的开工是能够体会到我们的货币机用力啊,这是一个很好的一个练习方式,大家可以试一试 再这样。嗯,育苗就是先抬高一点啊,慢慢描,慢慢走力,慢慢描,右眼描,换眼睛。 对,好,往后拉,靠位没到走力好,现在开始精准瞄准备放箭,放箭的过程中还是要注意手指的泄力,手指的泄力,手指的泄力就可以,不需要伸直。好, 但是我还好像还是没有掌握这个,他这个瞄准器,瞄准器,他每个人的瞄准器需要不断的调试。嗯,那比赛的时候一定要看吗?还是靠自己的看这个键的感觉也,比赛的时候是七十米,如果不看瞄准器的话,哦,你可能连靶子都 上不去。明白了,哈哈,可能我们现在练习的是比较容易的,开弓好了,开弓慢慢过来,靠位走好。很好 啊,其实作为初学者呢,呃,大概的技术动作啊,都已经讲解完了。嗯,你也都学会了。嗯,那么接下来呢,有有几个方向?第一个呢,你要通过练习,嗯,来提高自己的一致性,这是非常重要的。 第二个呢,作为一个射箭的爱好者的话,他其实是不断的需要锻炼自己,力量稳定性和力量需要加强练习。是的,对,那大概就是这样。 嗯,确实在这个练习的过程中也感受到这个力量的重要性。是,那我还是要好好继续去练习,先从力量开始是。好,谢谢教练。射箭中的发力技巧是很重要的,学会如何借力和吸。
 11:38查看AI文稿AI文稿
so the first area of good technique is obviously your stance and your posture, you'll see this when you see an ultra walking onto the shooting line, an international finals match and you'll see them step onto the line take their stance and then start their shot so this is a key element to start with use a square stance much easier much simpler and it's much more straightforward to get everything else correct and keep your posture and over time if you continue with your archery and want to develop more then you can start using different stances and experiment exactly what works for you, but start with a square stance and keep it simple now this square stance is basically you just have your feet square along the shooting line equidistant from the shooting line and this is the square stance so this is a great starting point and is a simple way to get started and get the rest of your shot correct the set position is the second part of the shot and you'll see this when an archer starts to lift the bow and begin their shooting process so you'll see them attach basically the two hands the right hand if they're right handed would be the draw hand around the string and their left hand would be the bow hand this is for a right handed archer so very simply put you have these two points of contact and you want to make them secure and you want to get the correct technique for the rest of your shop so what you do at this point is you simply have the bow very roughly in the right place you have the bow on the leg you have it you have it very roughly in the right place and then you simply put your fingers on the string and then come up to your set position string position should be the string should be in the first joint of all three fingers as a good starting point so you simply put the string in the first joint of all three fingers like that and you can see that that's a good starting point and allows you to get your hook, nice and firm now a key thing with the set position and this is something you should do right from the get go to make sure not to close yourself down what i mean by this is a very common mistake is at the set position archers will effectively try and just simply push the bow out with the left arm and pull it with the hand like this and what this means is the hand is very close to the body and it's closed down you can see this from this angle this is a super common mistake very closed down and they're trying lift up and draw like that so that's a super common thing right from the get go in your lesson make sure to keep this side as straight as you can and not kink the wrist focus on that at the set position this will help you massively so make sure the set position when you come up, don't kink the hand make sure it's nice and straight here through the arm and the hand and then keep that as you then lift up so this is a key point where you can really make some gains in your first lesson and get your technique correct from the start another thing you'll see is when the archer opens the bow you want to make sure to keep that wrist angle again so when you lift the bow don't focus on using your hand and moving the string to the face this is what most beginners focus on and this is actually what a lot of beginner archery lessons teach is just to move the string to the face because it's very easy to reference this, but think about moving the hand to the neck so not the string to the face the string to the face causes what i was talking about earlier string to the face causes this and it causes really bad wrist, angle and then a bad anchor as well, which i'll talk about later focus on the hand to the neck is much better so what you can actually feel to get this is the thumb against the inside of the neck here so you can come in and fill the thumb here because when when you then come and draw the bow, this is the point that you'll see in most international competitions or in films, you'll see the archer at full draw in recover olympic archery you want the hand alongside the neck under the chin and flush with the face and the body basically so focus on the thumb against the neck and you'll get the hand in a nice position you don't want the hand floating up against the chin here you don't want it back here you want to make sure that the hand is against the neck and the string is also on the on the face as we said but by thinking about the hand against the neck this will make you much better right from the start and will improve the chances you'll get a good anchor position so the most obvious part of the technique for a reek of archer when you watch the olympics or you watch films is the release and this is obviously when the string leaves, the hands, the arrow leaves, the bow and then the arrow goes to the target or in the case of films probably, some unlucky person downrange but if you make sure you get the release correct to start with then it's much easier to get it correct in the long term as well, so at at a typical beginner's lesson you might come up to you know your anchor and someone might say release the arrow but if you've not done archery before you won't know what this feels like you won't know how to release the arrow you will just go like that and open hand and you'll probably do that and then this will cause a bad release and the arrow flight will probably be bad and it's not good technique so to start with what you need to do if you want to start, the correct way is to learn the feeling of the correct technique and then basically you have the feeling so then you can replicate this so very simply you can get your two hands place the first fingered pads of each hand together like this so you can just simply place the finger pads like this together simply like that so you're hooking them together then you bring your hand to that anchor position i was saying with the thumb against the neck bring that there now you're in this good anchor position now all you do is you increase the tension increase the tension so you're just pulling with both hands increasing the tension and then as you do this you just let the fingers slip off each other like that so you can increase the tension you're squeezing your squeeze and you're keeping the fingers and then at the same time you let both both hands you let the fingers slip off so you just go like that notice now how you're learning the correct technique and you're not doing that you're not needing to release the string because you can do both sides what this teaches you is the correct way to release the string like this and you can keep your release hand hook correct and then when you do it with the bow and the string in the hand you'll then know the feeling much better to release it rather than coming in going like that because you don't know how to release so this is a great drill and do this before your first archery, lesson and you'll have a massive advantage and you'll really hit the ground running another key thing with archery technique for beginners is to make sure to get the body and the head still so you don't want to be drawing and moving backwards and forwards and you don't want to be leaning back like this you want to make sure that you've got your body straight with the square stance you keep everything nice and you simply have the technique in a nice t shape so your body is the stem of the t and then your arms are the actual t shape and this is the good posture you want to get this a great way to get it is to simply stand on the shooting line put your hands out to the side like this in a crucifix so you simply hands out to the side look to the left or look to the target it might be right if you're left handed so if you're right handed you look to the left where the target is and you simply just bend the walls there but you bend the right hand basically to your anchor position and that is a good starting point for your general posture notice now because because i've not had to draw and do all this i'm not contorted i'm not moved around you just simply there so that's the posture you're aiming for and you should be able to replicate that with the bow once you do it now? when it comes to actually gripping the bow and holding the bow what you want to make sure of is that you put the bow into the correct position with the hand you don't want the hand really far over like this so you want the left side of the thumb pad see this lifeline here you want this side contacting the grip you don't want this side contacting the grip so you want this position here is good you don't want that and you also don't want this that's too far around so you want the thumb add side here placed on the grip so you can make a v put your hand in the grip place it down here and then notice as well as i'm not losing the grip around like this i'm making sure i'm pushing through the thumb the knuckles are back and then that's the correct position and also not grabbing i'm not grabbing the bow and tightening the grip like this that's not correct either so you have the correct grip like i said and that'll be another massive benefit and a massive advantage you'll have right from your first lesson another thing you should be aware of is don't move around on the shooting line between arrows and don't shuffle around and move so very often at the beginners course you'll see archers that come and they'll shoot an arrow and then they'll shuffle their feet and shoot another arrow and shuffle their feet and move around or maybe move the body around and stuff like that once you go onto the line you put your stance as it should be then you stay there that's it you move your upper body you shoot the arrow you get another arrow you shoot the arrow but you don't move in between arrows there's no need to move it's not gonna do anything good, it's just gonna make it worse less consistent not as easy to replicate what you're doing so that's one key point as well finally another point for your beginner's course and when you're first starting, archery don't believe the target too much so what i mean by this is just because an arrow went into the gold doesn't mean you did the right thing this might sound funny but when you first start, your technique is not gonna be good like everyone so trust your instructor or your coach whoever is delivering the course and do what they're saying in terms of the technique and make sure your technique is good and enjoy the obviously the scoring and the hitting the target but bear in mind the fact that you know they have more experience than you do and just because the arrow went in the ten doesn't mean that arrow was perfect and you did everything correct because you're still learning and there's a lot of technique that you need to improve so bear that in mind and enjoy it but be aware that you know your technique will take time to develop and it will be extremely rewarding when you get it right and over time mastering, this discipline is really really good and super super exciting sport as well so bear that in mind and remember to you know trust your instructor and and do what they're saying in terms of that,
43羿心观德 00:44查看AI文稿AI文稿
第一步这样两个脚张开,与肩膀同宽,我们来回握到弓,把这个位置握到出尖点来下面,然后把剑 打到这个搭肩颈的位置,你将甩出去,放到这个出针点位置,我用的是蒙古式的三号。首先我们大拇指勾到箭和弦的夹角,一定要勾过来,食指搭到大拇指指甲盖上,套住这个键,小手套住这个食指 来,我们从上开弓,先把弓举起来,线保证是平的,然后往后拉,一直拉,拉的过程中左手手臂要转过来,左要转到位,贴到右侧面,然后发射。
1203阿利弓道 01:28查看AI文稿AI文稿
大家好,我是射箭润教练,润教练从今天开始为大家录制润教练射箭五步拆分法,希望通过润教练的视频让大家看懂射箭,学会射箭。 第一步,双脚平行站立,略比肩宽,挺胸抬头,侧面对把,提膝收腹。第二步,做好推弓勾弦手型,转头绳把,保持身体重心。 第三步,开弓由背肌发力,推弓手和开弓手一推一拉同时举起,继续保持身体重心,进入预瞄准直线 用力基本形成。第四步,惊喜用力,开弓手顺着下颌骨滑动,直到将弦拉到鼻尖处靠拢,同时瞄准器也瞄准目标。 第五步,撒法,拉弓手顺着直线干净利落的脱离弦,并且继续保持推弓手和拉弓手形成的这条直线。 整个开工过程我们都需要注意身体的重心不能改变,当然要做到如此轻松的开工,我们需要在平时加强我们的核心肌肉训练和我们的专项力量训练。关注郑教练下期继续带大家分解射箭动作细节。
1620射箭润教练 00:21
 00:31查看AI文稿AI文稿
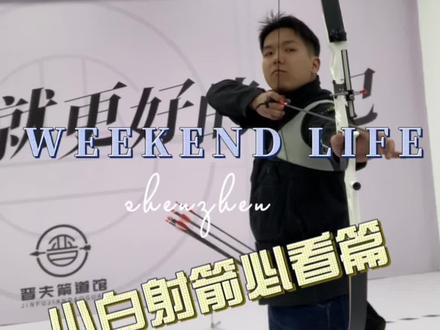
小白射箭必看篇哎呦,我的妈,哈哈哈哈搞错了再来错误的站位及发力方式容易导致手抖高开 不跑啊哈哈哈哈哈哈。
150晋夫射箭俱乐部官方号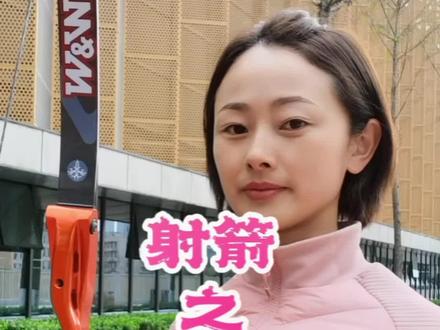 01:27查看AI文稿AI文稿
大家好,我是射箭任教练,支撑手啊是我们射箭的一个重点,在专业射箭里,我们一般将支撑手称为前手,在以往的视频中,任教练也教过大家怎么样去练习支撑手的专项力量, 今天呢,跟着润教练一起来学习如何练就属于适合你自己的射箭前手动作。 学习支撑动作前,我们首先观察一下自己的支撑手臂,打直手臂会发现很多人的手臂在肘关节处会有一点弯曲弧度, 这也是很多朋友没有学习过支撑动作直接去射箭打臂的重要原因。所以真正学习射箭之前,我们首先要学会转臂动作,也称转肘,这个动作既能锁死我们肩关节周围的小肌肉群,使我们的前手与身体形成一个整体,当然能极大可能的预防 弦打臂。学习转臂动作,我们切记带动肩部转动或者带动手腕转动,一定要在我们肩部最放松的状态下侧举支撑手,只转动肘部。要想练好射箭前手,找到属于自己的直线力感撑强辅助练习是必不可少的, 而且这种练习应该延伸到我们的生活当中。建立了一定的肌肉记忆以后,我们在逐步的增加一些阻力。练习前手动作一定是循序渐进,切记直接上重弓。练好前手射箭一定是一个可以陪伴你一生的好运动。
918射箭润教练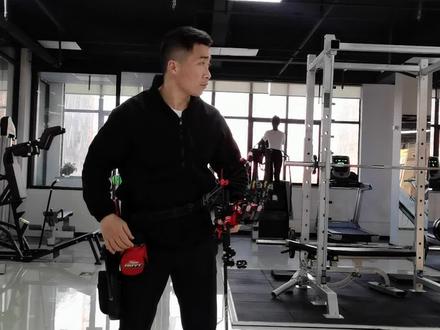 00:52查看AI文稿AI文稿
我们给射箭的新手的建议是,在训练的时候,打靶的时候呢,不要贴靶子,就对着一个空白的黑板或者是一张白纸去练习你的动作, 这样你的注意力就会更多的转移到你的后手上面,动作会更的做的更干脆,更干净, 这样对你以后的设准是有很大的帮助的。如果新手一上来就贴了一张很小的把子,那么你在练习动作的时候,你的注意力会不自觉的多转移到靶心上面, 你的眼睛的那些聚焦都在环心里面,这样子你会不知不觉的把你的后手的动作会忘掉,后手会松掉,注意力会转移掉。
31曾文正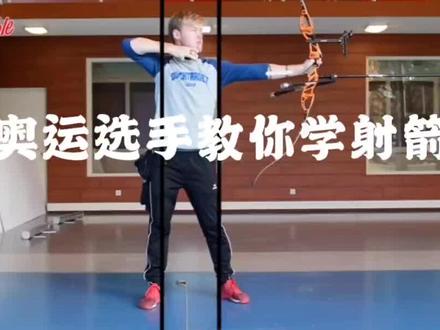 02:43查看AI文稿AI文稿
what's up everyone welcome to the drip driver? my name is hiz my name is chef and welcome to the fifth day of the technique in this fifth date we're gonna talk about the extension yup, so in a previous video, we talked about the stance about the posture of the t line about drawback and anchoring and to get from anchoring till the actual release we need to extend a little bit more and that extension has to happen as relaxed as possible, so that's part where you're aiming and when you're actually just waiting for the clicker to go off and you don't want to force anything so to make the extension as smooth and relax as possible you're only going to use your back tension and you keep pushing in the front, so the execrated movement you're gonna make is actually like this you're gonna pull with your back and push in the front and that makes your body actually turn around around the core, so as chef explained the last days you relax your fingers around the string put your grip right left, bowl, draw back and anchor and then in this moment between anchor and release you're just moving like this to make it as easy as possible for yourself to extend make sure you only have a few midimeters on your click left to draw back your arrow so when you anchor and you still have to pull the length of one point is going to take a lot of energy compared to when you only have to pull two or three millimeters so, that was it for a day fight if ice explained what you should do for the extending of the shot yeah, it's really important to keep it as relaxed as possible and don't use unnecessary muscles that are going to dance the things up yeah, so tomorrow we'll talk about the release um the one is the most important shots yeah i think so yeah, so um yeah i hope you stay tuned for that and if you want to see more of this stuff please subscribe down below if you have any questions about anything with the technique, please let them know we will respond as fast as possible to help you guys out and if this video helped you, please leave a like and that will help us so share it with your teammates it's your archery friends and see you tomorrow see ya hello。
32羿心观德 02:14查看AI文稿AI文稿
第一次射镜的宝宝看过来,首先进入眼帘的是五米区域,刚开始的宝宝都是先在这里练习的,接下来就是十米区域了,在五米的宝宝能达到完全在黄心就可以来尝试十米区域喽, nice! 这些就是保护装备了,很重要的,能起到保护自己的作用, 接下来跟着我把装备穿戴上吧。护胸是为了保护衣服不被宫弦带到,护臂是用来保护小臂在射击的时候不被宫弦抽到。估指的作用是减少手指和宫弦的摩擦力,让撒放如丝般顺滑,顺便保护一下我们的手指, 已经我们的手指还是挺细嫩的。首先让我们站到齐射线上,就是地上这根又粗又黑的线。接下来 拿起弓,挑选一只顺眼的箭之后,我们就化身丘比特了。这里需要注意,箭要放在这根黑色的钩子上,它叫做箭台,箭上的羽毛有一片是白色的,叫做主语, 还要对着自己,然后把箭卡到两个红色的中间,这个位置叫做弦口。完成上述步骤,我们就可以帅气的射箭了。首先我们先把前手举起两秒点落到靶子黄心的中间, 然后后手拉开,注意人不要后仰,不要扭头,后手贴住自己的下巴,慢慢的往后拉,让弓弦慢慢的靠近自己的鼻尖,最后就放手就好啦。因为这次玩的弓是带苗的,所以 所以可以先打,能把所有的键都打到一起之后再开始调苗,这样就能每只键都在靶子的黄心了,是不是特别简单? 最后示范一下错误的拔线动作,这样的方法很危险哦,很有可能会把把墙一起拽下来, 示范一下正确的拔剑方法,左手顶住把子,右手握住剑,靠住把子的位置,然后往后一拽就拔下来了。祝大家玩的开心,下一期示范下,没有苗的功怎么能打中黄心?
337小青不会玩


