三星sm-t355c拆机教程

粉丝5.5万获赞13.0万
相关视频
 03:56查看AI文稿AI文稿
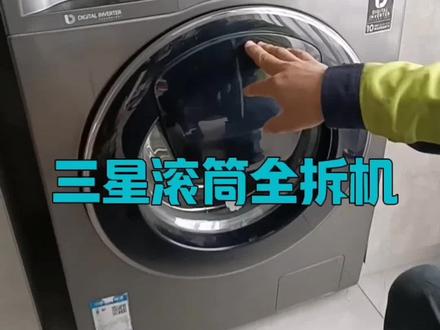
今天拆机一款三星滚筒洗衣机,先点赞收藏,看完视频你也能学会!来到客户家,先对洗衣机进行试机,看洗衣机外观进水是否正常,听声音是否有噪音, 然后断水断电。 拆卸上盖两个螺丝在机身后边往后一拉,上盖就可以取下来。把洗涤抽屉取下来,拆卸横梁、支架和电脑版的螺丝。 学家电清洗就选小绿人,随到随学,包教包会。 依次拆完螺丝,就可以把支架拆下来, 电脑版的线路插件依次断开。 取下电脑板,再来拆下门封圈的铁箍, 把门封圈整理到里面。把前面底部的三颗螺丝拆下来, 上边的螺丝也拆下来。取下前门线路断开, 门锁螺丝也拆下来。 洗涤和管路断开。 拆卸前面底部配重块, 顶部配重块也拆下来。 把底部的排水管断开。 塑料套筒底部的减震拆下来。上边的螺丝拆不动,可以拆底下的螺丝。拆卸后盖板。 把皮带拆下来,拆卸轴承螺丝,轴承螺丝取下才能把不锈钢滚筒拆下来。螺丝拆下,把皮带盘取下来, 把洗涤盒拆下来。重点来了,这款洗衣机挂黄挂的前筒咱可以省点是布。取后筒和电机 就是把洗衣机平放,把挂簧松开,这样就不影响拿下前筒了,还不用拆电机和后筒。取下塑料外桶一圈螺丝, 把塑料钱筒拆下来, 再取下不锈钢滚筒,搞定了!拆机完成了, 减震取下来放好,拆机完成就可以清洗了。想学习家电清洗的快快预约报名吧!
243小绿人家电清洗培训 02:55查看AI文稿AI文稿
哈喽,大家好啊,粉丝的一台笔记本,三星三五五 v 四 c 看一下要求想改成一体机加触摸,很奇怪的要求啊,问他为啥任性想改。好吧,就是任性。好了,废话不多说,先给他拆了 好了。这台笔记本呢,我们已经拆解完毕了,接下来给他定制一套外壳 好了。这台笔记本呢,按照客户的要求改成了一台大号的平板电脑,除了缺点之外呢,都是优点了。好了,本期视频到此结束,谢谢观看,下期再见。
723达人伟业 05:27查看AI文稿AI文稿
今儿来说一个三星系列的平板如何拆屏,以及他的故障现象是要换开关,为什么呢?变形成这个样子,导致一直静音没有声音。话不多说,继续。 全程总共是一个小时,由于时间太长,我努力安检加加速,主要是拆屏的时间太长, 我会把差评的注意事项以及平的走线,接口方向以及使用到的方法告诉大家。由于三星系列的平板都是合成平, 如果外屏消脆了的话,那就得贴合,而且会大大的增加维修的费用及成本。所以呢,拆屏这个东西必须要慢慢来。首先开缝 那肯定不用说了,超薄的那种就是 lc 干胶的另外一面透明纸,比普通的呢要厚,比名片呢要薄三分之二,用它开口最为合适,不用担心把屏敲碎。 在辅助上,万能的拆胶水,一边开口一边滴神液,当开口到了一定的缝隙的时候,就可以插入辅助的刀片或者稍微厚一点的名片,也可以开口涂胶的。这个过程一定不能心急,慢 有多慢就做,多慢慢工出细活。不要以为看着好像没几分钟就可以塞名片了,事实上,这个过程大概已经到了二十分钟左右了,当然如 如果你技术特别的硬,也不怕把原装的屏给敲碎呢,哎,放心大胆的整,拆到这个程度的时候,就可以用手电看看屏上的胶已经拆到什么程度,以及屏与拆刀片的距离。边拆边看。 再一次强调,拆平这个工作是一个细致的活,一定要胆大心细谨慎,一边拆一边看,如果感觉交出的不够多, 哎。再可以辅助一点,拆胶水这个东西不要吝啬也不能太多太多呢容易腐蚀平线,所以说呢得慢慢的一次一点一次一点的加一直到整个屏能轻轻 松松的拆下来为止。当开口较大的时候一定要用灯光辅助看一下既能确定双面胶的软化程度哎又能看到平线有没有伤到 以及平排线位置有没有被腐蚀有没有被撬到以及下一步应该如何操作才会避免平的伤害 遇到那种顽固不化的再多加一点。拆矿液瓶快要取下来的时候千万不要急不然的话一个不留神那就前功尽弃了。拆瓶这个东西看似简单其实上 嗯其实挺复杂的涉及到心理学手工辅助用品分子 雪量子力学等等等等是不是挺复杂的。如果呃拆主板不用拆平的话哎那就没有这么多麻烦事情了 相对来说维修的费用也会降低很多很多。反正我买东西的时候啊我首先第一件事情考虑坏了哎好不好修有没有维修的必要 而不是大众化考虑的,哎这个好不好看呢哎好不好用啊配置高不高啊哎那些都是其次的最关键的屏已经拆下来了后壳那就大到阔斧的随便整了啊。 换一个简简单单的开关哦。应该说是处理一个开关的问题要把左把皮前后盖拆的精光 这个是不是个问题值不值得思考。嗯我不知道,原本哎夹两下嗯几秒钟的事情 现在搞的要一个小时才能完啊。夹了一下之后呢再测试一下装好 测试一下按键哎能不能回弹有没有力度?如果不行再拆,然后取一下神器,这个垫片就是苹果专用的, 有没有知道这个垫片应该用在苹果哪些地方上的?估计见过这个垫片的人的话,维修年龄应该在八年以上了吧。哎,没有,五年以上应该正常。调试好之后,哎,剩下的那就简单了, 直接反向操作,怎么拆的,怎么装,瓶上的缠胶一定要去掉啊,这个东西会影响你以后瓶跟主板的。呃,不对,瓶跟矿的结合贴合程度,严密性呢,以及防水开机。哎, 最后再测试一下触摸摄像等等一切功能正常之后呢?哎,那就可以施工了。
116一根小火柴 02:54查看AI文稿AI文稿
大家好,我是辽宁强哥,今天给大家拆个三星平板,平板 n3t550 拆机视频, 这个平板不用加热, 四周都是卡牙子, 撬就完了 哦,这样就整开了, 先用撬棒给电池接口撬开, 拧下电池一圈的螺丝, 这样电池就拿下来了, 找块新的电池换上就好了。 给个关注,点个赞,谢谢大家了。
133宏途通讯 01:07查看AI文稿AI文稿
这是一台三星的笔记本,这也是一款老款的,我们今天打开了,他要换电池,我们看一下他的内部的整个 构造啊和布局。其实现在的笔记本都大同小异的,主板都不是很大了,因为他这个电池也不不是很大,这是山瓦式的版载的内存,一个散热器完了时候是一个铜管,因为这个配置比较低啊,他这个 二期相对来说比较小,赛阳的吗?因为电池使用年限长了,已经不能存电了,把它更换掉这个一 g 的这个叶片啊,这个四 g 的内存,这应该是赛阳的 cpu, 主板大小大家已经看到了, 相对来说还是可以的啊,现在的电脑技术含量不是很高,以前我们这个地方卖三星的还有那么两家,现在已经没有人卖了,现在这个品牌的 手机卖的人也特别少的,就这么一两家了,不知道你们大家当地的电脑经销商还多不多啊?我认识的我们这一行里面的好多都是自己上班去了,已经跳出这个行业了。
82数码老王 10:23
 01:42
 09:33查看AI文稿AI文稿
this is the samsung galaxy s twenty two plus disassembly if you want to see more videos like this make sure you subscribe and follow me on twitter so you'd be notified when i upload a new video and if you need any tools there are links in the description first, is some training is to be removed next we need to apply heat to the back plate using a hair dryer or a heat gun to loosen up the adhesive underneath and then we're going to use a plastic pry tool to pry the back plate off here's a better look at the glass back plate, the glass camera lens covers can be replaced by playing gate and prying them off the aluminum frame or camera bezel can also be pride off but it requires to remove the back plate on the back, we can see the other side of the aluminum frame which is basically tucked underneath and to the back class and on the flash diffuser there's a hole for the back microphone and there's a small pathway inside which picks up sound from the ring of the flash diffuser there are nineteen phillips screws that need to be removed now the flex cable for the wireless charging coil and the nfc antenna need to be disconnected and then the graphite film or the bottom speaker sampling needs to be peeled off the wireless charging coil is located in the center and the nfc antenna is located on top there's also a large graphite foam covering them to help transfer heat here's a look at the other side now that we have access to the battery cable we can disconnect it once the battery cable is disconnected we can proceed to this connect the rest of the cables the top plastic cover can also be removed there are some antenna lines on this plastic cover, which are those light, gray color lines here's a look at the other side the front facing camera can be disconnected however is glued in place at this point, the main board can be lifted up and removed looking at the main board there's a twelve megapixel ultra widelands of fifty megapixel, white angle lens and a ten megapixel telephoto lens only the white angle and telephoto lens have ois or optical image stabilization there's a secondary microphone located on the top corner and the led flash and light center located below the main board is a dual layer board design the camera connectors are located on the back and they can be disconnected by just popping them off the proximity sensors located next to the top camera connector and there's graphite film on the back shield to help transfer heat the third microphone is located right here and that's the microphone for the back which picks up sound from the flash diffuser once the graphite film is peeled back we can see thermal paste on top of the ram and processor here's a better look with the thermal paste cleaned off there's a single phillips screw, which is holding down the top speaker assembly now the speaker assembly can be lifted up and removed the top speaker assembly has a little white foam ball underneath the blue tape and here's a look at the other side now the bottom speaker assembly can be removed here's a better look at that and the speaker assembly also has the little white foam balls and there is a thermal pad underneath the speaker assembly as well now as far as the linear vibrator motor or haptic feedback motor when i first active as twenty two apart, i didn't even see it, so i totally forgot to look for it and then later on when i looked at the video, i thought it was between the screen and the frame on the bottom portion of the phone, but actually a few people pointed it out in the comments that the flex cable for the speaker assembly does have four more contacts instead of just two so i tested it out and i removed the speaker assembly and then when i powered on the phone there was no vibrate and then when i installed the speaker assembly again and power the phone on the vibrate feature worked, so the motor is actually located in the speaker assembly itself and is closed off so i'd have to actually tear the speaker assembly apart to see it there's glue all around the speaker assembly itself which is adhering it to this plastic piece so the vibrator motor would be located on this back part of the speaker assembly now the flex cable connecting the main board to the screen can be disconnected, so if you need to replace your screen there are two ways you can do it you can heat up the front of the phone and just pry the screen off from the front or you can take the back plate off and remove the screws on the bottom speaker assembly and remove that speaker assembly, so you can you can disconnect the flexible for the screen this way and then once you have that flexible disconnected you can pry your old screen off apply new adhesive and reply your new screen and just resemble the phone obviously just prying the screen off from the front would be the easiest method however, it might be a little bit difficult trying to seat the replacement screen perfectly so the cable connector will just connect when you pushing it down now we're going to disconnect the two flex cables to connect the main board to the subboard, there are three phillips screws, which are holding on the sub board that need to be removed now the sub board can be lifted up and removed the primary microphones located here and there's a red ribber gasket around the charger port the sim reader is located on the back now onto the battery there are no pool taps provided to help pride the battery off, so we're going to do some ice or propol alcohol and apply some to the sides of the battery and let us sit there for about thirty seconds so each way that he's have underneath the battery make it easier to pry it off here's a better look at the four thousand five hundred milliamp hour battery once the battery is removed we have a better look at the copper vapor chamber which runs underneath the battery as well as the motherboard now comparing this with the design of that has twenty two that has twenty two had three d graphite which is layers of graphite to help transfer heat once the film on the bottom is removed we can see the indisplay fingerprint sensor there's a liquid damage indicator which is a wide sticker on the bottom and there's a rubber gasket a mesh filter for the speaker openings on the bottom and top with the frame as well as the microphone openings and for those of you who might have accidentally stuck your simijector tool in the wrong hole, you don't have to worry since the microphone end filter are seated above the holes so it's like an l shape and the simujector two won't reach them to cause any damage there's one millimeter wave five g on ten on the top right and one on the bottom left of the phone the top right one is held down with some adhesive and the bottom left is held on with two filled screws also some variance of this phone for different regions might not come with these antennas and that doesn't mean that the phone doesn't have five g these antennas are just for those carriers which use the ultra white band five g if you need to replace the flex table, power, button or volume keys there's a plastic and metal bracket in the frame, you'd have to pull that bracket out of the frame lifting it up and pulling it out, and that will give you access to removing the physical keys or replacing the flex table all right so to pry the screen off we need to apply heat to the front of the foam, so we can loosen up that he's underneath and then we're going to use a suction cup tool to help gain leverage between the screen and the frame and then we're going to use a plastic pry tool to pry the screen off here's a better look at the screen the fingerprint sensor is located here and there's a cut out on the screen on the top for the proximity sensor, so i just put the flex cable over here to give an example, so if the screen flex cables over here and you pry your screen off from the front without disassembling the back when you're applying your new screen you're gonna have to line the connector with the flex cable over here since there isn't much movement with the flex cable, so you just get your screen and line up correctly then have to press down to make sure it connects aside from that underneath the screen on the frame to some copper tape as was a large lay of graphite to help transfer heat for the repairability score i give this one to seven point five out of ten now it's time to put the phone back together once everything's back in place apply a new adhesive and a replayer back plate tip over the phone power it on and you're done it looks like the display got damaged when i was prying it off i hope you enjoyed the video and i'll see you in the next one。
152油管科技TV 01:14查看AI文稿AI文稿
you are to your mom i came to drop off i got more crops in the bottle got strong and just like the botticle said i returned and they won't stop in the mid you can't do it cause i got lyrics and you wake out now, so if you come the battle for your shot don't get your bill when i shoot the grip, i shoot the hill can we get down i can't get down, so get out the city, jump around, jump, around, jump around, jump up, jump up and get down。


