映射教程键盘iOS
what's good youtube this is lb back with another video today i'm gonna be showing you how to set up the oxygen pro mini with fl studio it's gonna be a pretty quick but helpful video before we get into it you already know hit that like button hit that subscribe button so i can keep bringing you guys this dope content all right without further ado this is alby let's get into it yes sir the way i'm gonna show you is how you're gonna be able to set it up right out of the box right, no custom template or anything like that it's gonna be needed for this you're gonna be able to control up to 32 mixer tracks with your sliders here you're gonna be able to control the volume of those mixer tracks you're gonna be able to control up to 32 tracks with painting as well so the same 32 tracks you're gonna be able to control the painting with the knobs here that come on the pro mini of course you have your art, your chord and scale mode and you have your transport as well your transport is definitely gonna work all these things should work just as i'm gonna show you how to get this set up today so we're gonna jump right on into it make it super quick we're gonna start with the fl studio midi settings that you're gonna need to configure and then we're gonna come to the keyboard and set that part up with the right functions on this one so let's jump right into it alright guys so the first thing you're gonna want to do as far as fo studio midi settings just go to options come down to midi settings and in your output session at the top here you're gonna go to midi out three where it says oxygen pro mini and you're going to hit san master sink and you can set this port to you can set it to one uh you can set it to really to almost any number what's going to be important is that you match it on the next section that we go to so in my example i'm doing media out three and i'm doing it a port one san master sink is enabled then i come down to the input section and find where it says oxygen pro mini and you want to set that controller type to a generic controller and then from midi and three you want to make sure that is set to mackie control universal so you would just hit this drop down here and find mackie control universal right and make sure it's enabled right so you should see a green icon next to it same thing for the oxygen pro mini make sure you see the green icon for these guys and then make sure you have your port set to one so median three must match media out three but make sure you have that set again you can choose another number as long as a match and that's gonna be important for you sinking up your tempo from your keyboard all right now we're gonna bring our attention to the keyboard you're gonna want to just press doll the doll preset button and make sure it's lit see what i did there make sure it's lit press it and hold it then you'll see the doll selection mode come up just scroll over to the right it's gonna be almost all the way to the right you're gonna get to fl studio press in the encoder and now you should be an fl studio mode and you should be be able to pull up your mixer and use your sliders to control your mixer track volume and you can see i can slider one controls track one volume and then your knob should control the painting and it does knob one controls the painting go channel one now you only have four of these on the controller but you can control up to 32 different tracks because you have different banks you can just hop across your banks here and you can see what bank you're in by looking at the led screen here and your sliders can go all the way up you know you can go all the way up here to 15, 18, 20 you know you can go all the way to 32 and the same goes for your painting so yeah you can control over 32 tracks your transport is gonna work just fine record stop play yeah yeah yeah all right all right all right so all that's gonna work just fine right out of the box another thing you're gonna want to do is go to tempo so press and hold your tempo button and make sure you have your clock set to external all right make sure you do that and then hit back and you should be you should be good to go alright guys that's gonna be it for this video i hope you found it helpful if you did hit that like button hit that subscribe button so i can keep bringing you guys this dope content all right until next time this is alby and we are out yes sir。

粉丝3898获赞3.1万
相关视频
 02:11查看AI文稿AI文稿
很多朋友喜欢玩吃鸡,但是手搓起来可能不是很溜,现在的话可以不用手搓了。你只需要把平板越狱,然后安装上我们的映射插件,然后在街上拓展屋就可以用了啊。我这款拓展屋是可以接三个 usb 接口的, 然后他还有一个快充和网线直连。嗯,用网线的话,他游戏网络延迟会比较低嘛。然后接上拓展物之后,稍微等一会。 好,他已经自配上了。他这个映射是我之前已经设置好的了啊,你需要用的时候只需要把鼠标键盘接在拓展屋,然后插上平板就可以用。 然后 ipad pro 的话是没有耳机接口的啊。我是自己配了一个这种 usb 转三点五毫米的声卡,也是接在拓展物上面。真的有一个拓展物之后什么都可以往上面接, 可以看到这个鼠标转动还是非常流畅的。毕竟是有线直连嘛, 目前市面上网做用蓝牙的还是比较多嘛,毕竟蓝牙他的延迟还是稍微有一点的,所以他的视角会一卡一卡啊。我们这个是直连,不会这样子。 那我们现在是可以呼出鼠标的。嗯,你可以用鼠标去舔包之类的丢东西。那万能标点键的话,你只需要长按你设置好的按键, 你可以用鼠标去选择精确标记的类型。这一款映射呢,他是越狱插件了,你只需要把平板越狱之后,接上一个可以插 usb 接口的拓展物。 嗯,如果你是有蓝牙鼠标或者键盘的话,你可以直接用蓝牙鼠标连到平板上,也是可以用的。然后现在还在内测阶段,有想体验的小伙伴可以视频底下留言或者私信我拉你们。
1501本幕 00:36查看AI文稿AI文稿
看到我拖动的小绿球没有?那就是映射交换器,要用的时候点击他,点击游戏键盘,这样你映射就打开了,要打字的时候就点击中文,好让你发指令。只需在百度上搜索游戏键盘切换器软件就可以了, 往下滑找到剪映设器,键盘切换器一点六下载就可以了,下载好后点进去,除了锁定位置,其他全打开,颜色大小自己选,这样子就好了。
3012雅奢门窗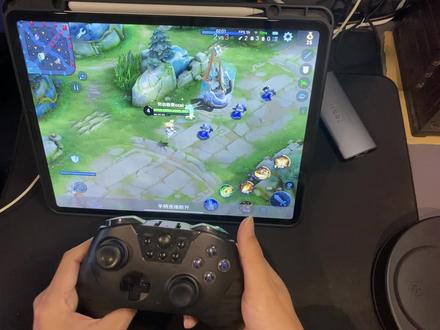 02:17
 02:43查看AI文稿AI文稿
大家晚上好,我是觉知,今天想给大家讲解一下我之前发的这个用键盘鼠标在平板电脑或者手机上玩游戏的这个视频啊,就是来看一下哪一些系统, 什么品牌,什么型号的设备能用软件呢?或者手机上操作眼神该怎么做?首先需要准备黑玉软件, 首先就是这两个软件啊,咱这是玩元神,他这是一个映射软件,很多朋友问我能不能玩这个游戏,玩那个游戏,理论上来说只要是在平板,在手机上运行的游戏, 甚至于微信什么的,你都可以自定义映射他,就相当于电脑上的这个模拟器一样啊。还有 就是安卓系统可以用,鸿蒙系统也可以。然后就是苹果的话, ipad 呀,苹果手机啊这些的话也可以,但是需要其他方面的就花一些钱买一些外设啊, 是这方面的给大家大概讲解一下。然后就是大家有的如果说就是联系我加我的话,就是希望大家可以备注一下你的,这是基本的礼貌,因为你看到我的视频,你知道我的的平台昵称叫什么,大家这样的话都省事一点, 然后有什么问题的话,我也是乐意给大家分享的,我们一起来探讨。 像这个软件的话,他主要就是玩这个吃鸡类啊,元神类游戏,射击类游戏比较好玩, 膜吧类,比如王者荣耀,英雄联盟手这些不是太适合,也可以玩,但是学习成本比较高,这是我之前录的视频,就是这个交互逻辑,基本上跟电脑上的这个绝地求生差不多了,这个键盘不断处直接向 绝地求生吃鸡一样来操作啊,包括这个推爆键,打开道具,打开背包 m 键、打开地图关闭 这些都是可以设置可以调整的。他这个可以设置的跟绝对求生一样,用按一个等号键,因为绝对求生就是按等号键可以直接加速我们和平经常正常的话就是用手玩,就是要拉一下, 我之前的话也不知道这个方法,就是还需要键盘鼠标,也需要单独用手拉,或者用鼠标去拉,比较麻烦, 包括像什么暗区突围啊这些设计游戏都可以玩。好吧,大家有问题的话都可以,就是来评论或者联系我都可以啊,希望能帮到大家。
4363觉知数码搬家优惠券 02:32查看AI文稿AI文稿
听好多小伙伴说还是不会映射,于是我这次带来了自己的亲身经历。首先打开浏览器,搜索游戏键盘 下滑,找到游戏键盘汉化版, 找到第一个,点击下载,下载过程就不给大家展示了,这边也是下载好了,他弹出这个提示,你就点,允许下一个点赞时 先点。步骤一,选择游戏键盘,点击管理输入法,选中游戏键盘, 退出以后点击步骤二,选定游戏键盘,点击设置,点击硬件硬设,找到硬设一,按音量上键, 找到 micro 一,点击 micro 一,点击映射二,按音量下键,找到 a, 点击 a, 退出硬件硬设,找到红编辑器,点击红一,搞成像我这样,点击确定,然后退出去。打开我的世界,我们打开我的世界,点击设置,点击键盘与玩法,打开全键盘玩法,找到攻击与摧毁, 点击攻击与摧毁,按音量上键,再找到放置,点击并 按音量下键。我们先来演示今天学的长臂元, 在来演示之前学的跑跳哒, 说一下这两种大陆都是长按音量下键,再来演示 pvp 长按音量上键就行了。对了,忘记讲了,一定要把热键关了, 不然会冲突,如果你还不会的话,打死我!
7674MC🌟黑茶君 01:24查看AI文稿AI文稿
女仙的要求基本的映射教程,因为主播很 l, 教不了多好的。第一个长臂 映射一按一下音量键下滑,找到一点一下, 这就好了。第二个深渊 同意拉美打勾找到添加件一, 然后映射摁一下音量键,找到 m e。 第三个的来了,这玩意也没弄个视频凑合看吧,我三星羊毛差不多三秒一组。同意打勾拉没添加件 q, 然后映射摁一下音量键,映射找到 ap, 然后就好了。你干嘛?哈哈。
3898临时的名字 02:04查看AI文稿AI文稿
你以为我们平时打吃鸡是这样的?我跳,我跳,吃我一记职权吃我一记左摆拳,哎,真费劲,我这操作白瞎了我这吃巨资购买的 m 一, 刚才这行云流水的操作是如何做到的?下面咱们看看抖音版的系统版本, ios 十四 a 十二叉处理器,话不多说,直接开始操作, 询问是否打赏开发者,咱们直接略过完成。点击好的红旗设备, 更新一下孕育后的软件包,下载运行环境中必要的安装包过程根据自己的网速而定,耐心等待即可 重启设备,即可添加映射键盘,需要的软件员等待验证 lorev 完整性,耐心等待安装完成。 接下来通过已经完成的软件员安装 预设程序右上角点击安装,在软件安装完成。 接下来见证奇迹的时刻,享受愉快的游戏体验吧!
 01:32查看AI文稿AI文稿
嗯,大家好,我是书中啊,这一期教大家来加一下这个 obs 的虚拟鼠标键盘映射,然后这个文件到时候会发在我们的这个盘里面, 然后这个文件呢我们直接打开,然后一直下一步就可以了,就是我们只要安装了 obsobs 里面他的,他会自动跟踪到 obs 的文件夹,我们一直在下一步就 ok 了。 然后我们把这个文件安装了以后呢?呃,点击加号,呃,点击输入叠加,然后点击确定, 这个时候去选择他的文件,我们这边文件是在我们这包里面,我们自己去打开他一下,然后选到这个 m 开头的这个是鼠标,然后再选择下一个映射,哎,这样点确定就可以就可以了,然后下一个呢 就是我们的键盘,这样的,我们的再点加一添加一次这个输入叠加,点确定,然后呢选到下面这个啊,下面倒数这两个,然后先选第一个,然后在里面找到他的文件,这个他就是另一种的键盘映射。 渐频声音还有很多种啊,不一定是,就是一定要用小的,然后还有大的我们可以去改一下。就是在属性里面啊,一样的,点击刚才第二个选项,然后选择下一个里面,然后去我们去选另一个样式的啊, 也是鼠标界面验车,但是他的按键会更多一些。好,这期就教学结束了,嗯。
326OBS伴侣直播调试-初衷 06:50查看AI文稿AI文稿
哈喽,大家好,这是小亮电玩啊,之前我们介绍过这个 g 幺幺手屏在安卓手机上面的一个使用方法,我们今天来介绍一下这个 g 幺幺手屏在苹果手机上面的一个使用方法啊,苹果手机或者是 ipad, ios 设备设备都可以的。 好,这个手柄在这个苹果手机上也是有两种模式的,一种是 and fire 模式, and fire 模式就是呃,可以玩,直接玩, 不需要映射什么的,直接可以玩原声呐啊,我的世界啊,还有重生细胞之类的支持手柄的游戏哈,这种游戏有很多的, 就是 m f i m f i 那个手柄支持的游戏他都是可以的。好,这个模式的话,我们就是按住这个 b 啊 b 键,然后按一下这个小房子键哈,进入 配对模式,然后我们点开设置,然后蓝牙打开搜索哈,这里我们看到搜索到一个,这里识别的是一个 ps 四手柄哈。好,我们点击连接好,这个连接好了,我们进入像原声这样的游戏哈, 就是直接可以玩的,然后进入游戏之后,我们设置一下,把这个设置改成手柄, 把这个触屏改一下,改成手柄。好,现在手柄就已经可以用了哈。 啊,这个每个键的作用都可以看一下,在这里都都 要做好了的每个键的作用,这个是放必杀啊,很丝滑, 这个手柄就是不管是安卓还是苹果还是电脑还是 switch 都可以用,然后可以有体感操作哈,带陀螺仪的,另外 这个扳机是有震动的啊,这个一百多块钱的手柄当中哈是很稀少的有板机震动的,那这个手柄的话性价比是相当高的。好,给大家介绍另外一种模式,就是映射模式怎么使用 好,然后给大家讲解一下这个 ios 的映射是怎么使用的哈,我们映射模式的话是按住这个 y 键播放,然后按下这个 home 键,好进入 配对模式,然后我们点开这个蓝牙。好,我们看到这里有个 g 幺幺,我们点一下配对 好点,配对好已经连接好了,然后我们需要下载一个这个 a p p 收听 plus。 好,我们看到这里有个 shooting plus v 三,这个在那个软件应用商店里面搜索,或者是那个扫码,扫那个说明书上面有一个二维码, 就可以下载这个软件,你点开他。好,我们看到上面啊,这里点确定这些游戏哈,很多游戏 有英雄联盟、和平精英、王者荣耀、荒野行动,明日之后哈,我这里下载了一款实况足球,我们以实况足球来举 点一下这个实况足球,然后我们随便就下载一个预设吧,就下载第一个预设好,已经下载好了,我们看一下,我们看一下这个他这个键位,我看就可以看到这些键位了。 好,如果说,如果说你要你的游戏没在上面,你想玩的游戏哈,没在这个上面的话,我们也可以的,我们点个这个添加预设,添加预设之后,我们这里要在游戏里面去截一张图。 好,这里选择图片,在游戏里面截张图,然后用这个图片去自己啊调整一下这些键位映射啊,这些。 好,比如说我们这里打个比方哈,比如说摇杆,左摇杆就可以把它拉过来, 可以把它拉到这个位置,然后比如说我们 a 键 a 键传球, b 键 b 键,我们选冲刺吧,然后射门,射门我们选这个 x, 好,直传球我们选外键。好,然后这里就可以保存, 就这里保存预选方案到设备哈,保存预选设备到 a p p 勾上。 好,我们这里就有一个预设了哈。好,我们还是用实况足球哈,因为他这个是已经做好预设的,已经做好预设的我们可以调整一下, 这种做好晕色的话,他就不需要自己再去改了。嗯,给大家测试一下 啊,当然你自己不习惯的话,你还是可以改的。我们看已经可以操作了。 已经可以操作了。传球时间到了 啊,没球的时候也可以 可以去铲球啊。这个游戏我不是太会玩哈, 好像和平精英呢,这些游戏都是可以自己设置映射的啊,越位了。好, 再看一下这个,这这个是预设的,自己也可以自己添加预添加这个预设方案的。好了,对这一款手柄感兴趣的小伙伴哈, 可以联系我们客服哈。嗯,领一个优惠券哈,这个手柄一百多块钱哈,性价比相当高的。今天的视频就到此为止,谢谢大家,再见。
681小亮游戏 04:13查看AI文稿AI文稿
hey, what's going on guys in this quick video i want to show you how to set up your midi keyboard inside the logic pro, so the midi keyboard i'm gonna be setting up today is an m or the o key station 61 mark 3, but this will be the same process despite of what midi keyboard you are using it is just a case of changing a preset which we'll talk about in just a moment so when you first plugging your usb cable into logic pro it should work straight out of the box in times or play your notes and sounds, but if we focus on the transport section we'll find that they don't work as they should so it's playing a note rather than the function itself and this is what we need to fix so in order to go and do that the first one we want to do is come up to logic pro in the top left hand corner right there and we're gonna go down to control surfaces first of all and down to setup so going back a few updates ago we used to have a section over here on the left hand side of all the perimeters in there that we needed to change that isn't there automatically anymore so if you guys aren't seeing that i'll show you how to get that back in a minute as it is really important in order to get this to work, but before we do that i just want you to focus on this new tab right there so if you tap on that and hit that install button we'll be presented by all these tamplates inside of here so you may have to a bit of research or maybe go to your manufacture website or manual to find out, which one of these you need with a logic pro, but for anybody that is using a m or the key station we need to set that up using the mackey designs mackey control right there so once you guys find which one it is that you need along here you just simply add that and we can just close this boxer cause we no longer need it so at the moment we can't do anything with this because we don't have the perimeters on the left hand side so we can double tap it we can try and delete it it just won't do anything so in order to get this to work now we need to come back over to the left hand side at the top and this time we're gonna go to preferences over to audio and all the way over to the right hand side to where it says advanced so once you tap on that you got all of these here and the one that you need to make sure that is checked is that control surfaces one right there you can enable all of these if you want this entirely up to you, but if you don't just make sure you got control surfaces checked for me i'm just gonna enable them all and i'm just gonna close up so if we come back and we close this now and we come back to logic pro again back down to control surfaces back to setup there's all our parameters that i was talking about so now we got these all we have to change in all of this are these two top ones right there, the output port and the input port so for the mrdo key station it will appear here yours may have a different name providing what you're using so for the output we need just the usb midi for the input we need to make sure that says transport and that is all you have to do and it will work from there so if we close that now and we just just hit the notes make sure note working as it should and now our transport should work with the play button straight away you can see it's moving the play head we can hit stop to stop stop again to go back we've got the record button stop we got these buttons here that can scroll through the tracks and if you hit that one there it'll make them bigger or smaller by zooming in and out and our volume will work as well for some reason it doesn't seem to move it on the screen as you can see it did used to work i'm not sure why it doesn't anymore but if we play a sound so i've just got to go back up to that piano up the top there so we've got a sound loaded you can see that is working and as we just the volume it gets quieter pull the way down and we got no sound at all so you can see that is working also。
163艺佰联腾 04:57
 00:41查看AI文稿AI文稿
be happy has some trouble when you worry you make it double don't worry be happy。
36多多云-云手机 03:07查看AI文稿AI文稿
今天教大家原地大备孕和迟疑部大备孕之前的教学视频没有键盘案件映射,导致很多粉丝表示难度较高,以后的教学视频里也会加入键盘映射。先以拉文作势力进行大备孕的演示,右手弧顶大备孕, 右手比脚大背运,左手比脚大背运。 接下来教大家如何做原地大备孕。当左手持球时按住 shift 加速键轻点特殊方向下以及特殊方向右,也是我们 ol 键盘的 xz。 然后长按方向键右合上, 当右手持球时按住 shift 加速键轻点特殊方向下以及特殊方向左,也是我们 ol 键盘的 x c。 然后长按方向键左和上,左手持球时同时轻点 x v 加长按方向键右上, 右手持球时同时轻点 xd 加长按方向键左上。 在底角,右手持球时按住 shift 加速键轻点特殊方向下以及特殊方向左,也是我们 ol 键盘的 x c。 然后长按方向键左和下底角,右手持球时同时轻点 x c 加长按方向键左下 底角,左手持球时按住 shift 加速键轻点特殊方向下以及特殊方向右,也是我们 ol 键盘的 xb。 然后长按方向键左合上底角,左手 持球时按住 shift 加速键轻点 xd 加方向键右下 底角,右手持球时按住 shift 加速键轻点 x c 加方向键右上。 这就是原地大备孕的全部案件方法了。接下来教大家如何做迟一步大备孕,还是以拉文作势力在弧顶位置向左侧移动轻点 c 做出迟一步之后轻点 x 做大备孕, 右侧移动轻点咪做出持一步之后轻点 x 做大备孕 迟疑部大备孕对控球要求属性不高,对迟疑部动画要求较高,比如杰伦布朗可以做原地大备孕,但是布朗的迟疑部不好,无法衔接大备孕,所以迟疑部动画不好的球员是做不了迟疑部大备孕的。 也有个小技巧,就是加速进入三分线内时,正面是可以做出迟疑部大备孕的,三分线内是可以做出迟疑部大备孕的, 这就是原地大备孕和迟疑部大备孕的全部教学了,还有什么想学的,看我主页视频,快艾特你的兄弟来学吧!
3009🌟2K阿一🌟


