rog掌机游戏设置档

粉丝2719获赞3.8万
相关视频
 01:21查看AI文稿AI文稿
哈喽,大家好,我是小龙,好久不见啊,这掌机呢发布要有一个月的时间了,大家入手之后的体验怎么样?其实我总体体验下来呢,就是从这个掌机,它的颜值,屏幕,音响啊,发热控制, 还有噪音等等等等啊,我觉得都比较不错。作为 lg 这样的大厂呢,即使是第一次做讲机,细节方面把控的也是相当不错。相信大家在拿到讲机之后呢,也遇到了一些关于玩游戏方面设置的问题啊。今天呢,我也是给大家总结了一份热门游戏的设置调教指南,以便呢让大家能够在游戏中能够畅快的玩。 按照我以上推荐的这几个方法去设置这几门热门游戏啊,你就会在 r o g 掌机的体验中更加的顺滑,达到极致,所以你学会了吗?
287网易数码 01:06查看AI文稿AI文稿
好不容易买到的二号狙掌机,却不知道如何提高游戏性能,今天就给大家带来霍格沃斯之遗这款大型游戏的设置调教教程。 在一零八零 p 分辨率预设画质中, f h、 r 为平衡的状态下,将模式调整为插电时候的三十瓦增强模式,帧率稳定在五十帧左右。 在同等分辨率和其他相同预设配置下,将模式调整为十五瓦的性能模式。可以看到帧率稳定在三十帧左右, 我们来优化一下。首先打开奥创中心,找到系统设置中的运行模式,再找到手动,将圈出来的部分全部调整至十五瓦,这样就切换成了手动十五瓦的运 行模式啦!记得要勾选可调节选项上方的小方框,运行模式才能生效哦!再回到游戏,将如图选项全部调整为 d, 调整后的帧率基本能稳定在四十帧左右啦!
371ROG官方账号 00:22查看AI文稿AI文稿
dnf 如何设置按键?打开掌机右上角进入奥创中心,找到控制模式,选择游戏手柄进行影射设置完成后进入游戏点左上角进入控制中心,改为游戏手柄。
461废手电玩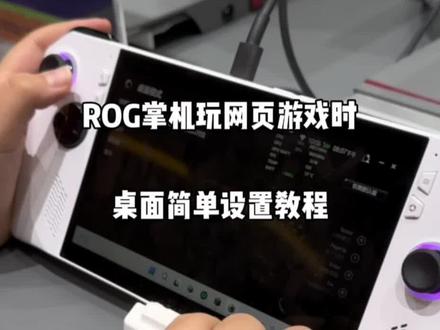 00:29查看AI文稿AI文稿
当掌机玩网页类游戏时,这时候我们就需要给我的世界游戏进行桌面模式设置。首先点开奥创设置控制模式, 控制模式里选择桌面模式,在桌面模式里选择菜单,对键盘、鼠标及其组合键位等进行设置。另外通过左右摇杆死区和外部阀直的设置来调节游戏里识别区域及鼠标灵敏度。还有其他问题可以打在下方评论区哦!
 00:40查看AI文稿AI文稿
哈喽,抖音的小伙伴们,大家好,我们 og 掌机啊,已经发售了一个多月了啊,我们今天为大家分享一个小技巧,一些操作啊,一些设置啊,可以使游戏变得更流畅啊,更流畅的一些运行。那么我们今天就为大家展示一下。首先我们打开 屏幕左侧的一个控制中心按键,然后我们调节一下运行模式,调成增强模式, fps 限制器调成一百二十帧。 然后我们的 amd rs 二操分辨率打开刷屏幕,刷新率调成一百二十赫兹,分辨率调成一零八零 p, 这样就可以了,这样我们就可以流畅了一些,运行一些。呃,三 a 游戏啊,今天呢,我们小技巧就介绍到这。
 03:28查看AI文稿AI文稿
r g 的掌机如何设置按键映射?首先打开凹创 包装,打开以后咱们点击设置,点完设置之后,这有一个控制模式,点击配置,咱们以游戏手柄模式为例啊,因为玩拿这个东西都是打游戏吗?点进去点击以后看左边有一个按键映射, 按键映射的意思就是你这个面板上的这些按键和你机器的侧面的扳机键都可以用来映射成一个按键。什么叫映射?就是把它映射成类似于电脑上键盘上的一个按键, 然后比如说我现在要映射一下我的这个识字,识字按钮,咱们找到方向点,这 找到方向键以后,咱们按一下哎,按一下哎, 然后,嗯,比如说把方向键设置成 w、 s、 d, 假如说我玩儿的是一个吃鸡的游戏,我把它设置成 w、 s d, 这时候我的方向键现在返回,这个时候我的方向键就变成了键盘上的 wsd 了。然后假如说我想用,我想用这个这个键开枪,这个左侧的扳机键叫左扳机键啊,咱们找一下 这个,这个刚才我设置了一下变成了鼠标单机了啊。 l t 这个点一下看上面有有 动作键盘,数字键盘鼠标,你可以把它设置成任何一个,咱们把它设置成单击鼠标左键。好,这个时候的,这个时候我的左扳机键就变成了鼠标的左键,这个按键就变成了鼠标左键。然后假如说我想把右边的这个按键设置成鼠标右键, 先把右边的这个扳机键设置成鼠标右键,这个一样的道理,点击 rt 右扳机给它改成, 改成鼠标右键返回,这样他就变成了鼠标的右键扳机,然后剩下的所有按键啊,像这个 a b xaby 这个按键都可以进行设置,任何一个按键原理都是一样的啊。返回,然后你看左摇杆下压,这个摇杆是可以按下去,左摇杆下压也可以设置成一个按键。 知道原理以后就特别简单,左脚杆下压,你可以把它设置成一个按键, 也可以设置成一个动作,也可以设置成键盘了,数键盘了,任何一个按键都可以, 你所有的按键映射都在这个按键映射里设置啊,这个左摇杆右摇杆不是设置按键的啊,它是设置你一个灵活度的一种感觉的啊,就是这些。
550xmw0921 01:29查看AI文稿AI文稿
r o g 掌机在手,却不知道怎么提高游戏性能,今天就给大家带来赛博朋克二零七七这款大型游戏的游戏调教教程。 首先,豪业之城在幺零八零 p 分辨率 steam day 预售画质状态下,将模式调整为插电时候的三十瓦增强模式。可以看到,在内置测试中帧率大概稳定在四十帧上下, 在游戏实际画面演示中帧率大概稳定在三十六帧左右。在同等分辨率和预设画质以及其他配置下,将模式调整为十五瓦的性能模式。 可以看到,在内置测试中,画面帧率稳定在二十四帧上下,在游戏实际画面演示中帧率大概稳定在十七帧左右。我们来优化一下。首 先打开奥创中心,找到设置中的运行模式,再找到手动,将圈出来的部分全部调整至二十瓦,这样就切换成了手动二十瓦的运行模式啦!记得要勾选可调节选项上方的小方框, 运行模式才能生效哦!再回到游戏开始时候的主菜单页面,找到设置,将游戏中的基础画质调整为低画质,纹理质量调整为高, fhr 调整为平衡。 调整后内置测试的帧率基本能稳定在三十帧上下,在游戏实际画面演示中,帧率也能稳定在三十帧左右啦!
453ROG官方账号 13:34查看AI文稿AI文稿
hey, what's going on everybody at tta prime back here again today, i'm gonna show you how to set up your rog ally now with this we're gonna do a few tweaks and we're just basically gonna go from an unboxing to play in a game here lots of little things that i want to go over some things that i personally do and really what prompted this video was i had to buy another one for my wife she was stealing the one that i have the review unit that i received from asus so i figured i'd go ahead and get her one she was initially using the steam deck but you know this is much lighter and she just does enjoy the look of it a lot better so i figured i'd go ahead and pick one up and while we're at it we'll do a setup guide also it'll kind of give me an idea of what was different from the initial review unit i received a couple months ago to the retail unit so far does look exactly the same there's no extra markings or anything like that on this one versus the review unit that i received pretty sure those were just kind of early retail units that a lot of the reviewers did get and one thing that still gets me when taking this out of the box is just the weight of it it's super light and it's a really good looking handheld so like i mentioned we're gonna do a quick setup guide from a basically unboxing to running your first game and obviously you're gonna get the ally and the only other thing we really get here is a 65 wat pd fast charger let's go ahead and turn this thing on and set it up now you will need to plug it in one time in order for it to power on i just let it charge up and since we're running windows we do need to do the initial windows setup i'm not gonna bore you too much with this because it is very self explanatory and if you've ever set up a laptop top or a pc in the past you're not going to have an issue doing this obviously we'll need to connect wifi or you can plug this into ethernet if you've got an adapter once, we have that done updates, updates, updates and that's going to be really important for the ally these updates for windows and especially the updates from asus themself really help out with performance so just let everything finish up i've signed in with my microsoft account i've declined a few of these offers for like office and everything like that i'm not gonna be using it on this device but it's really up to you just kind of follow that walk through and once it's finished it'll bring us directly to the desktop now we can actually start using the device but there are a few little tweaks that i like to do here and i kind of want to explain a few things so i'm gonna plug this into my game capture just so we can get a better look at it and we'll just go over everything that i personally do to set these up so on every windows installation that i do be it on a handheld or pc there are a few little tweaks that i like to do or just kind of disabling some apps and some settings first one is gonna be uac it's totally up to you if you want to do this or not but from the search bar we're gonna type in uac and this is the user account control settings so from here we can actually disable this completely or you can turn it down a bit this is gonna alleviate any of those pesky pop ups when you try to run a app or anything like that it's up to you, but i personally always disable it once we disable it we're gonna get that pop up one last time just more of an annoyance to mean i like to completely turn it off next thing we're gonna do is head to our settings from the search bar we're gonna type in power power mode i go to best performance you can leave it a balanced if you want to and once we start messing around with the rog alloy power profiles this isn't gonna matter too much, but i always just set it to best performance to get the best performance while we're in the settings let's go ahead and remove some microsoft apps and you can go through and debloat this whole thing with an application if you want to i kind of just disabled the stuff that i'm not using so from installed apps one of the main ones i disable is one drive i do not use it on my pc but you can go to the website and use it directly from there i'm gonna uninstall teams or microsoft teams is another one i always disable we're gonna remove that and the final thing which i'm not sure how this is still used but cortana we can't completely uninstall it, but we can go to advance options disable the microphone and we're never going to allow this background app permission that's about as much as we can do with cortana from the stock microsoft windows settings, but those are the three that i always disable and now that we have that taken care of we definitely need to update so there's a few places we need to update from first main one being from windows itself so windows update obviously we'll check for updates let this finish up i've probably got a lot here given that this is a brand new device yep, it's gonna find as much as it can here from the microsoft servers, so we'll let this finish could take a little while depending on your internet connection, but then we can also run an update from my asus or even armory crate se which is something we're gonna get into in just a second once, we've got everything downloaded we're just going to restart now to install it okay so now that we have the initial windows set up done, we can now get into the good stuff with the ally on the ally we have an armory crate button we're gonna go ahead and press this obviously it's gonna open up armory create se for the first time for us we'll just go through the steps here agree to their policy if you want to it also gives us a nice little walk through i would recommend kind of reading through this or just letting it do its thing we're gonna go all the way through we can totally remap the buttons on the ally rear buttons also and here it is and when you boot this up for the first time you're gonna get the moving out demo i believe it's a demo maybe the full thing, but as you can see this is our game library once, we start installing games from other platforms or manually installing games we can actually have this scan automatically and our games are gonna show up it'll download our artwork and some metadata for us using the right shoulder button it's gonna bring us over to settings there's a lot of great stuff in here, but for this video we're not gonna cover everything one main thing we will be covering is operating mode in just a second, but we're gonna hit that shoulder button one more time to content we've got a media gallery system game platforms and this is where we're gonna download our new game platforms from you can use the web browser if you want to as you see we've got the xbox game pass installed steam is already installed also you can go with epic games g o g, ubisoft or ea just makes it easy to go ahead and download those, but what we're really focusing on here is the update center since we've got a brand new device check for updates and i believe this already went through and checked for me, but we should have some updates especially for armory crate sc and a lot of the updates from the device and component section do help out with performance so we've got an update for armory crate and some device component updates we're just going to update all first from our components and of course we want to update armory crate ac, so we'll just update now it's gonna do its thing and i know updates can be a bit time consuming, but they really do help out with the device like this we're gonna relaunch it now that armory crates updated there's a few things that i want to focus on here for this video the first one is gonna be our command center as you know we've got the armory crate button on the front of the ally, but we also have another button which is gonna up our command center this comes in very very handy we can change our volume brightness and we've got a lot of settings that we can mess with performance we'll get into this in a second very important for getting the best performance out of the ally control mode set to auto, but if you want to kind of just set this to only gain pad mode you can do it from here or only desktop i usually stick with auto got game profiles fps limiter, real time monitor, keyboard show desktop so on and so on we're gonna press the command center button again to shut it down from settings you can see over here we've got edit command center so not all of our settings are showing right now we can add more so if we go through the list resolution game visual it's gonna change the screen's color profile and another one that i usually like to add here is led brightness i do like the rgb but sometimes it can get a bit bright at night you can set it up basically how you want but from here i'm also going to go to screenshot in amdris, so i've got mindful and if we go back to the command center you can see they're now added you can customize this to your liking but really the way it set up out of the box most important stuff's already there like real time monitor this is great because it brings up a real time monitor on screen for us this will give us our cpu usage gpu, our apu wattage, fps temp and battery so i'm plugged into power right now given that i'm using an hdmi adapt but this will also give us the full wattage that's being pulled from the battery so it can get an idea of what kind of battery life will get out of this great for having up when you're playing a game, but i'd say the most important thing here are our operating modes right now we're at 15 watts if we press a it'll go up to turbo, we've also got a silent so this is 10 watts 15 watts with a boost up to 20 for performance in turbo mode is gonna bring us to 25 watt we've also got a little bit of boost there also turbo mode's gonna kill your battery the quickest but from the stock profiles you'll get the best performance from turbo, but there's one more thing we can do here with these operating modes and that's create a custom profile from armory crate operating mode we've got the windows profile we've got the silent profile performance turbo and manual manual is usually what i like to use, but does give you kind of a warning here we can set up different profiles so for instance i'm gonna create a new one and what i'm gonna do is just call it 18 watts now from here i'm just going to go to 18 watts across the board we've got the spl the sppt and the fppt so these are kind of going to be our boost this is just kind of our baseline here, but to get good performance and great battery life 18 watts is kind of a sweet spot for me so i'm setting up an 18 watt profile here we can also control both of our fans so you can go manual if you want to, but if we choose number three gives us a nice little curve we'll get louder, but it keeps it nice and cool we're gonna apply choose yes and now we've got an 18 watt profile and we can go on up if we want to you can go to 25 with a nice boost all the way up to 35 if you want, but you can definitely experiment with this indie games won't require a lot you can go down to like seven watts with a lot of the 2d indie stop, but a lot of the newer triple a games will require more wattage i'm still right there at 18 watts and now it's time to install some games so from the game library we've already got steam installed we can go ahead and launch it and obviously we'll need to sign into your steam account and the way they've got steam setup here goes directly in the big picture mode which definitely looks like the steam deck now with all of the updates this valve is put out for steam again nice little walkthrough if you haven't used this before you can start downloading your games i'm just gonna go with something simple here, something quick, we'll go with shredders or revenge we'll install once, we've installed our games in steam we can play them directly from here but what i'm gonna do is just shut down big picture mode so from the bottom left hand corner power exit big picture mode i'm gonna go back into armory crate our game library comes in really handy this will start up automatically and as you can see it already found that game so it's going to scan the default directories from a lot of the major game platforms you can always swipe down from the top also to refresh this page, but we can launch it from here and once once we try to start this game up, it's gonna ask us to select a controller template we want to go with gamepad mode with this game and that's it you're now up and running with the rog ally, we're playing our first game here installed on this new device and it's quite easy i just kind of wanted to go over a few little things now there's a lot more to this device and if you want to in depth kind of tweaking guide let me know in the comments below and i can definitely come up with something because there's a lot of things that i've done to mind to get a little better battery life, a little better performance but this was just kind of an initial quick setup guide if you pick one up and you just got it you go ahead and follow this or just kind of do your own thing it's really up to you, but that's gonna wrap it up for this one if you want to check out some more ally videos i've got a bunch and i'll link them in the description it'd be really cool if you could hit that subscribe button and think about turning notifications on so you know when i posted the next one, but that's it for this one like always thanks for watching。
11圣贤 01:41查看AI文稿AI文稿
各位小伙伴大家好,今天给大家带来一个掌机使用小技巧,如何使用按键映射来畅玩接机模拟器等一些网络网页游戏。首先打开奥创中心, 按右侧侧键找到桌,找到控制设置,选择桌面控制模式,选择按键映射,将我们的掌机 左摇杆以及四个按键映射为键盘的指令按键。打开我们想要玩的街机模拟器或者是游戏, 将游戏的控制方式以及按键设置为掌机映射按键的相对应按键,就可以开始畅玩游戏了。搭配我们的雷切 pro 游戏手柄,还能进行多人联机游戏。关注我,了解更多电脑!
 00:34查看AI文稿AI文稿
lg 用户如何拥有一套专属自己的游戏设置,帮你省去每次登录还要进行游戏设置的繁琐,就让奥创中心来帮你打开奥创中心。选择左侧情景设置吧。针对魔法游戏可以做一些预设,例如选择元神,在右边的系统设置中关闭问键 以及触摸板来防止操作误触。神光同步可以任意设定,这里就调为呼吸模式,屏幕显示建议选择生动来提高游戏内对比度。设置完毕点击保存,这样每次打开游戏都会自动加载这个设定,一套专属自己的游戏设置就完成了。关注我,教你更多 lg 使用技巧!
824华硕终端 00:27
 04:27查看AI文稿AI文稿
大家好,小峰本期视频是 led 掌机星空的首发测试,本座优惠不少问题,不同的区域帧数差别巨大。本期视频依旧包含两道方案,分别是插电最优化日设置与锂电的续航设置。我们先看画面设置,具体参数设置参考我给出的表格。 星空目前玩下了大致 foil 三个区域,任务区、太空区和主城区。本期视频会分别对这几个区域进行测试, 任务区域涉及到大量的枪战,所以帧数需要维持较高水准,本设置下帧数可以维持在四十五帧左右。 out, 室外枪战会掉到三十五到四十吨左右。 to return to the larges。 正常的室外探索帧数维持在四十到四十五帧左右, 太空区可以维持在四十五帧左右。 到达人口还建筑密度较大的主城区,帧数就开始维持不住了,这个没有办法,帧数大概维持在三十到三十五帧左右。 i can assure you this unprovoked attack on a united colonies research facility you'll be scanned as you enter the city please keep moving。 武神区的地下区域地图较小,可以跑在四十五吨左右。 trees sounds upset whatever it is get me that bad right。 下面我们来看锂电十五瓦的设置,具体参数设置参考我给出的表格, 太空区域可以维持在四十五帧左右, 任务区可以维持在四十帧左右。 古城区压力较大,基本维持在三十帧浮动。 五泉区地下区域可以维持在四十到四十五吨。 and up there huh space。 好了,本期视频就到这里,我是小汪峰,想了解更多优质掌心内容可以关注我,下期视频再见!拜拜!
25拜托了小峰峰 00:58查看AI文稿AI文稿
once, you've unboxed your ally setup is dead simple turn on your ally using the power button on the top of the device you'll be greeted with the windows welcome screen you can use the touch screen to tap the next button and go through the setup process alternatively use the right stick to move the cursor on the screen just like a mouse use the right shoulder button to click you can also highlight options with the d pad and use the a button to select the left joystick can also be used to navigate the menu with the a button to select to type text just tap the text box and use the on screen keyboard that appears once, you're done setting up your device armory crate will launch and you can explore other settings now is a great time to set up your fingerprint for quick logins with windows hello, just open windows settings and go to accounts sign and options fingerprint recognition and tap set up that you're ready to grab your favorite launchers install some games and get playing。
30ASUS华硕西北 03:07查看AI文稿AI文稿
大家好,我是小峰,本人视频是 led 掌机,关于荒野达标可一代的运行测试,我会把参数设置放到开头,同时对比 yout 模拟器与龙神模拟器的运行效果,默认三十瓦手动模式测试 安装了一点零一的升级补丁和六十帧的木头,木头我会放到评论区。 柚子 work 模式有错误,切换成 open g r 模式, 继续看龙神模拟器设置, we get fight we get fight 图形或单选择 working 选择 open g r 的话会很卡。 marston back in the land of the living i figured it's about time i started paying back that 15 dollars i sure can use the next repair hands around here let's see if we can get you back in the saddle ants looks like whoa to your right is the general store you won't find breeze in high fashion but it's good for the essentials very convenient i don't think i've ever seen a ranch with its own。 难道要关掉他? 好了,本期视频就到这里,我是小汪峰,想要了解更多优质掌心内容可以关注我,下期视频再见!拜拜!
36拜托了小峰峰 06:14查看AI文稿AI文稿
新机在首次开机时是必须要插电的,进入系统时也要进行一系列设置与登录的。而 rg 掌机在设置完成这些之后,会跳出一个华硕信息收集,这个实话说并没有什么实质性作用,但是会让人心里一舒服,觉得非常靠谱。 进入系统后, windows 会告诉你设备针对触屏做了优化,你可以进行手势学习。任务栏隐藏默认的是平板模式,并且开机默认的是单机进入,使用体验更加接近于手机操作。稍微习惯一下,你会觉得单机比双击更加适合 windows 掌机。 我们可以在任意界面中非常丝滑的一键呼出功能齐全的奥创中心与快摄菜单。在奥创中心中,我们几乎可以对所有东西进行设置,比如手柄按键映射、屏幕色温调节、灯光调节等。 在控制中心里,我们也可以快速设置分辨率设置刷新率、更改新的模式等,当然这些快速功能也是可以进行自定义的。另外, 在胡说奥创中心或是打开滑车管家时,任务栏会自动隐藏这些细节,是可以提升用户体验的。当然,在功能上也有让我觉得不方便的地方,比如工号调节,虽然官方又给出几个预售方案,用户也可以进行自定义,但是跟 steam deck 相比,少了方便好用的工号实时调节, 用户想更改功号只能切换到预设好的档位。如果想一瓦一瓦的调节,只能进入奥城中心,在手动模式中进行更改,而手动模式中风扇、转速等其他选项也必须手动调节。这样一来,在游戏中寻找最佳甜点功号就会变得麻烦一些, 不过在找到甜品工号之后,玩家可以针对不同游戏建立不同的性能档位,在开始游戏时,系统可以直接调用该游戏的工号策略。另外值得一提的是,在插吧电源时,机器会有弹窗显示,提示目前的电源状态以及性能档位。在桌面模式下,倍电是可以搭配手柄按键来实现很多系统功能的,比如呼出屏幕键盘任务切换、呼出 任务管理器、切换投屏模式等等等。你也可以在奥创专用中进行自定义,自由度非常高。如果你自定义的功能过于混乱,记不住了怎么办?哎!你可以长按奥创键来显示每个按键的功能,便于您使用记忆。 在华硕管件中,我们可以查看产品序列号、保修时间等信息,可以一键更新或是下载掌机全部驱动等。除掌机专属硬件驱动之外, md 显卡驱动也会被包括在内,这样更新显卡驱动再也不用到 md 官网去搜索了。 从开机到现在为止的整个触屏体验都非常顺滑,有点类似于手机触屏的感觉。原因可能是这块一百二十赫兹刷新率低显示时间的屏幕带来了更加顺滑的构筑动画,也可能是这块屏幕的触控采用率相比其他运转机来说要高尚一些。 另外,这是一块七英寸幺零八零 p 分辨率 ips 原声定制横屏,但是在色域表现方面并没有做到业界最强。边框控制上也让我产生了一种在看电影的感觉。好在 它的亮度达到了四百七十多尼特,并且它竟然支持 m b 的可变刷新率计时,可以在 m d 显卡控制中心中开启,可以从硬件层面避免画面撕裂问题。另外通过四千分之一快门拍摄,可以看到全亮度、无屏闪 与屏幕素质同样重要的。音质表现方面呢,我们直接听听看 and the needles are mexico og 掌机的音质表现真的可以称得上是听觉盛宴,再带大家感受一下这个大表哥二的菜单界面音效 这重低音,我就想问一下,你们这掌机的音质做的是不是有点太好了?以后你们的笔记本如果我不能当音响用,我个人是不太认可的。 今天配置方面,它的处理器为锐龙 z one x dream, 跟七八四牛油比较接近,内存容量为十六 g 频率,运行在六千四百兆盒子硬盘支持 pcie 四点零,使用了悉数的 sn 七 四零,实测读写速率如下,电池为四十瓦时,支持六十五瓦 pd 充电,实话说电池不算大,当然这也是为了平衡左手感而做出的牺牲。具体续航后面测试 三十方面,我个人觉得在冰掌机圈内他并不是最强的,但是他可以做到非常优秀的风扇噪音控制,实测室温二十六点七度左右,在插电状态下开启增强模式,以三十瓦单烤 fpu 这个风扇掉落策略,我不知道该说他是保守还是基金。在考级开始阶段, sppt 功耗会短时间内维持在四十瓦左右, cpu 温度会顶着九十五度跑, 而此时的风扇噪音仅有三十八分贝左右,持续考虑到三十瓦强势功放后,室温二十七点五度, cp 温度会稳定在八十五度左右,此时的风扇噪音同样仅有三十八分贝左右。此时正面最高温度集中在充电口下方附近,会来到五十度左右。背面最高温度集中在继续上沿,会来到四十九度左右。令人非常舒适的是,虽然 cpu 温度不低,但是在玩游戏时,手能触及到的握把区域都很凉快,完全感觉不到机身内部的热量,真的是一点也不夸张,整个握把区域仅有这一块有一点点温热,但是在正常游玩时并不会碰到这块区域,其他地方都是凉凉的。机身背面摸到很靠中间的位置都是没有温度的,都在三十多度, 这样的使我感受配合优秀的风扇噪音控制,绝对是可以增加开机率的,也可以增加在手中去玩的时长。给人的感觉是阿迪团队在设计这款掌机的时候更加侧重于游玩体验方面,所以他们并没有为了更低的温度把风扇调节到全速模式,也没有为了更长的续航增加机身的重量,而是选择了一个平衡点,提升用户在真正玩游戏时的体验。 我个人在使用时会拉高一点风扇转速,让温度保持在八十度以下,这样转速会更稳定些。整个烤机过程持续了半个多小时, cpu 功耗可以一直稳定在三十瓦持续运行。当然,如果你就是想要更低的 温度,你也可以手动把风扇拉至全速模式。此时三十瓦烤机的 cp 温度会下降至七十四度左右,但是风扇噪音会来到五十二分贝左右。我也测试了在锂电状态下开启增强模式,一二十五瓦双烤 cpu 与 gpu 最终温度会稳定在七十九度, 此时的风扇噪音更是离谱,仅有不到三十五分贝。由于锂电状态是电池供电,所以此时机身背部下方区域会比插电时稍微热一丢丢,会来到三十八度左右。
2.0万会弹钢琴的疯疯


