迈拓斯黑蜂2号教程
粉丝1115获赞1348
相关视频
 07:51查看AI文稿AI文稿
分享一款最近刚拿到的非常适合小型直播的四路切换台,麦托斯的黑风二号在两千到三千价位区间的小导播台里,其实最有名的还是 bmd 的 ito mini pro。 相比 ito mini pro, 黑风二号的主要优势是支持原声竖屏直播、戴耳机监听接口, 而且还有一个手感不错的推子,推子可是导播台的灵魂。接下来分享一下这款黑风二号是如何使用的,我们仔细讲一讲他每一个按键和每一个接口。 黑风二号自带一个收纳包,可以放下导播台本体电源插头和一些常用的线材,外出干活的时候方便收纳携带。黑风二号整体体积小小, 全金属的机身棱角分明,质感不错,整体带一个坡度,放在桌子上时方便操作。我们首先从硬件开始介绍一下,整个切换台分为正面的操作区和后面的接口区, 底部最中间有一个四分之一螺口,户外直播时可以固定在云台或者怪手上,两侧是通风的散热孔。再来看看接口区域,首先是一个 dc 电源接口,这是一个带螺纹锁紧的 dc 接口,很安全,不会因为电源线被扯到而导致切换台突然断电。 然后是一个太绿灯接口,这是一种方便多级位直播时的设备,不过我目前还没有用到。然后是网线接口, 这款黑风二号是不支持直接退流直播的,这个网口主要是用来接入局域网,连接 pc 端的控制软件。据说今年下半年会出一款黑风二号的 pro 版本,支持仅依靠切换台本身就能实现 推流和录制功能。接下来是 usb out 口,这个 type c 口可以直接连接电脑,相当于一个采集卡的功能,让导播台的画面能被 obs、 抖音和淘宝的直播伴侣等等识别到,从而让他变成一个摄像头。 而且这个泰博西接口还可以连接安卓手机进行推流直播。接下来就是 pgm 接口,输出节目视频信号,也就是实际播出的信号,即观众最终看到的视频画面。然后是 motwo 接口多视频画面信号,也就是这种同时包含多个画面和各种信息的视频信号,让导播可以重揽全局。 然后是四路的 hdmi 输入接口,可以连接相机、笔记本、无线图传等等,让需要的视频画面进入到我们的切换台。然后这边是两个三点五毫米的输入接口,可以连接麦克风和调音台等等。这边还有两个接口,这个 usb 接口是通过优盘把一些直播用到的素材拷贝进行切换台的。这边还有一个耳机监听接口,值得一体的是 bmd 的 ito mini pro 是没有耳机监听接口的,作为一款切换台,感觉有监听接口还是十分必要的。 接下来就是正式开始介绍正面的操作区了,按键虽然看起来很多,但是按照功能分区后还是很容易理解的。首先看到最大的这几个钮, pgm 一二三四和 pvm 一二三四。 pgm 刚才我们提到过,是最终播出的信号,我们按这里切换画面,观众就能时时看到被选中的机位,红色的灯代表当前画面落在哪个机位上。 pvm 遇见限号,遇见是什么意思呢?就是比如现在输出的是二号机位,观众看到的是二号机位的画面,但是我想看一下三号机位的限号,然而我并不想去破坏大家增 在看的二号机位的画面,那么我就先按一下 pvm 的三号键,看看这个机位的限号和构图怎么样,同时也提醒三号机位的摄像师做好准备。如果感觉画面还可以确定要把三号机位的画面呈现给观众,那么就可以按一下 cut 键,这个时候三号机位就变成了红灯,是现在正在直播的画面, 二号就变成了遇见画面。我们也可以随时改变不同的遇见画面,可以在保持一路信号不变的情况下去查看其他几位的画面。然后这里的 style 是竞争功能,相当于截图。 peter 按键是显示预先设定好的图片, 通过优盘把图片素材拷贝进来,一般是直播的主视角定版画面。当我们的直播中场休息或者遇到突发情况的时候,就可以直接按 patter 键切换到这张图片。 mute 全局静音, f、 t、 b 是全局黑屏,是两个用于应急的按键,按下这两个键之后,按键会一直闪烁,提示用户,直到再次按一下恢复正常。 视频讲完之后,我们讲音频,前面我们说了,黑风二号有两个麦克输入接口,实际包括四路 hdmi 在内,他可以最多接入六路的音频信号,这个区域就是控制这些声音的。 master 是全局音量,麦克一、麦克二和音一音二音三音四一共七个按钮,分别对应不同通道的音频,选中后用加号和减号分别控制每路音量。 a f v 音频跟随模式,每个 h d m i 通道的音频都可以设置为 a f v。 当某一通道的 h d m i 音频设置为 a f v 模式时, p g m 也就是最终输出画面 切换到这路 hdmi 时,这路的音频也会被同时自动打开音频讲完之后,我们再看看这个区域,这个区域是切换功能,推子是一眼就和艾特 mini pro 最大的区别,操作更灵活。画面切换的时间取决于手动推推子的速度,而且这个推子还有一个更高端的玩法, 我们通过设置擦除转场的效果和柔化度,然后把推子推到合适的位置停住,就能实现这样两路画面叠加在一起的特殊效果了。 cut 键,在预览和最终输出画面之间进行简单的计时切换,这是一种没有转场特效的无缝切换。 auto 用预览和最终画面之间的自动切换,切换的时间可以通过速度按键来设置,也可以选择不同的切换效果。面板上自带了几种常用的效果, mix 叠加、 d i p 渐变、 w i p e 擦除可以在系统菜单里自定义各种擦除效果。 i n v 我们刚刚选择的擦除专场就会进行反方向的运动。 速度一和速度二是修改转场速度的按键。讲完了视频、音频和切换这三个最主要也是最常用的功能,接下来我们来讲一讲更进阶的功能。这个区域是画中画、画外画功能, 黑风二号支持在一个画面中添加两个画中画,在这里用 pip 一 pip 二来控制,而且画中画的大小、位置、边框等等这些参数都可以配合这个菜单旋钮进行实时调整,不依赖电脑软件,不依赖手机 vp, 只靠这个旋钮就能实现包括亮度键、绿木、抠图画、中画 等等很多高级功能。还有一个是 logo 叠加,通过右侧的 usb 口提前上传 png 格式的透明底的图片,给画面添加 logo。 另外值得一提的是,黑风二号有多达三个输出接口,其中两个 hdmi 输出,一个 type c 输出,而且这三个输出接口可以在菜单里进行自定义操作,每个接口都可以修改为任意的输出,包括 只输出 h d m i 一二三四中的一路或者清洁 p g m 遇见 p v m 多视图画面信号等等。 最后总结一下这款黑风二号切换台的优点和缺点,优点是功能多、接口、全原声、竖屏直播和中文菜单,而且体积小巧,做工优秀。缺点也有几个,就是这几个常用的按键,如果做成机械键盘的 结构就更好了。现在的硅胶按键按下去之后段落感不强,可能也是因为成本和体积受限吧, 毕竟同价位的 bmd 也是这种按键。以上就是本期视频的全部内容了,如果你对本视频感兴趣,欢迎点赞、收藏加关注,这对我有非常大的帮助。
644梦游前生的旅行日记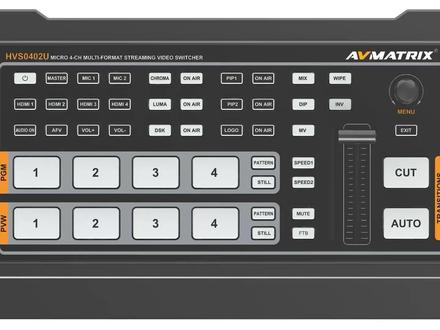 04:18查看AI文稿AI文稿
这是麦克斯四路直播切换台,切换台对输入的音频信号有独立的调制区域,等于有了一个简易的调音台。 用投影机展示切换台的操作画面,不要被切换台这么多的按键吓倒, 其实他的功能是很简单的,日常主要用到的也就是四路视频画面的切换。电脑软件可以远程控制切换台软件有麦克版本和 文多斯版本,不要畏惧切换台其他功能的复杂,你可以在直播之前先设定好这些功能,到时候就不用手忙脚乱的了。 麦托斯四通道切换台,开箱,打开包装盒,选择卡片,这是配件,这就是切换台, 切换他的提把推杆旋钮就是主要的功能菜单,提把推杆很有仪式感。 后面的 o i 接口侧面有耳机监听接口和一个 usb a 口,整个机身呈现一个器型的斜面,便于控制人员的操控。主要接口都在后面, 电源线有锁止功能,防止意外滑脱。 切换台的外观和做工都是 ok 的。 切换台还有扣像的功能, 抠象的话还是绿木最好,家里没有绿木,我就把家里的灯关了,抠一下黑背景试一下。黑背景和灯光都弄得比较粗糙,试试效果而已。你看看菜单里面都有些什么功能,一个个都玩一下。 这是官方给出的切换台设备连接的示意图, 直接用切换 台扣像,不占用电脑的资源,对电脑的性能要求就不用那么高了。切换台开机演示 思路,画面切换,演示这个菜单的功能,然后演示一下这个 转场的转场特效的选择。 大型切换台有的功能,这个小切换台也都有了。 切换台有自定义画质化的功能,也有叠加 logo 的功能。优盘加载的自定义的 logo 切换台可以用电脑推流,也可以 tfc 线连接手机推流,横屏直播竖屏直播都是可以的。 切换台上单我第一个进去的就是先选择中文,然后我把切换台的风扇调到常开状态,让切换台保持一个较低的温度。 logo 的位置和大小都可以自己设置,这是调整 logo 的位置, 放大缩小的歌 关机。
 11:50查看AI文稿AI文稿
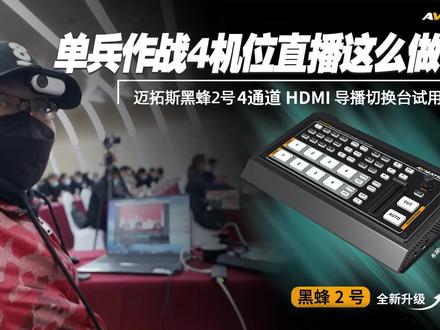
嗨,大家好,这个春节啊有很快就这么过去了啊,今天已经是,呃,应该是正月十二啊,已上单了啊,去年啊,在这个七八月份就是扬州一景。之前啊,有一个导播台或者切换台的一个厂家发了一个这个他们的最新的产品给我, 呃,我当时就很疑惑,哎,这个品牌啊,我听说的都不是很多。然后呢,呃,他们的产品啊,就是名字啊,包括他的包装啊,这些都是很英文化的。 后来我就去查了一下,哎,这个公司确实是中国的,但是他们之前一直在耕耘海外市场啊,海外有很多这个呃, 影视从业人员在使用他们的设备,现在呢,他们把一些产品啊转到国内来销售啊,但是从我拿到这个产品啊之后大概两三天扬州就疫情了。呃,大概有两三个月,这个疫情闹得都是纷纷扬扬,一直啊没有机会来 做评测,然后呢,我就去在网上去看了一下,就是这款产品啊,嗯,他们的评测到底多不多?哎,我查了一下, 确实他们的评测都不是很多,然后他们评测基本上都是由这个 logo 啊,自己坐在电脑面前啊,然后讲解了一下这个产品的一些使用方式,并没有把它应用到实际的这个使用当中。哎,我当时想,我不要跟他们做的一样, 我觉得我想把它做的就是能够酝酿到我们的这个实际的使用当中去啊。前不久啊,我们这边呢承接了一次这个正式的直播,刚好呢是四个机位啊,然后是一个会议活动, 我就把这设备带到会场里面。第一天我去呃查看地形,安排线路啊,布线,然后呃把设备全部调试好,然后第二天呢,我就一上午进行了这么一个直播,然后我把这个直播的过程啊,就是我在布 啊,安放设备的过程啊,基本上简单的记录了一下,我就给大家看看我这个整个实际呃用来直播的这个过程,然后这个设备在这个过程当中是怎么使用? 这款导播台的英文名字叫 lv matches, 中文名字叫麦特斯黑风二号四通道 hdmi 导播台 还得搁这睡觉? 对,要他要直播哎,不是摄像。那你家的孩子通过家里面有一个,有一个导播台切换的, 这里有一个脚架,然后上一台相机做整的,这个就是总体的这个一个会场的视角, 我先把相机先剪好了啊,各自的机位先剪好了,那边有一个,这边放一个,然后中间再放一个, 这是一个小的复读宝的易拉云牌,正好可以扫一扫领导的这个画面啊, 这个线是 ok 了,好,这个线已经接上去了啊, 是一个迷你的 dma 线,然后我用了一个这个转接成网线的这个转接头啊,通过这个网线 接到这里啊,目前两个画面已经有了啊,这边一个再来接一个啊,三个画面都有了,一个侧面的,一个后面的全景,一个局部的啊,三个。 我们现在开始使用这款,嗯,这个麦克斯的切换台啊,做一些简单的使用啊,我给大家看一看啊, 我现在就是做了一个推流的,做了一个踢败的切换啊。目前我把这个四路相机我的安全已经架好了啊,顶部是一台 松下的 g 一百,然后这边是一台复式的 xs 十,呃,这里有一台尼康的 d 七五零,我现在手里面拿的是尼康的 zfc 啊,四路刚好全部驾驶完毕,然后有一路的这个 多路的输出放在了这么一个这个百事乐的小的屏幕上面啊, 正常看起来小凝固带的比较方便。呃,如果你是一个固定的机位做直播的话,我建议把它换成一个嗯,至少是十九到二十寸左右的一个显示器,这样看的会比较清晰一点。 如果是那种当兵作战的这种零食做一些直播的场地啊,要,要切换的啊,可能我觉得这个叫呃就是便于携带是更重要的一步啊,给大家看一看啊, 我来切换一下击败。然后呢,有一路这个麦克风啊,可以通过这个线接入他的这个麦克麦克风的接口啊,这里有一个 usbc 的这个线路啊,会呃连接到电脑上 啊,这样的话通过 obs 的这个推流软件就可以把它推到你想要的平台啊,什么 b 站啦,抖音啦,什么虎牙啊,这些直播啊,都可以了。 这块啊,这块这个导播台的这块除了一个开关键,其他呢都是音频的混音键啊,上面的这个像麦克一麦卡是代表了 两个两路这个音频揭露,下面呢,这个 sdmi 的一二三四啊,是用来呃,这个混音,就是这个每一个视频啊揭露的视频 当中的这个信号啊,他们的声音会在这个上面显示啊,下面他会显示声音,开声音关啊,比如说这个麦克风,你可以只接入这调音台或者是麦克风的声音, 其他的所有的视频的声音都屏蔽掉啊,也可以切换到,就是每个视频都需要用他们的声音啊,可以打开啊,下面这个 a f v 这个键啊,相当于是跟随模式,把某一个这个或者是四个思路信号都选择了 fv 的模式,那么他就是跟随模式,你视频切换到哪一个画面,那么他的音频就使用这个画面的音频。 这边呢是绿木抠像模式啊,目前因为我这边是没有绿木的,所以这块呢可能暂时测试不起来,而这块呢是画中画和这个 logo 的模式, 现在我切换的啊,这个大家其实是可以看到他的啊,你看我来切换一下啊,这边 开下来之后啊,你看我的右上角和左上角都有画中画的功能啊,这个功能是需要在设置里面去设置的啊,按这个美女进去设置,你可以画中画出现在哪一个部位啊?另外这个我可以把这个你看啊,我的右上角会出现一个 logo 啊,这个 logo 也是我在这个麦六里面通过这边啊,这边可能大家看不到这边有一个 u 盘,我啊考入了两个这个 pg 呃, png 的这个格式的图片在这个里面, 然后通过这个嗯 money 键切换台去选择我需要的这个 logo, 你就可以在直播画面上直接 切换你要的 logo 啊,如果我把它换掉的话,我把它切换掉啊,换一个 logo, ok, 我现在 logo 就已经换两套。然后这边呢是他的转场按钮啊,这个 m i x, 这个就是常见的弹入弹出 这个 pi 啊, wpie 啊,他是你之前设置好的,他有一些不同的这个转场模式啊,目前我设置的就是左右推的这种啊,你甚至用过通过 t 半啊,你可以设置成这样啊,如果我把这两个画面再切换一下啊,一个切换,一个切换成这个这个 这个,哎,这样的话我调整一下角度啊,同时就可以直播一个人的两面啊,感觉是两个人在说话,嘿嘿,这个还是蛮有意思的,当然这个前提是必须你要有, 如果没有踢败他是不可以停的半一半的地方啊,他是这样是可以调节的啊,像这个 dip, 这个是黑茶先黑掉再来整洁。 所以这个导播台的功能啊,还是真的还是蛮多的啊,大家其实不用看这个切换台上面的按钮特别多啊,特别多,呃,也没有像你想象的那么夸张,实际上平常使用呢也不会用到那么多的按钮啊,主要的主要的这块啊,还是还是这个包括踢吧啊,这个看得见的 就是多画面的快速切换啊,直接硬切,不过按自动呢,他是应该会设置,就是你前提要在这里面设置好了,他是有一个转场的切换方式啊,当然用这个踢半也可以做到这一点。 上面是遇见画面最终输出的画面包括四个这个小的就是四个思路信号 进过来的画面啊,这里多了还有另外一个画面啊,另外一个画面就是这里啊,他就是一个嗯,参数调节的画面,现在画面是用的这个。呃, obs 软件里面直接呃这个 录制的按钮录下来啊,麦克斯黑风二号的这个评测到这里差不多就结束了啊,这个产品啊,我目前使用来啊感觉几乎没有太多的短板啊,就是我没感觉到,就是他有让我嗯 特别不满意的地方,哪怕就是小小的我觉得都没有,你如果非要鸡蛋里面挑骨头,让我来挑这款这个切换台的 这个就不足的地方啊,就是我觉得他如果能够把一些不常用的功能,其实不一定非要有实体案件来这 布局啊,然后把空间在整合一下,留有一部分空间放一块小的屏幕,呃,哪怕只是一个四寸的屏幕我觉得也不错,这样的话我出去真的当兵作战的话,带一个导播台就可以了,连那个小的监视的小屏幕都可以不用带了啊,我觉得这个就是超级完美了啊, 我希望这个黑风二号是,呃错了,不是二号,黑风三号啊,四号啊,升级之后啊,有这方面的功能啊,甚至这个屏幕啊如果能够做的再大一点,把一些功能集成到这个屏幕上,带有触摸啊,这个我觉得就真的很牛了,他的那个电脑,呃,调节软件啊,就是 客户端啊,他在这个无论是你在英文网站下的还是在中文网站下的,他都是英文版的,所以就是让我使用起来稍微有一点不变,但实际上那个东西我平时真的用不到,一个导播台他就可以解决那些问题。好, 这次节目到这里就差不多了。呃,希望大家呢给我的这个视频啊多多点赞转发评论啊,那么我们下期视频再见喽,拜拜。
110玩味生活陈明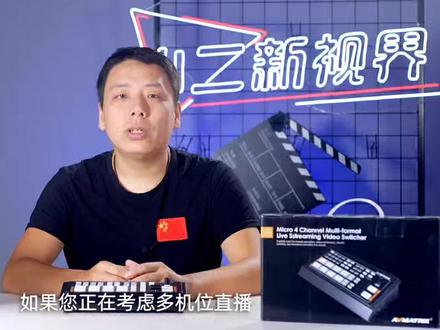 05:56查看AI文稿AI文稿
如果你正在考虑多机位直播,如果你的客户想要多机位导播,但又没有太多的预算,如果你想对导播深入的学习一下,先买个便宜点的导播台来练练手,那本期内容啊,建议您一定要看一看。 本期小二新世界跟您分享的是迈特斯的四通道 hdmi 直播导播切换台,那么请看本期的小二新世界。 哈喽,朋友们大家好,欢迎来到雪儿新世界再来再看,好运不断,我是你们一直很喜欢的张雪儿。本期雪儿新世界要跟大家分享的是麦特斯的四通道 hdmi 直播导播切换台。小二拿到这一款切换台啊,也有一个多月的时间了,期间 体验了很多这款切换台小二,感觉啊,可以说是麻雀虽小,五脏俱全,体积小,便于携带,操作逻辑啊,优秀,十分容易上手,对于小成本的直播导播来说啊,相当不错。嗯,很赞。首先啊,咱们来看一下他的外观以及做工的表现, 在没有参照物的情况下,看图片还会以为是一个比较大的导播台,但其实啊,并没有,这是他,这是 iphone, 他的体积啊,还是很迷你的,这也决定了你可以呃,把它很轻松的塞进包里,带出门穴。 全金属的机身边角处理的都很不错,拿在手里啊,沉甸甸的,很扎实,这种优秀的做工让你对他的信心啊,不由得又增加了几分。看图片之所以会觉得他很大,就是因为啊, 上面这些按键一眼看上去啊,真的挺多的,按键是橡胶材质的发光键,开机之后通过灯光也能判断出切换台当前的工作状态,这跟那些专业的导播台啊是一样的, 背面呢是各种插口,两个三点五的麦克风插口,四路 hdmi 的输入,呃, pv w pgm 的画面输出, usb 的输出口,网线接口,胎类接口,电源接口。 导播台右侧还有一个可以插优盘的 usb 插口,以及一个耳机监听的接口。对于一个入门级的切换台来说啊,接口方面可以说是十分丰富了。然后啊,这个切换台还有一个很贴心的设计,在切换台的底部有一个四分之一的螺丝孔, 考虑的大家如果在户外进行直播的话,可以把导播台安装在云台或者怪兽上。 外观说完,我们一起来说说麦托斯的这款导播台的功能。首先这款导播台是具备 usb 输出功能的,本身啊,就可以当做一张采集卡来使用, 通过 usb 输出直接连接到电脑就可以了,不需要我们啊在另外购买一张采集卡了,一是省钱,二是带出门的时候可以少带一样设备像。嗯,这张采集卡当时买的时候啊,就要一千多块钱,相当于三分之一这个导播台的价格了。 然后我们结合他的面板说一说这一款导播台的功能,虽然看他的面板上有很多按键,嗯,但是呢,功能划分啊还是相当明确的, 这个是电源开关机键,相信大家都认识。然后这几个黑色的按键呢,是声音的控制区域,这里可以控制声音是跟随画面切换还是用固定的那一路声音音量的大小等等。 这个导播台很小,但是在声音的控制上还是把实体按键都给全了。呃,在实际使用中啊,确实会方便很多。再往右边这六个白色的按键,分别是色度键、亮度键、电四 k 键, 我们可以通过他来进行对图像进行抠图。呃, dsk 键呢,还能在画面中啊加入我们设置好的图片,但是啊,我们想要进行抠像的话,还是需要进入系统菜单来设置一下,弄明白操作逻辑之后,操作还是 是很简单的。再往右边这六个黑色的按键是画中画呃,以及添加 logo。 这款导播台可以同时显示三路信号,也都是在原画面里面加入两路的画中画,画面的位置、大小、边框等等这些参数也都可以进行开单进行调整。 再往右边这几个键是切换时的效果,这些效果也都是可以进入系统菜单进行设置的。再往右边的这个旋钮是可以按的,通过按压可以进入系统的菜单,通过旋转来进行调整。 exit 大家都了解了,就是退出。下面这一排相信大家都很熟悉, pgmpv w 的选项控制、竞争抓取、全部 黑屏静音,还有导播台的灵魂推子。所以说从这些按键上我们也能看出这款导播台在功能上还是相当丰富的,基本上涵盖了我们对于导播千万台的绝大多数需求。 这段时间体验下来,麦作斯这款导播切换台还是相当不错的,那些预算有限又确实想多几位导播的客户,我就会带着他去, 能满足客户的需求,还能降低我们的成本。如果这款导播台啊能再加入一个录制的功能,雪儿觉得那这真是美的要上天了。 对于有导播切换需求的小伙伴,这款导播台啊,还是值得考虑的。那这又是本期视频的全部内容了,如果对你有所帮助,请给小二再练,没关注的一定关注下小二,全网搜索小二新世界,更多精彩内容等你来订阅,我们下期再见!
 15:38查看AI文稿AI文稿
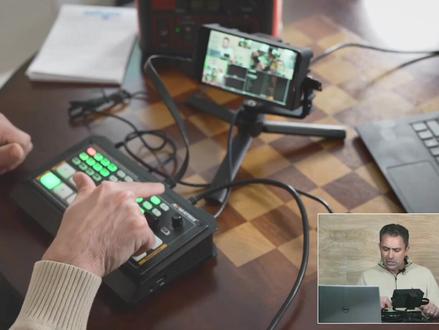
hi, i'm dustin abbott and i'm here today to give you a little bit of a different type of review and today we're going to be looking at a video switcher and controller from the av company av matrix this is hvs o four o to you and yeah maybe not the very best name that they have could have come up with and it's probably primary competitor is the black, magic, atm, mini or mini pro and part of the reason why that's maybe the more popular of the two has a lot to do with the fact that that name rolls off the tongue a little bit more, but as we're going to discover today this av matrix product actually has i would say more going on for it in terms of functionality and inputs, and so we're going to explore that together devices like this have become necessary in the last couple of years maybe for some people for many people they already work, but for someone like myself prior to the before the pandemic, i really wasn't doing any kind of virtual events i wasn't really concerned about live streaming or things like that, but there's a lot of new technologies that i've had to explore and discover along the way as a byproduct of trying to learn how to communicate and i've done everything from doing virtual conferences to meeting with camera clubs, virtually and of course with other local and small groups for business meetings, etc over zoom and similar technologies so trying to continue to put your best foot forward in that requires some new bits of technology that's where something like this av matrix deck comes in so let's take a closer look at what we've actually got here in terms of the control layout and everything that is a part of that so taking a closer look at this we can see that there is this is a really nicely made and really nicely functional well laid out things and it definitely has some advantages over the either, the atm, mini or mini pro and so one of those is it actually has an on off switch and so that's obviously very nice to have to be able to control that independently there is a lever here that allows you to transition in between your sources which is obviously something that was not on the a to many and something i find to be very very handy you can program your different effects here and there are even more that you can access through the menu and then you can put them onto the slider and so you can transition between those various sources so that's a nice layout there i also note that the menu layout here is controlled through this dial which allows you to both click it and then to rotate it to access function and the menu here is really really in depth and it's actually the basically all the functionality functionality you might typically find with other products on a computer you can actually access all of those through the menu functionality right here and so i find that to be a really great layout and you get a standard feed here in the multi view as you can see on my little monitor here, which gives you some life feedback the various things that you've got going on more on that in just a moment so as far as the rest of of the basic layout here unlike the item mini or mini pro you don't just have your program output, but you also have a preview output here as well, so two different decks with two different complete different set of controls there which is obviously very handy to have now when it comes to the output of these what is a really really interesting is that there are multiple hdmi outputs and so you can actually have a a program mode that's going out to something where you're capturing right now i'm capturing on obs studio which is most commonly used because it's free and open source, but you also have the multi view and so you can go out as i'm doing here you can output to a monitor and then you could also output to another source with your other hdmi output there, another handy thing there is that this does obviously have a usb c port usb c is what actually i'm running out at the moment into my laptop for recording at obs but the nice thing about the the usbc here is that number one it eliminates the need for a capture card you know from the actual deck and so you're able to get a figure that can be used like for a webcam or things like that right out of this so that's handy for things like zoom for example the other nice thing is you can actually program what goes out over that and so instead of just you know typically by default you would have your program mode? which is what you're seeing on screen right now, but you could also default this program view that i've got here and so if you wanted to have that for whatever reason and so obviously that's very handy you can see here there's also some picture and picture controls which i've been using somewhat and what's unique here over the or they see the atom mini is that instead of just having one picture and picture you actually have two of them that you can control on air you also have the ability to use a logo which you can see in the bottom portion of the screen there you can program in your logos more on that just a moment and take them on and off there is various chroma controls here and we'll have a separate section on that in just a moment and so you've got you've got chroma, you've got luma and then you've got a downstream chroming effect of there as well you can control whether or not that's on air or not over here on the left side you have audio controls and and so those will allow you to have independent functionality over a variety of different functions which include two uh three point five millimeter audio inputs you have right onto the deck itself and you have a lot of controls in the minimum on how those going to function one other nice thing is here on the right side is you actually have a headphone jack and so you can actually do headphone monitoring right here in the effect itself and so there's a lot of controls there that are really really useful as a part of that so let's take a quick look at how the actual chroma functionality works and how you can use something like a green screen so in this section we're going to take a look at how chroma works on this and so i'm actually going to be using a static background as my source on this point and so we're going to take a look at a background that's going to look something like this and so i'll show you how we arrive at that destination and the various components that are going to be at play here so we've got a few different inputs here we've got our main camera here, which is are going to be our key for this and so you can see i've got green screen behind me i've got a secondary camera that i'll as i'm using as a part of this that is showing us what's on screen and and so for that capture and then our third thing that we have got at play here switch back for a moment is that we have got our our chroma pattern which if i cut to that is going to show you this kind of just standard background and the actual chroma taking place the other factor that we have got here is the ability to go on and off with my logo which i have uploaded here and so i'm going to just show you that on the side here there is a place to put in a usb drive and as a byproduct of that i've been able to upload a few things including the background some different you know logos that i might want to use and so you have the ability just add a touch to take that logo to turn it on and off altogether or you can take it on air and off air and so easy thing to add there as a part of this so right now we're looking at our feed from hdmi three which is obviously here of the av matrix deck itself and so and then as a byproduct of that i also have the option of you know using this as an overlay, which isn't necessarily the effect that i'm looking for so there are basically three different functions you're going to want to have access to here first being the chroma and taking it on air or not in this case we don't want to go to the main key thing because all you're seeing is in my face interposed over this so at this point we're not going on here because i'm demonstrating because of what i'm doing demonstrating here but what i'm going to be looking at is the ability to have the the pattern look here and then to be able to cut back and forth between that and so the cut button being large here and on the right is what's going to allow me to cut back and forth between those sources or you know we could use an effect and white in between those depending on what we're doing and even if i wanted to use this slide to kind of slide in between those two sources like this or you know even have a you know a part way which obviously we don't want to do, but the slider is going to give me ability to smoothly transition between those different items now you can see that the acromo effect works you know quite well for doing it all in box there's no software involved in doing this this is all being done right off of the switcher itself and so i believe that the effect is pretty good and obviously you know chroma is going to be improved by a couple of factors the better that you can do the sampling on your actual background is going to help the second fact that it's really going to help is to have a little bit of distance between yourself or your subject and the background itself, the green screen or the blue screen whatever, you're using in this case that's not working so well is that i don't have room for that at the setup or i'm at and so my green screen is only a few feet behind me and so obviously you can improve that by getting some distance some separation between the subject and the background but overall i would say with at least my limited experience in doing chroma uh green screen type work that it seems to work quite well once you get all the various pieces figured out that did take me a little bit of time to figure out and i think in some ways it's simpler if you don't have to have the factor of having a static kind of pattern background behind you and you can just do your chroma key using a couple of inputs are coming in from hdmi that seems to work a little bit more simply, but i was with a little bit of work able to figure it out and it works quite well, so obviously a good result when using chroma and the ability again to be able to control that all from within this unit without having to use a separate computer for that is really really useful and one of the i would say the highlights of this particular unit the atvs o four o to you is the fact that you can do all of these things independent right here from it you don't have to use a computer to unlock extra functionality now that's not to say that you can't use you you can actually can virtually control this through ethernet and you can have the control to where you can be away from the unit itself and you can control it over your laptop or something like that, but you don't have to rely on that and so in this case you know i'm actually going to my laptop here for the the actual capture, but i don't have to worry about having to have maybe two windows up or two competing things going on i can just function on running obs here all the other other functionality i can run right from the av matrix other strings include having this wide variety of inputs all four hdmi inputs they're all auto detected and also having the outputs here is very useful as well and where you have a lot of different options of not just getting your content out, but getting your content out maybe to multiple sources simultaneously enjoy having a slider functionality and the ability to transition between sources there while also applying effect as a part of the process and then obviously you can just hit the cut button or even the auto button which the auto button will automatically, apply and effect and so you have different ways of transitioning between your sources, but i really do like having the ability to have that slider and then also to have the actual visual readout of the slider control so are there any negatives that have come up as a part of my review process i'll first say that for me there is a learning curve with devices like these, i've only done a couple of reviews of a couple of these different devices and i'm typically as you know someone that's working in front of a camera for a video i'm not a behind the scenes guy and so for me there is a bit of a learning curve with these things and with any device like this you can see here that i don't have a lot of things hooked up and yet you've got the worn and snaking of cables that are coming in and out and so those cables have to come from somewhere and so one thing i will point out is that even after you have invested the money and buying the switcher you're still going to have to have the various cables it basically comes with the power cable it did come with the usb cable out to connect to the usb c to the usb standard, usb port, and so to connect into your computer it did come with that cable but all of the hdmi cables or any of those type things obviously you're going to have to supply that separately so you know that's one maybe aspect of that i also found that there were some of the functions that were just a little bit obscure it took me a while to figure out how to do chroma for example and you know i kind of went around and around and it's basically just a matter of maybe some of the controls being not as logically laid out for something like that is what they should have been and finally you've got another limitation here which is unfortunately fairly common with these, but i will highlight it here and that is your output is limited at ten eighty p up to sixty frames per second, but you're not gonna get any kind of four k function alley which does limit your output for someone like myself typically records all of my content in fourk again as i said it's a fairly common limitation of switchers like this, but it is one i wanted to highlight so finally you're paying about five hundred and forty nine us dollars for this and while that is a little bit more expensive than what the atm mini pro is selling for currently i would say the functionality here is higher it has a lot of features that are missing on the atm mini pro and it also allows you to do a whole lot more right inside here and not to have to rely on using a computer to achieve your end result so at the end of the day if you are looking for a quality switcher and the ability to control things for live stream, maybe running, multiple cameras and i will note one other feature that is really pretty awesome and that is right in from inside here you can actually set up your own user profile so not just you know upload you know the your various logos and backgrounds to the actual device which is great not have to use computer for that, but you also can set up different profiles for you know a whole different setup maybe with you know graphics and various things and you can save those profiles and so if you have like multiple prototype projects that you do on a regular basis you can switch between those profiles you know at just a few clicks and be ready to switch over without having to go through and to change all those menu settings or to rely on a computer to accomplish that so the overall theme here when it comes to this particular unit from av matrix is the fact that it really is very well self contained a very functional menu that allows you to do what you want to do inside this without having to rely on a computer to do it and i think that that might make it very appealing for some of you that make you know want to move as simply and as lightly as possible i'm just an abbott and if you look in the description down below i do have linkage there to where you can get some various purchase options for this and beyond that there's linkage to follow myself a craig on social media to become a patron to purchase channel merchandise check out our video centric channel let the light in tv and of course if you haven't already please click that subscribe button right here on youtube thanks for watching have a great day and let the light in。
 15:37查看AI文稿AI文稿
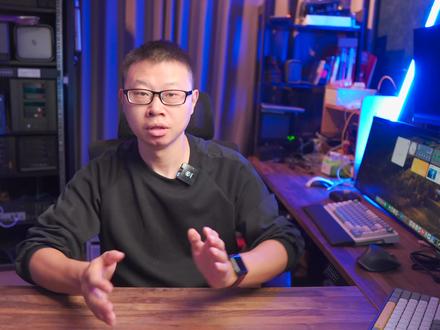
兄弟们,两年前老水买了一台黑风二号的这个导播台,那一直用到了今年,那么今年双十一老水又剁手了一台导播台,这就是来自于 sport lick 家 new life r two plus 导播台。这款导播台基本上啊,把所有老水想要的功能都集中在了一起。 y y d s 我们先来开个箱, 兄弟们,现在拿到我手上的就是一款全能导播台,来自于 sport link 家的一款啊,新款导播台来开箱,走起, 噔噔噔!这就是 导播台的本体 new level 阿 two plus 非常漂亮啊,我们来看看它的外观,时隔两年,现在的导播台是越来越卷,代替霸 带,录制带推流的,导播台就是这个的机器,可以包含录制推流、直播、导播切换一体机。我们就来打开看一看这款机器,激动的心,颤抖的手,哎呦,当当当!打开盒子就可以看到我们机器的本体啊,我们把机器拿出来,哇, 这机器的分量还是可以啊,拿在手上比较轻巧啊,没有想象中那么重,但是整体的做工看上去非常的扎实啊。我们把这个机器放在一边,然后是一个 合格证,一个配件包,我们打开看看里面有什么东西,这里就是开箱出来的所有东西,包含电源识别器一个,插座一个,线一根,机器本体一个,然后就是一份合格证 和说明书啊,他的说明书是电子版的,这一点好评,比较环保。那我们就现在就来看看这个机器的外观,把这个东西都拿开。 兄弟们看一下 linulan 五 autoplus 的这个外观,整个机器老水最喜欢的就是这个五点五升的大屏幕,这个大屏幕可以显示很多信息, 比如说监控画面啊,预监画面,各种信息都会在这个屏幕上显示,那么啊,老水就是因为这块屏幕才选择了这款阿图 plus 的机器,整个机子的按钮布局也是非常合理啊,左侧是开关机键,音频控制键以及推流直播键 啊,这三个旋钮是用来进行音量调节和相关操作的,下方是多功能按钮区域,包含了录制按键、功能按键、捞水还有一个非常小的地方,就是这个导播台带了一个 摇杆,刚开始我还以为这是个游戏机,哈哈,他带了个摇杆啊,那其实这个摇杆是用来控制呃 p g d 的摄像头以及一些相关操作的啊。中间的下方是画面切换按钮和化妆化啊, logo 等相关的功能按键 啊,这个按键也是非常的 q 弹,所有按键都做了静音处理,我们在切换画面或是调整像功能的时候都会听到按键声音,这段话更好的保证 呃,直播间的禁闭性。左侧部分就是整个导播台的灵魂推子啊,以及各种切换键啊,这个是硬切,这个是 自动切换,这是一个功能旋钮,就是这个旋钮可以很方便的操作菜单,他可以按下或者是旋转调整菜单,整个机器的按键和旋钮都是非常的人性化。 r two plus 呢,所有接口 都集中在背面和右侧啊,那么背面的话从左到右分别是四路 hdmi 输入接口,可以接摄像机、单反相机、笔记本电脑以及各种游戏机等 hdmi 输入设备。右侧是两个 输出接口,可以接两台监视器,用来进行成品的直播画面输出啊,待会我们功能部分会显示演示啊。再往右走就是我们的网线接口, 有了这个接口就可以实现,不需要电脑直接通过这个网线接口来推流啊,我们到时候把推流码和推流日子写入到机器里面,大家可以直接通过这个网口直接推流,支持抖音、 b 站等 主流的直播平台。再往右边走就是 u v c 的 type c 高速传输接口,这个接口可以把 画面传输给电脑用来啊,无损的采集我们的这个导播台的画面,也就说他还可以通过电脑和 o b s 录制视频以及直播推流视频。最右边则是十二伏的 啊,带螺丝锁口的这个电源接口,那么还可以保证稳定安全的供电。那么机身右侧是呃音频输入接口以及各种探里灯和 usb 接口,那么有两路 麦克风输入,一路这个监听输出以及 tanning 接口。这个 usb 接口还有个特殊功能,可以外接移动硬盘进行视频录制 和素材的导入导出,这个也是非常赞啊,这款机器不光可以拖机推流,而且还可以拖机录制视频,可以把每场直播的视频都录在外接硬盘盒里面,这样的话就方便我们 啊,在直播完以后,把直播素材切片传送到短视频或是长视频的平台,这一点也是非常赞啊,以后我们就不需要带个笨重电脑去录制了,直接 autoplus 就可以直接录制了,非常赞!这个机器简直就是一个全家桶,把所有老鼠想要的功能都集中在一起 外卖 d s 好,接着往接口外观,接下来我们就开始来体验这台机器,我先把线都连上,然后开始开机体验。 好,现在老师已经把设备都连上了啊,我们来看看现在连接的设备啊,现在我们总共是连了三台输入设备,两个相机,一个游戏机,这个是连接到了我这个截止屏上啊,这个截止屏显示就是我们现在直播输入的画面,那么我们来看看这个机器的一个情况啊,那整个 五点五寸屏幕显示了很多信息,这就是我们直播的时候默认的信息啊,左侧的画面是我们直播给观众看的画面,右侧是我们导播要去啊推荐的一个画面啊,待会我们就把这个 画面推出去,那我们现在把这个贴把拉下来,这个时候大家看到的画面就是,呃,左边是我人,右边是这个 啊,机器的一个画面,这就是通过导播台进行切换的啊,左边这个画面就变成了我们遇见的画面啊,我们可以在这个两个画面之间来回切换,也可以直接硬切啊,我现在把这个 model 按钮按成了红色, 按这红色就可以快速切换,比如我想切换到一号机位,我们就按一下一号机位就切换了啊,按下二号机位就要切换二号机位,按下三号机位就切换到我们的游戏机,这就是呃导播台的常用功能,就这些,如果说你不想去做过多的设置, 那么就可以这样子直接硬切就可以了,硬切就可以了,随意切,随意切,非常的快啊,刚才我所演示的就是导播台啊,大家常用的功能啊,那么他也有一些非常有意思的功能啊,比如说像刚才这个画面,我们就是用的是场景模式来打造的,那我现在就来教大家怎么使用场景模式。 首先我们按这个场景按键按一下啊,按下以后它会出来很多场景,我现在用的就是这个左小右大的这个场景,我们现在可以把它改成 左大右小的场景啊,这就是场景功能,可以快速在两个不同的呃画面中来回切换啊,还有不同场景啊,还有这种放在左下角的这个效果,放在右下角的效果,放在左上面的效果,可以放在左下角的效果,这就是 是场景的使用功能,还可以保存多个场景。来,我们切换一下啊,把这个摇杆往右拨就可以切换到保存场景啊,这个时候我们按下这个左右键 来选择这个保存场景,我现在选择一个场景,比如说我想用这个两机位平行的场景啊,我们选中它好,选中它以后我们呃拨拨到右边选择保存场景, 然后按一下这个按键,保证好场景后,我们按这个左箭头把它选中为加载场景,这个时候我们就可以加载场景了啊,比如说我们按一下一,呃就变成了这个场景啊,我们按下二 他就变成了这个场景啊,我们想要快速些的话,就可以这样子啊,按照这个 model 选择三啊,他就变成了这个场景,这样的话就可以在一二三 这三个场景里面随意切换,就不需要我们去调了啊,这样我们就可以实现很多效果的啊,想要展示呃,产品多一点,我们可以切换到一号场景,就是左小右大啊,想要展示人多一点,我们就可以变成啊 左大右小好吧。啊,想要两个都展示,就按一下这个,变成两个都展示 yyds, 如果你是做产品直播,做带货直播,导播台,这功能非常像,还有更多的场景我就不演示了啊,大家可以买回去自己慢慢研究。 除了好用的场景功能以外,我们的 autoplus 还有非常多的转场特效,我们现在演示一下转场特效,来切换一下机位啊,选择这个特效 按钮啊,这里可以看到非常多的转场特效,所有特效加起来总共有三十多种啊,我们拿起来看一下 来,这里就是转场特效啊,这里大概有三十五种特效左右。好,我们随便来演示一个特效啊,我们选择这个十字架 来,选择好以后,我们就推一下他就变成十字架的特效啊,就在转场的时候会有这种特效,那么还有一些啊,这种田字特效啊,然后还有一些我们常用的啊,有这个特效 啊,这是淡如淡出特效,老水平时就喜欢用这种淡如淡出的效果,非常的有质感是吧。啊,这是特效的部分,除了特效以外,我们还可以给这个画面上增加 logo 啊,这是 加 logo, 这个 logo 图我们是可以自定义的啊,可以根据自己的喜好换成自己的图片,换成自己的 logo 都可以,然后就是竞争功能,按一下他就截图了,再按一下他就恢复了啊,那以上这些功能就是我们常用到的一些导播的功能,那么除了导播以外啊,这个机器还有非常多的特色功能, 这个机器还内置了录制功能,我们可以外接一个移动硬盘或者是 u 盘就可以录制视频了,我们来演示一下怎么录制啊。 来,我现在就已经开始录制了啊,这里我插了一个 mr 的固态硬盘,插在这个 usb 接口上,插好以后,我们在菜单的设置里面可以看到存储选项啊,这里显示到我这里还有多少容量啊,已经用了多少容量啊,这样的话就可以进行录制了。然后录制也很简单啊,直接按 一下这个录制按钮就可以录制了,现在我就已经在录制了,再按一下他就停止录制,再按一下他就开始录制,他录制的时候会亮起红灯,现在在录制。呃,这个按钮就是我们的推流按钮啊,把推流码写好以后, 按这个 steam 他就开始推流了,是吧?那么这个机器的两大特殊功能就是可以推流,可以录制,非常赞啊,以前老水的那台黑风二号是只能直播导播啊,无法推流,无法录制。 现在的机器不光可以录制视频,还可以直接推流,不需要电脑就能推流了。 autoplus 还有一个非常有意思的特色功能,就是连上网以后,可以通过啊网络来控制这台机器,而且那我们就 来演示一下通过网络来完整的控制机器来,我们切换到这个电脑上。 好,现在大家看到这个界面啊,就是我通过这个阿图 plus 的地址啊访问到的这个 呃机器,而且你通过通过这个网络界面就可以直接控制我们的阿图 plus 啊,注意看啊,我现在这个机位是在一号机位,我现在这里电脑上点一下二号机位,他马上切到二号了啊,再点三号机位, 切换到三号了。好,我们现在来切换下模式啊,在这个界面上可以很方便的加载各种呃模式和这个场景来,比如说我们有这个中画面,对吧? 左下角,右下角,左上角,右上角,一大一小,平均大 左小右大,右小左大啊,这样就可以非常方便的切换啊,而且还可以点这个 cat 自由切换,还可以点这个 alt 啊,这种这种切换,那基本上这个 w 呢,包括呃特效啊,你看我们这个特效完全可以变啊, 这个特效随便你选哇,这么多特效随便选啊,包括一些声音的调节啊,图像的导入导出啊, logo 啊,背景图啊,都可以,在这里就可以很方便的添加推流地址啊,比如说我们要在啊某个地方直播,把推流地址填进来, 可以填进来啊,点保存,然后就可以直播了,在这个界面上可以完成所有导播台可以完成的东西,而且非常的方便,甚至还有一种更极致的玩法,可以通过远程来控制 台,导播台,就说你导播可以跟主播不在一个地方,这就可以远程控制导播台,只要做好内网穿透,就可以直接实现远程进行导播。 yyds。 好,以上就是 autoplus 的全部体验视频,相信看完本期视频,大家对这款导播台已经有了大致的了解, 那么整体来说,这款奥特 plus 的导播台功能非常丰富,特别是这个五点五寸的屏幕,有这个屏幕在,我们就可以不用外接显示器的情况下,就可以直接对整个 直播导播的流程和过程有一个完整的监看和啊把控,这点非常赞!第二点,他除了可以直播导播以外,同时 才能够啊录制视频,我们接上一个这样的 u 盘或者是移动硬盘,就可以直接把视频录制到这里面,然后等到直播完以后,我们就可以啊把这个素材导出来做直播切片啊,特别适合做电商直播,带货直播的兄弟,那么 啊,你不光直播完了,同时还能保存你的所有直播内容,这一点也是非常赞的。而且这款机器 啊,可以不使用电脑情况下直接推流,连上网线以后直接通过外部地址去访问,访问到以后就直接把推流地址填进去,这样就可以直接推流直播了,可以省下一台推流电脑的钱, 特别适合预算紧张的兄弟。那么这个机器简直就是全能,他既是四路的 hdmi 采集卡,又是直播推流机,又是录像机,又是这个带屏幕 的监看设备。 yyds 基本上老水对一台导播台的所有功能所有要求他都满足了,特别是他的那个外版操控界面,更是把所有操作都 极度的简单化了,强烈推荐需要做直播的兄弟买这套设备,这个设备也不贵啊,但是你想啊,买了它以后可以省下一台电脑钱,省下一个录制视频设备的钱啊,那这样子算起来 还是很香的。好了,以上就是本期节目的全部内容,如果喜欢老师视频,记得点个关注分享一波,我们下期节目再见了,兄弟们!
137老水科技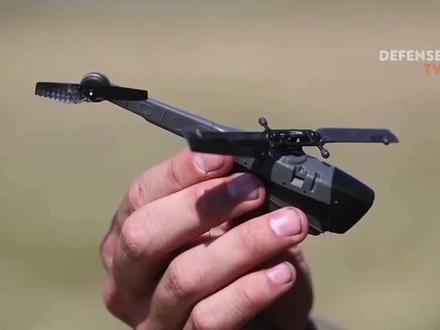 03:26查看AI文稿AI文稿
the unmanned aerial system is intended to aid dismounted soldiers on the battlefield it improves soldiers situational awareness by acting as a dismounted covered soldier delivering all key data on surroundings and spine on enemy movements to ensure the safety of frontline soldiers floor systems manufactures, the black cornet personal reconnaissance system prs for use by military forces government organizations and disaster relief agencies around the world the prs employs the black cornet three an upgraded version of the combat proven black cornet pd one hundred unmanned aerial vehicle the black cornets shell is made of a tough plastic molded material the nanouav's aerodynamic shape which stands strong winds free surveillance cameras are hidden within the nose of the tiny drone the entire black cornet system consists of two uavs and a base station the uav is about one hundred millimeter long and has a rotor span of one hundred and twenty millimeter and weighs sixteen grams the tonal system weight excluding the display is less than one kilograms the black cornet is launched from a small box that can be strapped to a utility belt which also stores transmitted data since the drone itself does not store any data and advantage of captured operators can steer the uav or set waypoints for it to fly itself an operator can be trained to operate the black cornet in as little as twenty minutes the air vehicle has three cameras one looking forward, one looking straight down and one pointing downward at forty five degrees a black cornet package contains two helicopters and since a ninety percent charge is reached in twenty to twenty five minutes the same as it's hovering time when one needs to be recharged, the other is ready to fly the black cornet nanouav as a field replaceable battery that powers the main rotor as well as the two bladed tail rotor it has a top speed of approximately twenty one point four nine kilometers per hour a flight endurance above to twenty five minutes and a range of two kilometers according to gizma crazed a single unit cost only one hundred and ninety five thousand dollar with a single reaper costing over sixteen million dollar according to a usa for port the black cornet represents significant cause savings when used as a replacement for missions, such as personal reconnaissance as of twenty five october twenty thirteen the british army had three hundred and twenty four hornet nanos and service and in may twenty twenty more than twelve thousand black hornet and been delivered to defense and security forces around the world the aircraft was being used by soldiers from the uk's brigade reconnaissance force at campaston in akanastan operation herit personnel and acanisten deployed the black cornet from the front line to fly and do enemy territory to take video and still images before returning to the operator it was withdrawn from service in twenty sixteen twenty seventeen designed to blend in with the muddy gray walls in afghanistan and capable of flying for twenty minutes on quiet electric motors, it has been used to look around corners or over walls and other obstacles to identify any hidden dangers in enemy positions the black cornet is connected to the operator with a digital data link in gps images are displayed on a small handheld terminal which could be used by the operator to control the ua。
37夜鹰


