pixelmash教程

粉丝187获赞901
相关视频
 10:27
10:27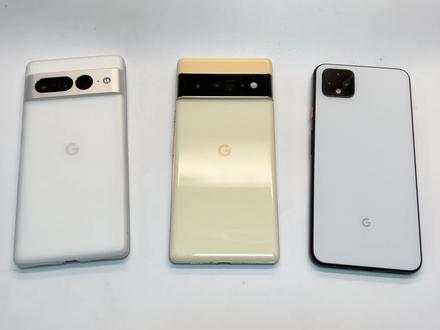 03:19查看AI文稿AI文稿
ok, 开始很简单,一分钟,嗯,教你免解锁 botlog 免 read, 开启谷歌 pixo 全系列的窝体。我这里已经操作成功了,先给大家来演示一下, 免解锁免入特,不需要解锁,不透漏的也不需要入特手机,这样的话你就可以在线 ota 确认一下我是没有解锁的,没有解锁 o m 是可以开,当然你不开也无所谓。然后六 pro, 六 pro 已经升级到安卓十四了,嗯,也是已经开启了沃体 噔噔噔噔,当然也可以自己关可以开。 好,接下来开始正式教程,准备一分钟解决。首先你需要下载这两个应用,拿近一点看,一个叫十组库,另外一个叫 pixo m i m s, 然后下载。安装好之后啊,第一个应用你可以在谷歌商店或者酷安到处去下载。第二个应用我一会会上传网盘放到评论区,然后安装完第一个应用,打开往上拉,这里有一个通过连接电脑启动,使用 adb 查看指令, 把这个指令先复制下来,然后通过微信或者别的方法发到电脑上,然后接下来,嗯, 手机打开开发者调开发的选项里面的 usb 调试,把手机插入电脑, 然后输入刚才的复制的这段命令,按回车键就可以把十足库激活。 这个条件的话,需要你电脑上安装 a d b 环境,如果你电脑没有 a、 d、 b 环境的话,你自己百度搜一下,其实也很简单,实在不行也可以用那个中沉降的那个搞基工具箱也可以。 然后安装好这个应用跟这个应用之后啊,把十字库激活之后,打开这个 pixel a m s 这个应用首次打开的时候会弹一个对话框,就是这个允许使用十足库,你点击始终允许就行,当然你拒绝了也没法用。允许了之后,这边右下角就会看到你的运营商, 然后 c m c c 就中国移动,呃, china unicum, 就是那个中国联通,然后你在这里面把这个我体、我 wifi 这两个 开关,或者你只需要我体也行,把这个开关打开就可以了,就是这么简单,就是这么 easy, 打开之后你的手机就获取了我体。最后给大家来演示一下,证明我确实已经成功开启了我体。打开中国联不通看一下 看见没?通过中国通话不掉网或中国联通客服微信公众号自助办理业务,通话不掉网可以正常上网,把链接以短信发到您的手机上, 就是这么简单。说好的一分钟就是一分钟,一分钟简单激活 pixo 的 watty 免入特免解锁,还可以 ota 噔噔。
434隔壁老黑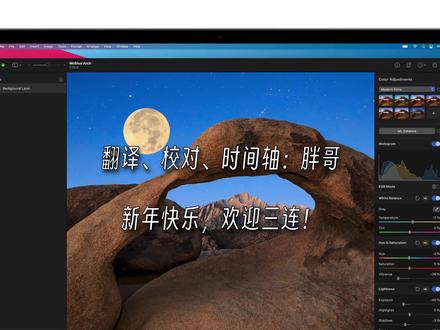 23:34查看AI文稿AI文稿
pixelmeda pro is an incredibly powerful and very easy to use image editor for mac in this tutorial, we'll take a quick look at most of its key features let's start with creating and opening images this is the welcome window here you can choose to create an empty new document open an image from your photos library or browse and open images saved on your mac using pixel made a pro, you can edit your photos create designs and illustrations paint and more if you're creating a new design or illustration you'll usually want to start working on an empty new document so let's do that this is the template user which contains image size presets for many common image size to create an image with a custom size, you can enter it at the bottom here if you'd like to add this custom size to the template chooser you can click the file menu and choose save as template there are even more ways to open images in pixelmator pro for example one of the best ways is by simply dragging and dropping images onto the apps icon in the dock now that we've opened an image let's explore the interface the main pixelmator pro window can be divided into four parts the toolbar at the top the tool sidebar on the right the layer sidebar on the left and your image in the center the tool sidebar contains all the tools you'll use to edit images and the options for every tool the layer sidebar displays all the layers in your image will explain layers a little later the toolbar has controls for hiding and showing parts of the interface it also gives you a quick way to zoom in and out and there are a few options for working with the entire image rather than individual layers finally the image you're working on is displayed in the center of the application window by the way if you ever want to hide the entire interface and just take a quick look at the image you're editing you can click the view menu and choose hide interface in that same menu you'll find pretty much all the options for hiding showing and customizing the pixelmator pro interface now let's talk a little about layers pixelmator pro is a layer based image editor that means it lets you add and combine different kinds of layers such as image layers, shape layers and text layers to create your own images to hide or show a layer you can click its visibility icon in the layer sidebar note that when some part of your image is completely transparent you'll see the checkerboard pattern there are many different ways to add layers to an image for example you can click the plus button at the top of the layer sidebar and add an empty new layer if you were to paint or draw on this empty layer the layer below wouldn't be affected but it would look like you were painting on your image now you can move this star filled layer independently of the rest of your image to make it easier to work in images with many different objects you can also create group layers from multiple individual layers to do that select some layers in the layer sidebar then ctrl click one and click group grouping layers together is useful for organizing layers but a great feature of groups is that you can also apply effects and color adjustments to them as if they were a single layer at the bottom of the layer sidebar you'll find controls for adjusting the opacity of layers and changing their blending modes let's explore the tool sidebar tools are laid out according to what they do at the top is the arrange tool? which you use to choose move rotate, align and transform layers then there are the three non destructive tools that change the look of layers in different ways the style tool, the color adjustments tool and the effects tool blow them are the selection tools which let you select a specific area of a layer to edit, delete or isolate in other ways some tools are grouped together with others like the quick selection tool and the color selection tools to select a tool in a group double click the group control click it or click and hold it then we've got the painting tools such as the paint tool and the color fill tool the next group is the retouching tools which includes the repair tool, the warp tool and others after that are the shape and text tools, the pen tools, shape tools and various type tools finally we've got the zoom tool and the crop and export for web tools in one group you can also choose tools from the tools menu there you'll find the keyboard shortcuts for each tool now it's time to take a look at a few of the tools more closely first the arrange tool this is the tool you use to position resize rotate and organize layers to move a layer you can simply drag it if you press and hold the command key you can click to select multiple layers on the canvas if you lock the background layer, you can also easily drag to select multiple layers with a few different layers selected you can align and distribute them using the buttons in the tool options pane to make it easier to position a number of different layers more precisely you can also use rulers and alignment guides to see the rulers choose show rulers from the view menu then to add a guide you can simply drag it out from a ruler you can also add guides by double clicking a ruler and entering the exact position of your new guide now when you move any objects they will snap to your guides with pixel perfect precision another great feature of the range tool is automatic layer selection it's on by default, but sometimes you might want to turn it off to make it easier to move objects behind other objects with auto select turned off you'll need to make sure to select every layer in the layer sidebar before moving it on the canvas next let's check out the color adjustments tool which lets you adjust the colors of images if you want to automatically enhance the look of a photo with a click simply click the ml enhance button this feature uses a machine learning algorithm trained on millions of professional photos to intelligently adjust the colors and lighting in a photo and the changes it makes are visible in the color adjustments pane so you can also find tune them yourself at the top of the tool options pane you'll notice the presets browser which contains a wide range of color adjustment presets organized into color collections to apply a preset simply click it if you especially like a particular preset you can control click it and add it to your favorites in which case you'll always have quick access to it in your favorites collection finally you can show and hide certain adjustments using the customize button at the bottom here effects work in a similar way to color adjustments they also non destructively change the look of a layer letting you create blurs distort layers tile them or even fill them with patterns and other images just like in the color adjustments tool you'll find a presets browser at the top of the tool options pane with a collection of effect presets checking a preset applies a number of effects with predefined settings, but you can also apply effects individually to create your own effect combinations the order of effects determines how they're combined the bottom effect is applied first then the one above it and so on to rearrange effects you can simply drag and drop them now let's talk a little about another feature of layers layer masks masks are one of the most powerful features of layer based image editors they let you non destructively hide or in other words mask layers to apply a mask to a layer you can control click it in the layer sidebar and choose add mask the thumbnail of the layer layer mask is now displayed next to the layer itself and the blue outline indicates that the layer mask is selected layer masks work in grayscale or in other words black and white areas that are pure white are fully visible the default layer mask is completely white so it doesn't hide anything if you were to open the format menu and choose invert colors and invert the colors of the mask it would completely hide every part of the layer so to quickly recap layer masks work in grayscale white areas will be completely visible black areas will be completely masked gray areas will be partially transparent to precisely edit layer masks you'll most often use the paint painting tools for example you can choose the paint tool select a hard basic brush and set its color to black if you want to hide areas or white if you want to reveal areas then simply paint over the areas of the layer that you'd like to hide or reveal along with painting over specific areas you can also use the gradient fill tool to gradually reveal areas creating a fade effect to do that you can choose a black to white gradient then click and drag in your image to gradually fade out a layer in addition to layer masks pick this limiter pro also includes clipping masks clipping masks clip the contents of one layer in your document to the outline of another they're incredibly useful when you need to quickly fill a layer with a texture or an image to create a clipping mask, ctrl, click a layer and choose create clipping mask note that when using clipping masks the bottom layer acts as the mask layer so with two layers the top layer provides the contents and the bottom layer provides the shape however, when creating the mask you actually need to control click the upper layer now let's explore shapes first the shape tool in the default list of tools you'll find the shape tool here between the pen and the type tools you'll notice the shape tool includes a number of shaped presets in a few different collections there are several ways to add a shape to an image for example you can click to select a shape then start drawing on the canvas you can also double click a shape or drag and drop it from the browser some shapes are smart shapes and they have certain features that can be adjusted you can adjust the number and length of the star shapes points for example shapes layers are vectors and you can also edit shapes more precisely by adjusting their individual vector points to do that ctrl click a shape and choose make editable in addition to adding pre design shapes you can also draw your own using the pen and free form pen tools check out our tutorial and illustration if you'd like to learn more to customize the look of a shape you use layer styles layer styles are displayed in the tool options pane when editing shapes, but the same settings are also available in the style tool by default the fill and stroke layer styles are applied to shapes, but if you click the add style button you'll also be able to apply other styles there are four layer styles in total fill, which lets you fill layers with colors and gradients stroke, which lets you add solid color or gradient outlines around layers inner shadow, which lets you add a shadow to the inner edges of a layer giving it a recessed appearance and shadow, which lets you add a drop shadow to a layer here in the style tool, you'll also find a variety of layer style presets to add text to an image you use the type tool pixelmator pro includes a few different text tools so let's start with a basic type tool using the type tool, you can add two basic types of text layer to your images a free text box and a bounded text box to add a free text box simply click anywhere in your image when you start typing the text box will automatically resize to fit all the text it contains pixel mater pro also features text presets that make it very easy to quickly style your text now to add a bounded text box, click and drag in your image a bounded text box will always have the size you specify to change the look of text you can adjust the settings here in the type tool along with the basic type tool pixelmator pro includes a path type tool for typing text on paths although you can use any of the tools to type text, along paths and shapes text layers can also be converted into shape layers or pixel layers if you convert some text into a shape you can adjust each letter as if it were a vector shape moving its points or reshaping its curves there are also certain tools that work only with pixel layers so converting text to pixels will make it possible to use those one example is the warp tool a reshaping tool that lets you change the shape of pixel layers when working with images you'll often want to concentrate edits on specific areas of a photo or for example cut out one part of a photo and combine it with another for that you would usually use the selection tools the selection tools are grouped into three groups the first group contains geometric selection tools you can use these to make rectangular and elliptical selections the second group features selection tools that let you trace the outlines of objects either, manually or automatically and the third group has selection tools that let you select areas based on their contents or color most of the time the quick selection tool is the best general purpose tool for making selections though each one has its uses in this case we'll use the color selection tool once you've selected an area of an image any areas outside of the selection generally won't be editable for example when making changes using the color adjustments or effects only the selected area will change keep in mind that when working on selected areas your changes will be merged with a layer once you clear your selection to work non destructively you can duplicate your original layer then click reselect to make your previous selection appear and add a mask to the upper layer the mask will be automatically created from your selection now when you make changes this layer is master areas won't be visible and it will look like only the unmasked area is being edited to crop the entire image you use the crop tool which you'll find at the bottom of the tool list you can crop to a particular aspect ratio or a custom size and you can also choose to simply hide the cropped areas or completely delete them if you'd like to crop parts of a particular layer rather than the entire image you would need to use one of the selection tools the rectangular selection tool in particular you need to start by making sure to select the layer you'd like to crop in the layer sidebar after that make a selection of the area you'd like to keep using the rectangular selection tool and finally click invert in the tool options pane then press the backspace key on your keyboard feel free to adjust the position of the crop layer on the canvas using the arrange tool now let's talk about adjusting the size of images there are two ways to change the size of an image, image size and canvas size when you adjust the size of an image using the image size command and the resample option is turned on you'll be making the entire image bigger or smaller if you turn off the resample option the pixel size of the image will stay the same, but you'll be able to set a new print size using the existing pixel size this is a great way to check what the maximum print size of an image is turn off the resample option and choose the unit you'd like to use if you're printing something that will be viewed from very close a photo or leaflet you can use a resolution of two hundred to three hundred pixels per inch once you enter that you'll see the maximum size at which you can print if you're printing a poster or something else viewed from a little further away you can enter 150 for billboards you can even go as low as 20 ppi here you'll also see that pixelmator pro features an algorithm that can increase the resolution of images using machine learning this is great when you need to make an image bigger and want to avoid any pixelation when you adjust the size of an image using the canvas size command any existing layers in the image will stay the same size you'll simply be adding or removing space around the image by the way you can drag the image in the preview to reposition the existing content on the new canvas if you have an image with unwanted transparent or colored areas around its edges you can also use the trim canvas command to remove those areas when working on images you'll sometimes want to revert to a previous version of your document simply choose browse all versions from the file menu to see all your previous edits pixelmator pro supports the auto save and versions features of mac os, so your edits are automatically saved and reverting edits couldn't be easier when you open a simple image file or create an empty new document a new file in the native pixelmator pro file format is created for you automatically this file format supports all the features of pixelmator pro, including layers and other non destructive data when you open the file menu and choose save you'll be saving the file in the pixelmator profile format this means that when you later open the same file all your layers will be right where you left them? however, if you want to post an image on the web or share it with someone who doesn't have pixelmator pro instead of saving you'll need to export it to do that choose the export command from the file menu and choose the format you need as the general rule the jpeg format is used for photos and png is used for graphics and images with transparency note that when you open this exported image it will no longer have any layers so that was a look at some of the most important features of pixelmator pro and the general workflow of course pixelmator pro has many powerful features we haven't covered, but you can learn more about them on our tutorials page by watching other video tutorials and checking out the user guide which we've linked to below thanks for watching and we hope you have a lot of fun with pixelmator pro。
158带点电流声 04:36查看AI文稿AI文稿
都二零二二年了,还不会免费玩我的世界服务器 happy so 首先打开 hmcl, 没有的可以去百度搜索下载,然后我们点击下载 往下翻,找到幺点八点九版本, 安装 forge、 optime 均选择最新版本即可。 然后点安装即可,我 这里安装了就不再装了。选择离线模式, 填上你喜欢的名字, 然后点登录即可。 返回后启动游戏,静静等他启动加载。 我们现在已经进入游戏,如果你的语言不对,点左下角的小按钮,拉到最下面就可选择中文了。 点单人游戏。 d, 创建一个新的世界, 选择创造模式以及允许作弊, 等待生成世界。 成功进入世界后,打出一片五草之地, 暗意从背包中拿出唱片机和唱片, 先摆出祭坛,放好唱片机, 用铁针祭坛给唱片机覆膜,命名为 hipixo。 接下来站好准备放唱片。 关键的一刻来了,成败 咀嚼在这 hahaha。
2497喜灰剧场 01:23查看AI文稿AI文稿
哈喽,大家好。呃,这回 fb 的更新以后,大家会对这个像素和事件追踪这样一个事情比较迷茫啊,那我们今天详细的来说一下,首先我们去到我们的后台的设置里面,找到我们的域名这一块,我们做域名解析,那 做完域名解析的话,就要去到你购买网站的这个网站里边去做解析啊, dns 解析,呃,如果你不会的话可以再去问我啊。解析完以后我们去验证,验证完以后我们回到我们的账户投放里边找, 找到我们的 pcs 像素,这时候还是一样的,把你的像素写到你的刷皮派后台,写完以后我们回来看你的像素上面很多的那种转化事件,对吧? poses, i two, 卡尔这些事件,他是一个黄色的图标,或者说这个红色的叹号,这 就是因为我们没有做事件的一个啊更新,所以我们现在去到事件管理中心里面找到我们的域名,点击进去,然后我们编辑视 键啊,把我们常用的事件这种 vivo tnt 啊,对吧,艾图克啊啊, pluss 啊等一系列这种啊。呃,事件添加进去,添加完以后,然后我们点击保存,然后我们再回到我们的投放后台里面再看一下,这是 我们这些已经添加过的事件已经出现的没有这些叹叹号的标志了,对吧?当然可能会有,大家说那 perchats 是不是还有一个黄色叹号,对吧?那如果说你的 plass 有这种叹号的话,不用着急,你就 正常的去跑你的转化就就行了啊,当你跑出来一定的转化量以后,他记得叹号也就会也会也会消失掉的,所以说不影响的。
525跨境电商独立站上海瑾耕 03:12
03:12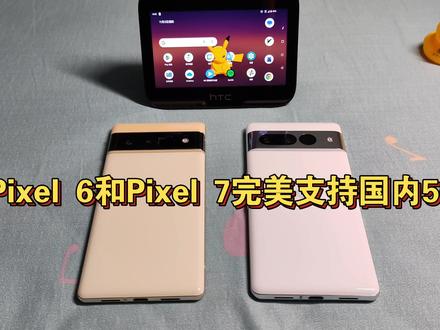 04:24查看AI文稿AI文稿
ok, 开始, 嗯,视频很短,来简单说一下谷歌 px 六以及 pxo 七 pro 的一个网络状况,很多想购买这个这个手机的小伙伴,一定在纠结 他们是否支持中国的移动跟电信以及联通的五 g, 我在这里面可以告诉大家是支持的。 在这里面我使用的是联通卡,两台手机都已经是五 g 的状态,虽然信号比较差。那没办法,我家里住的这个地方信号就是比较差,来测一下速,测速比较费流量,我就只测一台吧,另外一台就不浪费流量了。 大家可以看到,在我家信号比较差的地方,随随便便都能跑到三百兆实锤,确实是 任务 g 哦,卸了再测下去流量就没了。 嗯,我之前也试过,我老婆的移动卡是支持五 g 的,然后也接过同事的联通卡也是支持五 g 的,所以说大家可以放心,三个网络都支持。 至于怎么样让他实现五 g, 其实很简单,你只需要入台你的手机,然后安装那个我体模块,然后再用这个网络信号大师,就这个玩意,网络信号大师用这个东西就可以让他支持国内的五 g。 嗯,在这里面来给大家详细说明一下具体要怎么操作吧。首先就是入到你的手机 入套完之后在 magic 这里的模块,哎,出 bug 了,然后安装一个 pxo 六窝体的一个模块,这个模块去酷安或者 xca 都可以下载。 然后安装好这个模块之后重启手机,你的手机就支持了一个窝体,也支持了一个电信,比如这里窝体这个开关就可以打开了。 然后接下来就是安装一个叫做网络信号大师的东西,这个东西我两台手机都已经装好了网络信号大师, 然后装好这个应用之后,打开六,跟七的操作方法有点区别,但是都大差不差。 嗯,我们又结束后台重新再来一次, 然后两台手机都打开这个网络信号大师啊,点击右上角这三个点,选择这个强制功能, 然后在这里面都选择这个信用卡一,然后都选择这个。哎,不对,左边是选择这个 nrcts, 也就是个三选择这一条 nrcts, 然后右边的话是选择这个 nrmo 的 citics, 这一条也是三。 倒进去之后两个手机的方法也有点不太一样。 pixo 七系列的话是直接选第四项,也就这个 sa 加 nsa, 然后你只需要点一下,你的手机就会变成五 g, 很简单也很方。 然后六系列的话稍微麻烦一点,你需要在这里选择 otp 三,也就是个 edendc 下面的这个 opt 三或者 opt 二,而选择完之后,你的手机并没有直接变成五 g, 你需要重启一下手机啊,重新开机之后手机就变成了五 g。 这里我确实清测过,移动、联通、电信都可以五 g, 而且网速也确确实实能跑到五 g。 行,就这么简单,两三分钟就可以说。至于要怎么入到你的手机,这个东西在哔哩哔哩不方便讨论, 因为之前发过一个入他的教程,被哔哩哔哩给退稿了,说什么什么不合法。嗯,所以大家就可以自己去宽搜一下相关的入他教程, 或者去 xda 自己搜一下入套的教程。好就到这里了,有什么问题可以给我留言。
473隔壁老黑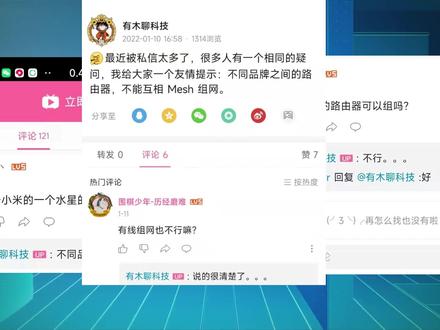 03:57查看AI文稿AI文稿
有关路由器麦氏族网的系列视频收到了大家很多的评论和私信,我这里选几个比较典型的问题,用视频的方式给大家统一回复一下,也是给我系列视频里面没提到的细节做一个补充。 第一点,不同品牌的路由器不能卖十足网。很多小伙伴都在问家里的某某路由器和另一个某某路由器能不能一起使用,答案是不能。 虽然迈式网络在行业中是有技术标准的,但是跟我们路由器厂商所说的迈式组网其实不是一个概念,他并不是一个开放的通用的网络协议。 确切的说,你可以把它理解成一种商业的宣传术语,它并没有那么清晰的界定。比如说华为去年新出 h 六路由器套装,他自己也宣传是卖式组网,但其实从产品形态上来说,这明显就是 a c 加 a p 的方案。其实我们从商业利益的角度考虑,厂商们也不可能自己去互相开放的,难道他们也不想多卖几台路由器吗? 我在打一个比方,假如你在用中国电信的手机卡和五 g 套餐,你说你想用家里附近更好的中国移动的五 g 信号基站,你觉得可能吗?技术上是可能的,但实际是不可能的。 第二点, ap mesh 方式的组网,光猫的千兆口不够用,能不能加交换机啊?这个是完全可以的,交换机最大的作用就是你家网口不够的时候用来拓展网口。但是这里提醒大家一点,其实我不推荐 这么使用,如果你家里的联网设备比较多,网络负荷也比较重,光猫的性能可能是无法承受的,其实更好的办法是把光猫改成调节模式,只用来做光电转换, 然后用新能更好的路由器或者软路由来拨号上网 dhcb 之类的工作。当然你也可以考虑去换一个更好的、性能更强的光猫。其实这个方案最佳实践就是用软路油。 第三个问题, ac 加 ap 会更好吗?其实对于超大户型别墅之类的朋友,我是非常推荐 ac 加 ap 的方案, 因为你用路由器去麦氏族网实在是不太美观,你说你家里放了五六个以上的路由器,拖着个电源又拖着根网线,实在是不好看。对于其他两室、三室或者 四室的朋友,如果你的预算在一千五以上,你也是可以考虑 ac 加 ap 的方案的。但如果你低于一千五的预算,你就老老实实买路由器搞迈式独往吧。目前现在市面上的产品来说,你想用还过得去的 ac 加 ap 的产品,而且还带 wifi 六, 至少也要准备两千块钱。但是如果你用路由器麦氏组网,一千块钱以内就完全可以了。 第四个问题,有线 max 组网内一集中使用单线附用的方式是一定要使用微烂交换机吗? 其实这个答案是不一定的,其实你用普通的交换机也是可以成功的,不过不是很推荐啊。首先是很多路由器使用普通交换机去做卖事,组网是会失败的。其次,你这样组网成功后,家里的网络会变 差,食盐会变高,但如果你使用微烂搅拌机的方式,就不会存在这种问题,网络质量也不可能会变差。 最后一个问题啊,麦始组网和无线桥接是一个东西吗?啊?这个完全不是,其实可以把麦式组网理解成无线桥接的升级版技术,麦始组网在易用性、使用效果、拓展性还有安全性上是全方位超越的。 好了,本期答疑就结束了,大家如果还有其他的问题可以给我评论,欢迎大家给我点赞投币,多多支持我的创作。
831有木聊科技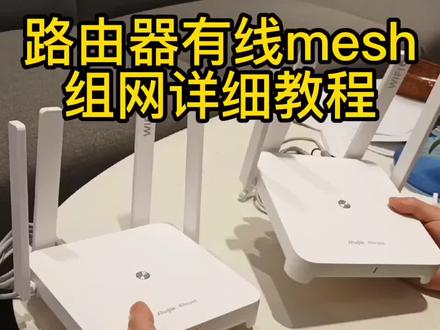 01:30查看AI文稿AI文稿
粉丝说路由器有线麦子组网,不懂怎么做?那今天出一期详细教程,让你家实现前无 wifi 无死角,信号满格无缝漫游。今天就拿两个幺八零零机叉 plow 来做视频。首先我们拿其中一台来做主路由,我们先把从光猫过来的网线插到主路由器的腕口, 再把主路由器的电源插上蓝光闪烁,说明已经接通。重点来了,仔细听,我们找到手机里的设置点,无线极易网,找到路由器放射出来的网络,点击进入,这边会弹出后台网址,点击开始配置,在这里输入电信私服给你的账号和密码,点击下一步,这时候系统有点晕,这边 出来了一个二点四 g 和一个五 g 的一个账号,然后我们把 wifi 密码给设置好,然后点击下方配置,这时候你得再等等,自动跳转到无线局域网设置界面,选择刚才配置的 wifi 账号,输入 密码,这时候可以打开抖音来刷刷短视频,说明网络已经连接好了。我们打开手机上已经下载好的一网络,点击创建新项目,再点击连接 wifi 添加, 点击已准备好,点击下一步,输入管理密码,点击确定,这时候就可以看到项目的状态了。接下来我们来连接子路由器,首先我们把子路由器通电,再从主路由器的烂口拉一根网线到子路由器的腕口,这样就连接好了。我们来看一下手机上的状态, 我们点开主路由器,显示路由模式,我们再点开此路由器,显示有限中记模式,这证明你是成功组网了。以上是路由器有限 mass 组网布线图,赶紧点赞收藏加关注吧!
1.0万肖米(智能家居) 03:47查看AI文稿AI文稿
one of the big trends we see when we search for pixel sorting is this image of a statue by the glitch artist giacomocarmic nola, and will look at his work for this tutorial the effect makes sense because it uses lighting direction from the source image you see here that it creates an illusion of depth in the face of the statue let's jump into after effects where i've already imported a photo that has a strong lighting direction let's apply ae pixel sworder to the image and adjust the threshold and angle we also want to work in the darker areas of the image so let's change the effect setting to shadows now since we want the effect to be visible only on a portion of the image let's move our ae pixel order effect to an adjustment layer on top of the image layer we can then mask our adjustment layer we will draw the contours of the region that sits in the shadows of the lighting direction this is part of the illusion that we're trying to create the next step is to add detail one source image is pretty much even in this region so it doesn't trigger the pixel sorting often enough in the previous version of the plugin i showed you how pixel sorter will react if you add a fractal noise before it a better way to do this is by using an advanced function of the plugin which is to sort the pixels of our image by analyzing another image let's duplicate our source image and add a fractal noise effect to it this layer will be used as a directive four pixel sorter let's move both of our images so we can see what we are doing back in our adjustment layer let's select the duplicated noise layer as the source make sure to change this to effects and masks so the fractal noise is included now we need to adjust the threshold again to get a better result from this point we can go to our noise layer and adjust the fractal noise settings mainly the scale you can see how changing the fractal noise now affects the pixel sorting i also like to drop the opacity a bit to bring back data from the original image when we have a scale that looks nice, we can go back to pixel sorter and adjust the threshold one thing we want to change in this specific case is the sort direction you can see that the pixel sorted lines are going from dark at the bottom to bright up the top to make it more consistent with the source image, we want to reverse this by clicking the invert sorting checkbox let's now do a small tweak to our mask by increasing its feather so the effect comes in more naturally, i personally like to get boulder sorting lines in the final result we have two ways of doing this and they both produce different results the first is to decrease the resolution percentage to make the image kind of an eight, bit or vintage video game look the second method is to increase the block size setting which will keep the full resolution of the source image, but will produce thicker lines finally why don't we animate this nice picture by using the cycle setting i like to animate this one with an expression let's type time time's eighty, which will change its value depending on the playhead position while it's playing we can continue to change the parameters and experiment with different results thanks for watching for more quick tutorials on how to use ae pixel sorter visit pixelsorder info。
20CG资源网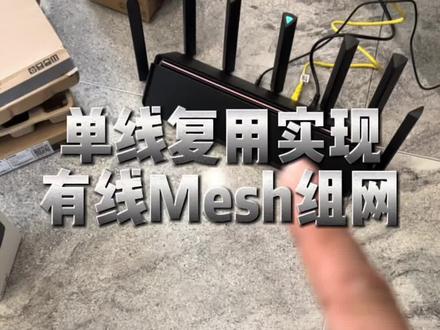 01:06查看AI文稿AI文稿
今天教大家如何快速的实现全屋 wifi, 这跟我一样的小伙伴家里面装修的时候,所有的网线都会遇到了这个弱电箱调通客厅,一条通卧室,然而客厅到卧室却没有布置网线,从而导致了两台路由器没有办法实现有线慢视组网。重点来啦,教大家没有布线也可以实现有线慢视组网! 第一步,先按照这个说明书将这两台机器进行无限慢速度啊!第二步,将光猫和交换机一的烂口 进行连接。第三步,将通往客厅的这根网线和交换机的腕口进行连接,这根四步,将通往卧室的这条网线和交换机一的腕口进行连接。第五步,将客厅的主路由器用两根网线和交换机二进行连接, 用一根网线和客厅的网络接口进行连接之后,大功基本造成了我们拿着指路由器到卧室进行安装,退一步, 将卧室的子路由器和卧室的网口进行连接就大功告成了。这样客厅的主路由器和卧室的子路由器在没有布线的情况下也可以实现了有线 miss 之网 app 这里已经显示了主路油和子路油采用了网线连接的方式,对你有帮助,记得点赞收藏!
7620小张老师V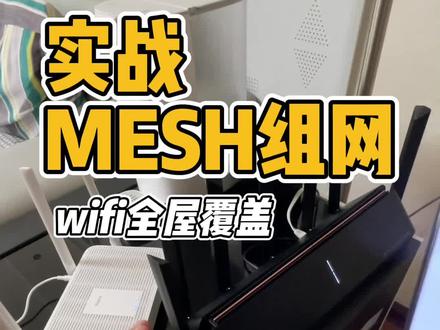 02:42查看AI文稿AI文稿
家里一个路由器覆盖不过来的话呢,就得改用麦式组网方案了啊,就是把这样多个路由器呢连接起来,今天就来实战一下如何来实现麦式组网。先说一下路由器的选择啊,首先多个路由器之间呢,必须是同品牌 华为,这都是华为 tpling 啊,就都是 tpling 啊,小米的都是小米。第二呢是必须支持 max 协议。这种 max 组网呢,其实上市时间不是很长啊,但它一定都会标识在一个非常明显的位置,老路由器大概是不行啊,这是扫地机器人绘制的我们家的一个户型啊, 客厅,卧室、卧室、卧室、厕所、厨房。之前我的路由器啊放在这个中间的位置啊,客厅和这个卧室还有卫生间的信号非常好,但是厨房和这个卧室就非常差,他隔得强太多了。现在呢,我的方案是把路由器放在这个位置, 他呢附带覆盖这个卧室和厨房啊,然后在这里呢卖是一个路由器,这样呢,他会负责连接这三间屋的网络,这样的话呢,也就是 实现了个 wifi 的全屋覆盖。现在这个路由器放在客厅的位置,两个灯亮了,代表的是路路由器的状态和网络的状态都非常好。咱们这个路由器是刚刚启动的,现在的 app 里面呢,找到了 mash 网络连接,当他离得很近的时候呢,就可以来进行搜索。哎,他已经找到了旁边有一个路由器哎,现在两款路由器已经不闪了,已经完成了 mash 连接点完成,现在设备都连接在主路由上啊,我们现在把这款路由器 放置在比较远的位置,他们现在之间呢,用有线连接就是有线麦式,如果不插网线,就是无线麦式,如何用有线麦式连接呢?现在新装修的房子,弱电箱里面基本上都有通往每间屋的 啊。网线,找到通往小卧室的网线,连接到主路由上,再从小卧室的面板上通过网线连接,就实现了有线麦序。我已经确定了这条网线是通往小卧室,需要把它插在 l、 a、 n 口这边,就要插在 wa 灯口,刚才是红灯啊,现在变成蓝灯了,证明有线麦是已经连接好了。这个角标呢,代表有线连接,他们底角的这个数字代表各自路由器的连接设备的数量。 如果是无线连接的话,这不,两个点就不能离得这么远了啊,可以形成这样的方案呢,你可主路由在中间的位置,如果这个点覆盖不到的话,可以在这家卧室呢部署一个无线连接的脉式路由,这样用它来覆盖这个点, 如果这个点呢,如果还是信号不好的话,可以用这边来说,离得太远的话,有可能他们两个之间的连接速率会受影响,因为他们是无线连接嘛,所以说有线连接可能是首选方案。 但是即使是这样,无线也一定是比 wifi 放大器要强很多的。其中有一个没有想套的问题,是啊,当我们家更换了路由器之后啊,我们家一百四十平米的面积啊,一个单路由器就已经比 之前的路由器好太多太多了,所以我觉得大部分人呢,先尝试一下更换一个比较好的路由器。如今的路由器比几年前的真是强劲太多了,如果这视频呢,确实对您有帮助啊,麻烦您帮我点个赞。
3086全能奶爸-大成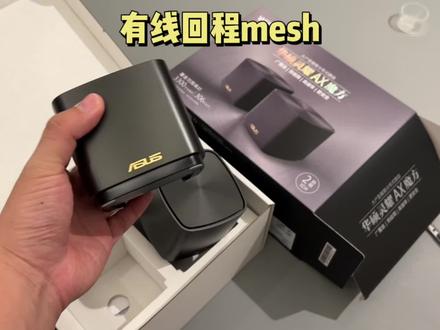 01:00查看AI文稿AI文稿
今天教大家做有线回程的 max 网络,实现全屋五 g, 信号满格,无风漫游不掉线,收藏起来。 一般有两种接法啊,我家是做的第一种,弱电相关猫接主路由的腕孔,然后主路由的链接,各个房间的子路由,就是同个品牌支持卖水的路由器都是可以足的,像我家就是利用了旧的路由器主的卖水同 同一个 wifi, 然后家里几十个智能设备会就近的连接。第二种接法其实更加好,光猫接书房的主路由,然后再接回弱电箱的交换机, 所以放主路由的位置要装这种双口的面板,才能够接回弱电箱的交换机,然后再分发到各个房间的子路油。这种接法呢,主路由不在弱电箱, wifi 信号更加好,我家这种一百一十平两个路由就主。 其实有线回程的 mash 无非就是要用主路由的练口接子路由的腕口,大家根据实际情况布置就可以了,尽量多留网口吧,然后哪里信号不好的话,还可以加一个子路由上去,对吧?不可以。
1.1万镇海


