今天教大家下载的是 bandlab 手机版,有了它就可以多轨编辑与 ai 修音,简单方便,一学就会,安卓苹果都能用, 下面我给大家出一期详细的教程。首先点右下角分享键分享复制链接,复制成功后我们打开这个蓝色小鸟,没有的话就去安装一个,打开后会弹出一个资源包, 如果没有弹出,就在这里搜索雪松资源,然后打开这个文件夹,找到这个软件保存下载安装就可以用了。

粉丝23获赞416
相关视频
 01:29查看AI文稿AI文稿
今天我在这里与各位分享一下如何在 mesh libe 软件中将多个 obj 格式文件合并为一个文件。首先我们打开 mesh libe 软件,打开软件后,点击上方菜单栏中的 import mesh 按钮, 找到相应文件夹后,选择所需要合并的 obj 文件,点击打开导入软件当中。稍等片刻后,当软件展示了完整的模型后,点击软件上方菜单栏中的 filters 按钮,选择 meshlare 下的 flatten visible layers 功能。在弹出的选项框中 勾选第一和第三个选项,如果勾选的第二个选项,则会在合并后删除原本的 obj 格式文件,只保留合并文件,点击 apply 按钮即可进行合并。并可看到右侧项目栏中会生成一个 merchamesh 文件,此文件 就是合并的成果文件。鼠标左键,选择该文件后,点击软件上方工具栏中 export mesh 按钮,在弹出的选框中为文件命名,并选择所需导出格式,点击 say 按钮, 此刻会再次弹出初 cc 令选框,记住选框右侧文理图片名称,点击 ok 按钮。保存成功后,将原本分块的 obj 格式的文件的文件夹中相应的文理图片复制粘贴到新的文件夹即可。
95茗秀数据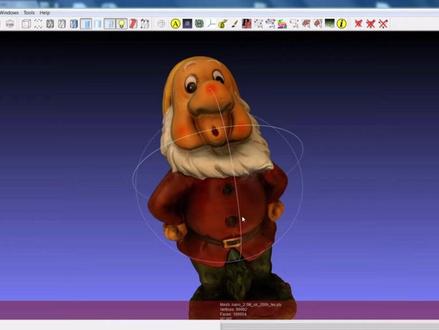 08:49查看AI文稿AI文稿
hi, in this tutorial, we will see an alternative method for the projection of color information from a set of registered images on a 3d model in another tutorial, we already saw the approach based on mass photoblanding where essentially the color information that is assigned to a single portion of the surface is awaited some of the contribution of all the hemages which project on that part you are part of the surface this time we will see an approach which is a kind of opposite one because for each single portion of the surface only one image is chosen which is the the kind of best one the one with best quality for that particular part of the surface this approach is extremely good because at the same time you can get two important result first one is the color projection, but you can also have a parametrisation of the model because each patch of the surface which is assigned to a single image is exactly a patch of the parameterization of the model so this is extremely good when you have models, which are not very detailed in terms of number of triangles for example and it gets very nice result and is able to preserve the color detail because your projecting directly on the texture map so this is a typical example we have several images, which have been up a line to 3d model like you can see here are the images and even the model is not very detailed because it's made of only 2000 faces and the filter is quite easy to be used it's inside the filter texture parametrization plus texturing from registered rosters and there are a few parameters, which are important the first one is a texture size, which is the size of a textures that will be created the bigger texture the more details and the more disk space for this example we can choose 2048 for example and you can also choose the name of the texture which will be created on the disc and another option which i wanted to talk about is the color correct correction this is because if you are dealing with the two patches of the surface, which are a diocent, but they are assigned to different hemages if the two hemages are really different one to the other for example they have different illumination you will be able to see the change in the border between the two patches this color correction option tries to blend the difference between the hemages in the portion of the surface, which are near to this border and it makes the kind of a similar thing to the blending made by the must for the blending approach, but only on the border surface so that you will have a very continuous color so i suggest to keep always this option on there are two other options which are important like use use distance weight and use the image border weight this i suggest to choose always those two because they are two additional criteria to choose which is the best image for each surface portion of the surface in addition to the default one which is the optobiolity of the direction of view and if you are add these two options, you will have a bit more fragmented progmented parameterization of the object, but the quality of the color would be much better so use them so once that you set all these options just launch for launch the filter and you wait this filter you use the gpu quite a lot so use the shaders it's usually quite faster it's already finished and when it's finished essentially you don't see anything about the final result but for example if you choose randa show uv text parame which is a way to visualize the texture of a model you see that a texture has been created and these are the portions of the surfaces which have been mapped in the context of the texture i can also open the texture that has been created so this is an image which has been saved already in on the disc and it has been also assigned to the model so the model is already a model with color and texture parametrization, but you need to save it to to to be able to warp in it in a second time so i saved the model and you see that automatically you have the texture coordinates and the name of the texture which is saved so if i close the project and reopen the model that i already saved you see here that i have a texture model okay the texture of this model is really very good you can see that the quality of the detail is really impressive because it's essentially the same detail of the original hemages so this is very good and this is an advantage with respect to the mass photo blending where the risk is to lose the defined details due to the blending approach, but so this is an extremely good field that you can get that extremely nice the results, but there are two things that i have to say the first one is that this metal is perfect when you have quite small projects so when you have like not more than nine ten images and the model which is not very resoluted and that works really well and you get incredibly good results in the case when you have more than 10 images it could be a bit risky because the more images you have the more fragmented the parameterization will be, and we will you can get not so good results and moreover another risk with this method is that if the images are very definite, one respect to the other then the color correction option could be not able to mask the differences between the patches of the texture and so if some images are very dark in some portions or very light with respect to the others you can see quite strongly visible artifacts, which are not as visible, which are not so visible when you use the must for the blending approach, so you have to choose which is the best approach for you and my suggestion is that when you have a set of humour just to be projected on the model you should try all the filters that you have in meshell and then choose the one which gives the best result one final thing about this filter is that this filter like some of the new filters of the last release is making quite massive use of the gpu and of shaders so it will be very fast but if you don't have a gpu which is very powerful it could be that you can you're not able to get to the best result and you can get the wrong result without any warning by mashla, so, in this case for example you could get texture where you have portion of texture? which is black and this is usually because you didn't have any enough graphic memory to complete the operation one way to overcome this in addition to the one of moving to a more powerful machine is to reduce the resolution of the original he matches or of the the model then maybe you will be able to complete the filter success for the so please feel free to try this filter is extremely powerful very small object and it's probably the best solution for most of the cases you have to deal with and thanks a lot。
10_WPXing 00:45查看AI文稿AI文稿
把路由器万口插在光猫网口上面,手机就可以上网。找一台不同品牌的路由器,万口插在第一台路由器的烂口上,两台路由器都可以上网,但是信号不一致,无法自动切换,走动过程中会断网。 找一台同品牌路由器,万口插在第一台路由器的烂口上,两台路由器都可以上网,而且信号一致,不需要手动切换。这个是有线串联麦齿的网,当你的房间没有网线,第二台路由器只接电源,两台路由器组网,这个是无线麦齿, 仅适合应急使用, wifi 信号不稳定, wifi 强度也大打折扣。两台同品牌路由器万口分别接在光猫的网口上面,并组网,这个是并连麦纸,信号不稳定,操作复杂,还并不是所有的路由器都支持。
8044小志全屋智能(桂林) 00:29查看AI文稿AI文稿
家里只有一根网线,能不能组网?当然可以。首先我们要有两台同品牌且支持 max 的 路由器,我手上的是华为的 b 一 三六零零以及华为 a 叉二 pro, 这两台都支持 max 组网。我们选择 b 一 三六零零作为主路由连接网线,将 a 叉二 pro 作为副路由,放在信号覆盖差的房间,插上电源,按下两台路由器的一键组网。看到两台路由器同时闪烁, 打开智慧生活 app, 添加路由器进行组网,等待片刻就组网成功了。学会的话,你也赶快去试试吧!关注我,了解更多全屋 wifi 覆盖小知识哦!
105友猫数码-全屋WIFI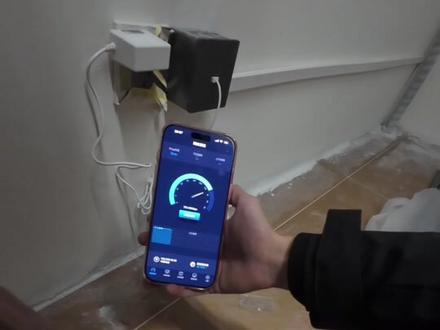 05:14查看AI文稿AI文稿
今天直接上硬菜实操,手把手搭建有线 mesh 组网,全屋走到哪信号都满格,一个 wifi 名,自动连接最强信号,这种 wifi 你 想不想要?我要我要我要!今天来援冷望品,冷望品 给大家看看没整理前的弱电箱,啥线都有,在里面设备是粉丝提供的,一个玄天墙面路由,三个墙面路由加一个主维 c 二点五 g 网卡的,今天装这些 我看了一下,这个光猫不错,带二点五 g 接口,再把这个庞然大物放进去弱电箱里面, 我现在下下面下面,我靠,你就装在这里了,对对对对,直接丢里面了啊对,放里面就行了,刚开始的话他是一个那个盖子推推拉的一个盖子,行客厅柜子这里放一个负责整个客厅的 wifi, 我 还是第一次装这个。 把客厅的网络面板打好模块,接到寻线仪,向,去弱电箱找到这条网线,打 打客厅主卧,在镜头找到目标网线,打好六类水晶头, 网线测好就贴好标签,方便后期维护。然后再来房间安装墙面路由器,先把网络面板拆下来,都没接,给大家展示金刚手, 再把线这样卡进去,然后这样子压, 找个东西 那往前一压,这个 压紧了就插上寻线引去到弱电箱,找到这条网线。对, 有那个小的, 找到目标网线,打好水晶头, 一二三四五六七八。刚刚那是什么房间呢? 先把路由器接好,一起调试。 阁楼这里也需要 wifi, 把网络面板给接好,先简单接好,一会和业主定位置,再贴到墙面上。 客厅顶楼主卧,这个也是二点五 g 网速,对,看这个袋子,客厅路由器,这个 主卧装一台墙面路由,现在怎么走 wifi 都不会掉线了,走到哪个房间就自动切换信号,不会出现最讨厌的断连现象。阁楼一台墙面路由 七百多,七百多,让你看看外面客厅也只能跑到七百多,主卧也是七百多,我我直接把这个路由器放到这里来, 就是直接直接从这个设备出来吗?不,经过你的这个网线测,它只能跑七百多,这里直接就排除墙里面的网线问题了, 这条线我也给换成六类线了,换万兆的,然后我就这一条,我把主卧的路由器也拆过来了,路由器用的那个六类的线能跑一万兆的这么高,但是也是只能跑七百多, 我的手机跑两千兆都没有问题,跟我手机应该没啥关系,运营上的网速用电脑测确实是达标的, 一经过这个中心的主路由就跑七百七十就到顶了,主路由后台万口也是二点五 g 速率,这到底是啥问题呀?问客服也没有效果,评论区有没有大神讲解一下?
5821海南弱电小陈💫 08:26
08:26 00:51查看AI文稿AI文稿
今天一分钟教会你全网爆火的灭视主网先讲并连有线灭视。光猫上接两根网线,分别插到主路由盒子路由的腕口,简单一插就能组网。再看串联有线灭视,先用光猫接主路由腕口,正常设置好上网,再拿一台同品牌路由器, 通过路由器背面标注的管理地址,登录后台,把 dhcp 关掉,避免 ip 冲突断网。再把它的腕口接到主路由烂口, 这就变成主路由的子路由了。这时候把网线拔掉,等一会儿自动切换成无线灭视。不管有线还是无线,全屋都是同一个 wifi 名称,手机摄像头来回切换都不会掉线,用到实际户型里更简单。 光猫在弱电箱,主路由放客厅,子路由放卧室。从主路由烂口拉一根网线到弱电箱,用对接头直通卧室,子路由全屋 wifi 直接拉满,漫游丝滑不卡顿。
9646鸿升光通讯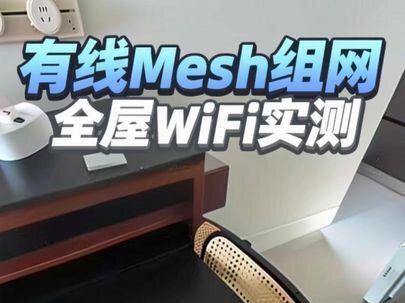 04:00查看AI文稿AI文稿
天窗有线 max 组问天七二零零 pro 这个单出弱电桥上一个千兆转换器,然后 a 叉三千 pro 当主路。由有线 max 先把弱电桥的水龙头给打开吧,五条客厅,两条阳台,一条主卧双卧, 把线全部捋直,然后按照 t 五六八 d 的 线去排好, 然后给剪平,就用压线钳把水晶头压进去,按照这个方法打好全部的网线。 原来这个也帮你打了啊,反正我帮你打了,到时候就不用来一趟了。打好所有房间的网络模块,模块按照上面标注的闭类线序,打好了就缠几圈电公交布,这样子就不容易短路。 这三个都是同款的,不是我故意的, ok, ok, 我 快打了,然后有一条线, 他做有线麦曲的话,要有两条线在这里,一条是光猫过来,然后另一条是从这里回去接到弱电枪的交换机打完这种免压的,打完一定要多压几遍,避免接触不了,再找个胶布过来贴一下就好了。 用巡线一对一下网线,看看是否八星全通。 一二三四五六七八这个要特别的主线, 然后再把客厅的回程线对上,一二三四五六七八, ok, 发生震动,回程线是要截到转换器以上的阳台网口的。也对。好了,主卧网口 最后一个次卧好,我们先连接起来,五条线都做好标签了。客厅回台线,主卧次卧阳台客厅主线,主线解扭器的这个路由器真的很大, ok, 这里一共接两条线,两小的黑色线是回到充电箱的,然后小的线再充一个主路由就行。 这边是客厅的主线,光猫到客厅的主线,然后这里有一条回程线在这里回程线,然后其他的房间都接到上面一个杆子,就正常的正确的有线麦克风全部切好去调试,这里有个开启 i b u 六,这个要关掉。 ok, 这个路由器发现了主路由是 wifi 七二零零 pro 加,然后副路由是 a 叉三千 pro 加,这边这里显示是有线连接的,检 测一下网速,看一下 路由器在这里,这里也是五 g 的 扁担,这延迟有四, 那我们走到房间看房间,还是会在这里把门关了,他这个菜是不会装的,走到房间他会自动提到房间的,一直都是满的, 房间能跑到九百八, 九百七十九,房间没有灯,这样一套有线麦式组网就成功了。
1514海南弱电小陈💫 00:50查看AI文稿AI文稿
先将主路由浪口与子路由浪口连接,打开 wifi, 找到副路由器发出的 wifi, 打开浏览器,输入 t p i o g i n, 点 c n 登录管理地址,创建管理员密码,点击路由,设置 dhcp 服务器设置, 关闭 dhcp 服务器后保存,点击烂口设置,将自动改为手动, ip 地址改为和主路由同一网段幺九二点幺六八点一点二,点击保存。保存后页面跳转,点击继续访问,输入管理员密码,进入路由器设置界面。 进入路由器设置界面后,可将 wifi 名称和密码修改成和主路由同样的名称和密码。
 00:19查看AI文稿AI文稿
如果你要做麦速网,除非你是电视机,下面就是弱电箱,否则我强烈建议你主路由到弱电箱的这个管路要穿两根网线来做一个回程,后面组网我们再讲这根线的用处,我家这根就忘了留,到时候重新抽出来再塞进去两根。
3415阿瑞阿磊记(硬装中)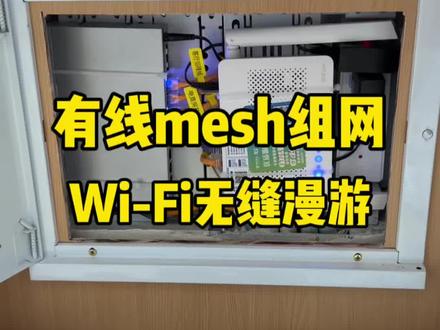 05:03查看AI文稿AI文稿
今天来搞个有线麦式组网保姆级教程,没人的钱是这样的 哦,塞进去了,在这里等一下收起来,不然难看也用不到,用不到就收起来。先把弱电箱这边的水晶头全部给它打好,被屏蔽的,被屏蔽的他才对,用屏蔽线把速度还下降。把房间的面板拆出来, 然后把各个房间的网络模块给打好。网络模块我喜欢用手打的问题小。 主卧电竞房右, 电竞房左。 ok, 两个这边三根网线打好,这两个直接接路由器,一根做回程线,一根做回程线,然后这个接单头尾完美。 ok, 找一下主卧的网线 要趴一下就是你的一二三四五六七八九趴一下就是你的一二三四五六七八六 一二三四五六七八。电 竞 防守打好仗先放这,我有个铁, 这根线刚刚已经插在这里上。也对,一二三四五六七 八九十十一十二。试一下。没事,要是不行的话你再加吧。哎,对对对, 把这个我这个 这里有这么轻随便挂, 因为它的面板不在里面。 ok, 调试一下怎么样? 三个房间都测一下。 对啊,它自己切换过来的呀,你要是手机支持快的话它切换很快,它会,它会卡一下就晃一下,它不会卡死,立马它就切换过来了。 一千二十六幺八零幺八八,然后再去另一个房间,然后把它六千再一直抬上 去 二十三, 然后再走个 qq, 一千兆家庭宽带,三个路由器都可以跑满一千两百兆。 这个可以了吧?可以了,我们走了,哎,没事哎没事,我走了。
676海南弱电小陈💫


