全浸教程-竹内慎司2013最新版
i can see my lovely。
粉丝2659获赞5.1万
相关视频
 13:15查看AI文稿AI文稿
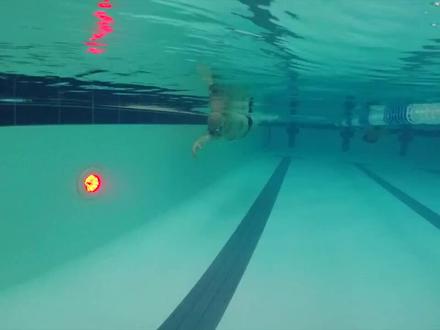
now in this next stage, we're going to get into the full arm action for learning how to coordinate and move through the different phases of the arm action is going to be our focus today, hi, i hope you've been enjoying your practices learning to turn your body to the side and back to the center without moving your head we're now ready to move on to the next stage and the next stage is learning the full arm action both under the water and over the water and we've got three separate phases first phase we call ready the second phase we call steady and the third phase believe it or not is called go where we find the path of maximum power and minimal resistance when you're first learning this you need to break it down into separate movements so it's a little bit like a child learning to write for the first time we start with capital letters and everything is sharp and held and very still then we learn to do curvy movements it's lowercase it's a bit more rounded and then we move into the third stage which is joined up writing so one movement will flow into the next and like in the previous lesson, the idea is to maintain the relationship between the head neck and back, so we're not turning the head later in stage three, where we'll be learning to breathe the head will turn but initially we need to learn how to turn the body without turning the head? so what you learn in stage one is going to be reinforced in this next age in shore method front crawled in order to achieve, maximum balance and stability we start with two arms forward which we called the ready phase before trying the ready phase in the pool, i always recommend that you try it standing up so this is how we start the action we start with a hand by your side or the eyes at eye level we're evenly distributed on both feet we take a step forward with our lead leg, which is in this case it's going to be my left and we extend the front hand making sure that it's flat and we make sure that the back foot and the front foot are both facing forward ideally you take a small step not a big one it's a small step avoid taking big steps and extend the arm this is in line with the shoulder and the second arm is turned to the side i can feel the muscles of my side of my body switched on and i can feel my weight right in the center just like bend at the front knee and my eyes are at eye level ready it's really important that the left arm is to the left of my spine and the right is to the right always avoid crossing your arms over eyes looking forward knot down weight right in the middle now the other side weight in the middle eyes looking forward ready and again ready step forward as if you're taking a pigeon step so it's a very small step it's really important that your back foot also faces forward you're not going to turn it out step forward that's perfect now take the lead hand bring it up make sure it's in line with the shoulder and the second on bring it up yeah now the position is the left is to the left the right is to the right so this hand needs to be in line with this shoulder and this hand needs to be in line with this shoulder if you're in front of the elbow this is the right position to enter the water if you're behind the elbow you've got too much rotation the second phase we call steady so what we're doing in the second phase, we're moving from having both arms in the water to balance us to using the front arm to stabilize to bring the shoulders into equilibrium ready and i move to steady now the reason i'm going moving up onto my tip toes is to represent if i was to press down on the water that would create a little left so it's if i'm going to go over the top of something so i'm going to go ready steady ready my weight is on both feet on steady my weight moves forward to the front foot and i'm maintaining the direction of the head neck and back, so with no turning ready steady it's not pulling ready steady ready ready ready learn the first two phases ready to study now we're going to move to the go phase, so the go phase is the propulsive movement, so we go now in the go faith the directional hand which is this hand is leading the movement the propulsive arm is going to propel you steady and go feels to me when i'm doing this movement in the right sequence it's like i'm catapulting myself for it so i'm going ready steady and if you're right handed it's often easier to lead with the right hand if you're left handed you might find it easier to lead with the left hand, but it's really important that your back is open, but the left is to the left the right is to the right and when you rotate here it's very easy to leave your balance so if you were standing in front of a mirror, you would see both arms in view if the fan comes too far back you'll lose your balance so left to the left right to the right those of you that's from a lot of front crawl, it'll be tempting for you to shorten the movement to do what we call the chicken this is a slightly blocked so the objective is to move from ready to steady to go in one flowing action to my right hand and my left hand arrive at the final destination at the same moment now just to give you an understanding of the movement, i'm going to show you without the arms, so you can see the way movement from the legs i have my weight in the middle with a slight bend on my front leg feet facing forward steady i move up onto tiptoes and go i turn to the side while maintaining the relationship to my head neck and back ready steady go ready steady go ready steady go ready steady go ready steady go ready steady go ready steady go ready steady go ready steady turn center tip toes spin center tip toes spin move up turn out center move up turn out ready steady go ready steady go working with a partner is a lot of fun and it really helps you get a sense of the rhythm of the movement, the differentiation between the propulsive and the non propulsive phases and the body ready steady go drop hands turn the head okay so now we're moving into the joined up phase the one stroke merge it into the next it's like joined up writing so i'm going to do three phases and join one stroke to the next do this for the camera ready steady as one go is two and then ready steady as one so it's like we're moving in we're moving out okay, so step forward ready steady good go! ready steady go ready steady! what's each other the arms are moving away from each other moving towards each other the hands are moving away towards away here there's an awareness of your front and then that's your back and now you're filling your front and now you're feeling your back now you're feeling your front back front back front chest open your back for your chest open your back for your chest open your back chest ready steady fly ready steady fly ready steady yeah yes! the eyes forward wait right in the middle, we this is ready steady go we step back center, side center, side center, side center, side center, side center, side hands towards hands away hands towards hands away hands towards hands away breathe out and shoo shoo repetition is another skill so the more that you can do this movement or the series of movements the more ingrained it will become and the easier it will be to apply when you get back into the water。
334syl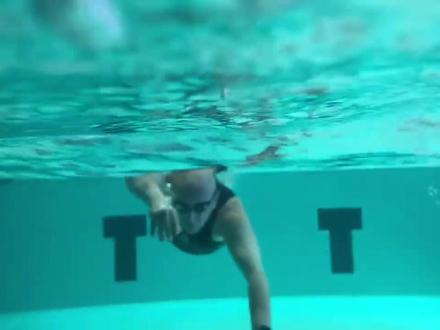 13:41查看AI文稿AI文稿
so the moment you've been waiting for has arrived and are ready to integrate the breathing follow the steps and enjoy the journey, so a lot of people have challenged fun breathing difficult in front crawl they feel that in breaststroke they can swim as much of their light they never get out of breath and they wonder why is it in front crawl, it seems to be much more so much more effort now in my opinion, it's for a number of reasons in front cruel, the mouth is much closer to the surface of the water than it is in breaststroke so if you mistime the breathing you're much more likely to get into difficulty the second reason that people get out of breath often in front of you is they breathe into too much they overestimate the amount of air that they need in so when they turn to breathe they suck the air into the muffle the nose and it's much better if you can just allow the air to come in and that's what people tend to do more like in breaststroke, so breathing too actively is the second problem the third problem is that people tend to forget the right body positions if we rotate to our side as we learnt in the early principles about why we rotate and have much more room to breathe if we don't rotate enough there's not enough space to breathe so by turning our body to the side we can allow the weight of that to remain in the water and there's more time and more space to breathe the moment you don't wrote it enough you'll tend to lift your head up a little bit too much, but you'll push your heads down and make it more difficult following the stages of stage one which is learning on the rotation stage two which was coordinating the arm action the more that you can work on these two preliminary stages the easier that breathing will be, but if you don't have enough rotation and you don't have the right timing of the arms the breathing is always going to be a little bit too difficult so going back to basics it's a king and the beauty of practicing online is you're never gonna get a nose on mouth full of water so it's gonna be easy to read you're never gonna follow the water you can keep practicing and ideally we breathe on both sides if you only breathe on one side it's like doing yogurt and only turning the way that you like to turn objective and breathing in the front crawl is to breathe with the weight of the head still in the water with the body rotated and with the arms open have a sense of pressing the head forward and down rather than lifting it up, so the key to breathing well is to have the right body orientation and have plenty of space to breathe and to get this feeling of actually leaning into the water rather than carrying ourselves well, now the way that we're going to learn this third lesson on the breathing is going to break it down into separate parts the first part we're going to be dealing with a transition between putting the face into the to bring in the face out of the water i'm going to learn to do that in a flowing way once, we've established that we'll move into how to bring the face back into the water so how to make the transition between the air and the water for how to come in and then how to bring the body back without losing the directional arm using the directional arm to support and balance you here we're going to break down the movement pattern into a various steps in order to breathe in an effectless way i'm going to demonstrate a step start with both hands forward i step forward with my directional hand which is going to be my left i look over hold the water in the steady phase and i've turned between the arm coming out of the water and the arm coming up for the head is turned the air is coming in as the arm is coming up left my window to breathe if i bend the arm earlier, i have less space less time to breathe if i take my arm back turn it over this is my window to breathe in so what i'm basically doing is i'm leaning on my direction on my arm is going forward into the handshake position i turn to breathe in and a key drive the head forward open to breathe in when it works well, it really feels that the movement is breathing you the more you lengthen and widen the back the more space and time you'll feel that you've got to breathe and remember never take a breath just allow the air to come in this hand second movement the head third movement the answer of bready yes and again here turn the hand and look away yes and the more that this directional hand lengthen the more space that you're going to have to breathe open across your back the movement breathes you the more you open across your back and the chest the easier there comes in if you hand it this way, it's harder to breathe if you have this way, it's easier to breathe you feel it many people find adjusting the positioning of the head really helpful in it being able to breathe more effectively in front crawl by glancing forward on the rotation before you rotate to breath it helps you turn without the need to lift when we breathe on the third stroke, it's really important to get the idea of the eye directions so in the first stroke, i'm looking forward from standing the second stroke, i'm bringing my eye level a little bit up closer to the surface of the water and the third move i'm turning the head with the body, i'm going to demonstrate without the arms first of rotation one looking forward and slightly down rotation two looking forward and slightly up rotation three first rotation second rotation third rotation yes, good forward a little bit up turn to breathe forward little bit up turn to breathe rotate to the right rotate to the left turn over turn forward and breathe the next stage is having breathed in with an open lungs and an open back we're going to learn how to move back into the water in a controlled way there's a simple way of doing it which requires you to control the movement from the directional art when we're moving back we've got the same sequence the first thing that needs to turn is the front hand the second thing that needs to turn is the head, the third thing that needs to turn if your arm comes over so what you don't want to do is drop that arm which is a common mistake and i'm going to incorporate the turning out and the turning in so rotation one rotation, two rotation three and back so having turn to breathe i turn the hand which and then i turn my head and then i bring the other hand back going to turn to breathe on my left side and i'm going to incorporate the turning out and the turning in rotation, one rotation, two rotation three and back so most important thing is that we never take a breath we allow the air to come in second thing get the sequence right, so the right hand the directional hand that's always moving to a handshake the next point the head needs to turn into the water not away from the water this is if you're pressing the head into the water you're pushing the water away from your mouth the third thing open up to create the space to breathe rather than contracting and then once you hat the earth come in instead of rushing the movement turn the directional hand in change the position of the body put the head in the water and then bring your arm over if you don't drop the lead on one, two, three, one, two, one, two, three, one, two slow pace one, two breathe one to breathe one to stop one two breathe one to breathe one you're breathing out on the first out on the second in on the third, one to breathe one to breathe easy easy breathe easy, easy breathe easy, easy breathe easy, easy breathe one, two, three, one, two, three, one, two, three, easy, please easy easy, please easy easy, please one, two left, one, two, right, one, two, left, one, two, right, one, two, left, one, two, right you got it let's do it together now okay one to right again one to left one to right perfect one, two, left, one, two, right, one, two, left, one, two, right, one, two, left, one, two, right yeah so if you've had fun over the last few days exploring the various lessons covering the front crawl, i'm sure like me you're really keen to take to the open water。
186syl 01:13
01:13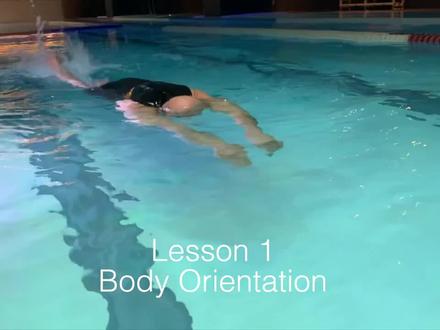 07:51查看AI文稿AI文稿
and we're going to start with a front crawl front crawl to the stroke that's is really beneficial it's a front wheel drive stroke which means that most of the power is going to be generated by the upper body and it's a rotational movement so the body is moving from the center to the side back to the center and over to the other side in franco, we're going to learn in three stages first, we'll learn the body alignment then we'll learn the timing and the integration of the arm action and how to perform the arm action in an open way and then finally in stage free, we're going to look at the breathing and how to integrate the movement of the arms and the rest of the body with the breath, so that we breathe in an easy open way ensure method front crawl we learn under arm recovery movement before over arm, under arm is much easier to coordinate than over arm, so that we can get this body shape and the timing of the stroke correct and then later we're going to learn to bring the arms over the top, so the first movement is called the fencer and the idea of the fencer is to achieve hydrodynamic position in the water and learn how to balance if i step forward with my right foot, i turn my left foot out and extend the arm my right hand is called my directional hand and my directional hand is giving me the balance drop extend and drop extend and drop step forward with my right foot and my left foot out focusing on the direction of travel extend my arm release fingers below wrist, wrists below elbow, elbow below shoulder forward forward forward forward extend let go extend let go if we're going to learn how the directional hand influences the positioning of the rest of the body so i'm going to move from the side toward the center and using the directional hand to change my body step, side turn together handshake position change of the directional hand change my back foot come together turn to the side rotate to the center come together let you go i receive you i turn you i let you go i receive my turn i let you go turn out turn in focus on your eyes eyes are eye level step forward with the right turn in together now we change left turn in together out turn in together so sometimes doing movements standing up feel a little bit strange at the beginning because we do swimming is laying down so i want to show you horizontally how these movements would translate into a kind of swimming mode first thing i'm going to show you is how the directional arm influences the position and the balance of the rest of the body when the hand turns into a handshake the hip is pushed up and when it turns flat the body rolls down being able to coordinate the rotation of the body with the leg action can seem a little bit challenging at the beginning so i'm going to show just by stepping leaving my hands by my side, so that you can get the idea of the body shape so the first thing is i'm going to step forward with my right foot turn my left foot out when my eyes centered i turn in with and then i bring my feet together opposite further turn in together one two three stop three one, two, three, one, two three next movement i'm going to show you is rotating from the scent to the side with an under arm recovery the key idea here is to rotate the body, but to maintain the direction of the head neck and back directional hand initiate the movement, so my right hand is my directional hand my left hand is my propulsive hand my directional hand always goes before the propulsive hand i turn the key to open the door rotate and then as if i'm bowling i slide back through the water turn out turn in together demonstrate that turning the key opening the door exercise laying on my tummy, so i'm going to move the center to the side and the side back to the center maintaining the orientation of my head neck and back and filling the length and filling the release having learned to rotate and maintain the direction of the head neck and back we're now ready to move on to the second stage。
395syl 06:59查看AI文稿AI文稿
if you want a sun, but you can't go to the park i'll teach you how to improve your freezer at home in free style we combine two pushers and two movements so practice and memorize them at home and apply them in the pool first the glide position if you want to see me easily you'll keep this version for longer extend your arm to the side wrote your hand and body together by forty five degrees while you try not to move your head rotate only your hand by thirty degrees raise your hand by sixty degrees put the other hand on your side shift your weight forward try the other side forty five thirty sixty then shift your weight forward that's the glide position next the switch position you will create proportion by the movement beginning with this position first get into the glide position open your armpit and bring your elbow above the air hole then put your fingers in the line where the other air is try the other side black position open your armbit then align your fingers with the other album without the switch position next the recovery movement this is how you move your hand forward above the water surface getting to the grass position form the switch position go back to the glide position move your elbow as short as possible then form the switch position to clear the water service open your armbit and move your album out wide dressed outside the glad position then switch position opening up it and move your available for a ride about the recovery movement next the switch movement you will move both hands and rotate your body to create proportion we will practice it step by step first body rotation get into the switch position drop both hands quickly rotate your body second the incision hand and bloody rotation get into the switch position drop the extended hand extend the insertion hand upward and rotate your body third the extended hand and body rotation get into the switch position drop the insertion hand now drop your hand while rotate in your body finally the combination get into the switch position move both hands and rotate your body together drop the other side that s the switch movement practice these postures and movements and memorize them then use them when you go to the pool happy swimming。
663syl 28:21
28:21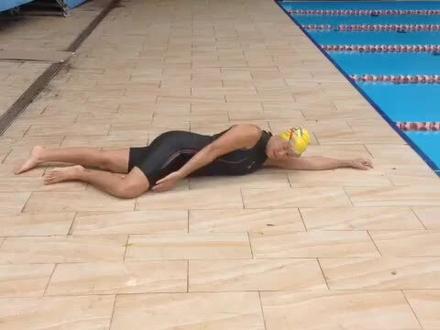 05:12查看AI文稿AI文稿
hey, everyone, this is claire from swim lab adult swim coaching in sydney, i'm gonna take you through another elector size that we do with our swimmers to help them understand recovery mechanics freestyle recovery medic mechanics which can often be the game changer and a lot of people strokes how you bring your arm over the water can be very disruptive to your balance it can cause a lot of shoulder impingement issues and pain even over repetitive use and what we do here on on on the ground we get some is lined down on the floor which is great because it's a solid surface um it's often challenging to um work movement pattens out in water because it's a it's it's very mobile um and it causes a lot of imbalance naturally so coming onto this solid ground we get this in a line down and we use this leg here just as a little sort of a support and pivot point to get the body on a similar angle that we would want it in the water okay we don't want a flat body and what i'm showing this to me here is that we don't want them to pull beyond the hip past the hip so that my upper arm, my elbow goes behind my body thereby taking the arm behind the scapula plane and having causing impingement issues in the shoulder, so we don't want to pull past the hip either with a straight arm or what we see is a kind of a little a little shark fin where the elbow has popped up and the the the hand brushes past the hip flexor so by stopping the arm underneath the water almost sort of just underneath on the quad there, the inner thigh we immediately start the process of bringing the arm out and forwards out and forwards there's a little elbow pop i take my elbow purposefully away from my body it's one smooth movement when you're swimming, but i'm just emphasizing that slight wide elbow pop before i bring my fingertips forward on the surface of the water so that subtle finger trail um allows me to know i've got a reference point there it allows me to know that i've got my fingers low and my elbow high i don't need when we talk about high elbow, we don't need to be hitching the elbow up high again thereby sort of impinging the shoulder with the angle of the body that we've got and the ball and socket joint in the shoulder needs to stay in the same plane look at the back of my hand always faces in that direction there's no internal rotation i'm not swinging my arm in it's drawing a straight line until i get to my entry spot there and then i get to capture the inertia of that arm, i get to capture the the gravity drop as i swap my hand into the water nice and smooth no drag, no splash, no turbulence to it sort of target point just under the surface of the water but helps balance so taking you through that one more time we don't want to pull past the hip we want to start our recovery and the only real movement we want forwards is there the arm recovery is forwards there's no up there's no back there's no movement away from the surface of the water only sort of over it and forwards i'm going to change to a sideway front on vision view here and again, i'm deliberately kind of showing that slight elbow pop, i don't want if you look at the rest of the blog i don't want that elbow to come behind my scapula plane it could cause over rotation i could then get my body over rotated and very unstable so we want some natural width we take the other wide and then i'm gonna trail my fingers along the floor, which is a reference point for the water my elbow is high my hand is low the back of my hand is facing same direction the whole time i haven't internally rotated my my arm, so that my palm you see a lot of swim as the palm faces outwards we don't want that again that causes tightness and impingement issues in that shoulder region and the shoulder girdle here okay apple wide trail fingers to that lovely high elbow position and ready for the entry hope you enjoyed that try it out in the pool this week。
121syl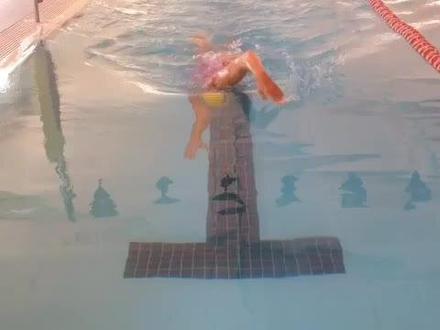 01:26查看AI文稿AI文稿
okay from this angle here we can see that patient skate shape with the lead arm, we can see the angle of the hips and the shoulders still there as that arm comes through the hip and the body has not started to drop there's our entry spot and we've still got that patient hand capitalizing on that streamlined position coming through the other side again, we see the independent movement there's that nice triangle which will work on next week, but we've got that patient arm fingertips below the torso you can see the angle, the angle of the body and the legs held until that last moment and that's what we call that the gravity drop and the effortless power that we can have now as this arm drops in patient arm is still there now just beginning to get traction on the water and pull back as the hips begin to move so the stroke is swam really through this tool, so this side is about to go in and down this side in reaction is beginning to come up and the hip is almost moving before the hand comes up。
369syl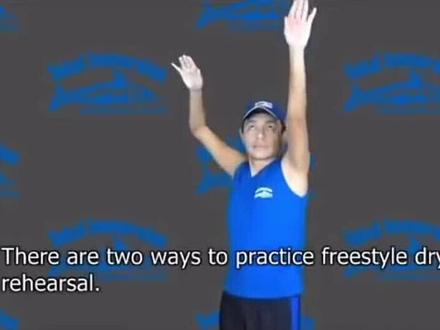 01:10查看AI文稿AI文稿
there are two ways to practice freestyle dry land rehearsal decide where the water surface is and practice the correct posture and movements in standing rehearsal practice in a standing position the water surface is parallel to the wall this is ideal for breathing practice since the axis of your body is completely straight this is also used to practice your arm movements coordinated with your hips in bent over a rehearsal practice in a position bent over at the waist the water surface is parallel to the floor this is ideal for recovery or switch practice since your body posture is similar to when you swim in the water if your body is not bent forward enough the range of motion of your shoulder will change and you cannot move your arms correctly make your back as parallel to the floor as possible。
171海明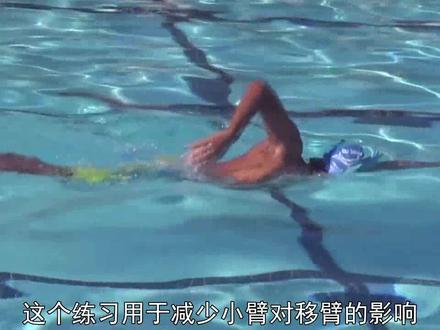 01:35查看AI文稿AI文稿
in recovery control your motion with your elbow nod your hand this technique helps you to understand the motion of your elbow by eliminating the influence of your forearm bend over and extend your arm in the water and touch your shoulder with the other hand open your armpit and move your elbow along the scapular plane move your elbow four inches in front of your body while preventing your back from arching swing your arm while paying attention to your elbow position make sure you move your arm in front of the scapular plane by paying attention to your elbow position rehearse the swinging motion on both sides and after you can control your motion with your elbows swim free style make sure your forearms are relaxed by moving your elbows。
328syl


