艾默生定位怎么做
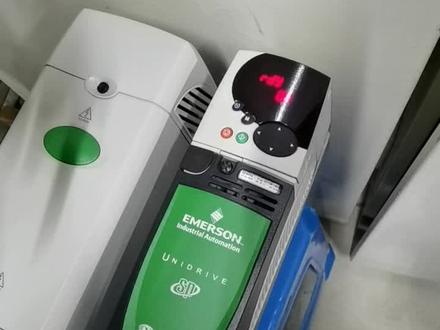
好,今天给大家说一下 dvc 六二零零黑色这款用手套器的调试方法。 首先我们看一下接线,如果你不连手槽器的话,你可以有一键整定,这有个 cal, 这个键按五秒,他就可以一个短时间的自调验。 然后再说一下这几根线,这个 lock, 这指令线,这有个 out, 再接反馈线, 这两根套壳,这就是接我们这个四七五这个手套器这两根线。下面我说一下手套器的自交宴,首先把四七五打开,在哈特 模式下看 enter 键, 然后这一步是自动巡设备,找到设备的序列号,然后按地接, 这是一个报警,对,我们 打到第二个 kill, 打到这一步,如果我们想交宴呢?我们直接可以在第四步里交宴,但是交宴之前啊,我们先看一下,是吧设备这个在是不是在就地模式更改一下设 设备的模式,我们这个就可以不改我们本身在 out 的设备,所以我说他本身不在这个模式,你看刚改一下模式, 刚改一下就是从远方改到就地,我们这个已经是就地了啊,我们就不用改,我们还在这个位置, ok 就可以了。 好,我们返回一个上级菜单,我们在第四步就可以自己吊唁了。 色椒艳, 继续, 这是一个 他,是不是你会发现直径是一个位置的, 到这一步的时候啊,一定要注意,他是让你是否再把上一步重新调验十五秒,再重新调验。 一般的人呢?他不知道,他选择 yes, 就是说他始终重复这一步,我们这一步应该选 no, 然后剪 n 次,然后 他执行下一步, 整个设备一个覆盖, okay, 这是在 dq hianda low, 好了,这有个拼凑是唯一神 statusbo, 这就是成功了。然后我们选 ok, 然后我们把模式打到远方模式, 好,这样一个 dvc 六二零零的直角宴就完成了。
粉丝1870获赞5644
相关视频
 00:30
00:30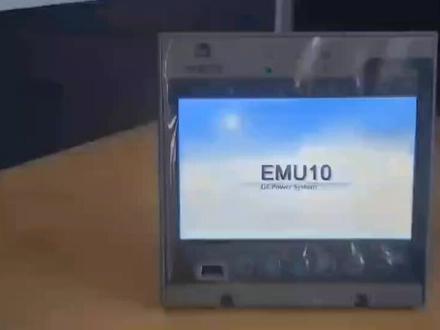 04:36查看AI文稿AI文稿
今天为大家讲解一下爱陌生 emu 幺零直流屏监控单元的参数设置步骤和方法。 emu 幺零监控是爱陌生网络能源开发的应用于直流电源或一体化电源的智能监控系统。直线电源系统的人机界面操作各功能单元的参数设置,系统用行状态的监测,用行数据的上传下达以及智能化电池管理。 在采用 emu 幺零监控单元的直流电源系统制造、生产称或在现场更换的新的单元后,需要对监控单元的参数进行设置并完成调试。 下边结合如何设置一台采用一爱陌生部件组屏的六空六核一百安尺直流屏的参数。这台一百安尺直流屏我们采 采用如下配置,配三台一二二二零幺零斜杠 t 充电模块一个 eau 零幺交流监测模块一个 edu 零二 mc 直流监测模块一个 egu 零二 mc 开关量和绝缘量监测模块一个 ebu 零幺电池巡检仪。现在我们进入参数设置环节。 第一步,家电开机现在已经完成启动了,启动后大家可以看到这样一个屏幕显示了直流屏的系统模拟图,大家可以看到直流屏的各个单元,点击后在下个页面即可看到相应单元的参数。 现在点击屏幕右上角的系统设置,输入维护及密码。由于维护及密码管理的参数设置必须由厂家专业人员完成,特殊情况需要密码 进入维护级参数设置的用户也可以联系广深直流屏技术服务中心,电话四零零九九三六六幺零索取。完成维护级密码输入后,监控屏幕会出现交流屏参数设置,直流屏参数设置, 点击交流屏参数设置,进入交流屏基本参数设置页面,因为演示的直流屏没有配置交流屏,所以 e a u 零幺设置为零, e g u 零二个数设置为零,点击确认后返回 第二步。下一步我们进行直流屏参数设置,点击进入直流屏设置界面, 大家可以看到这个页面有参数设置、 egu 零二模块设置、电池仪设置、模块设置等功能键,点击进入系统参数设置,可以设置 eau 零幺 edu 零二, egu 零二的个数,在这里我们统一设置为一,确认后返回, 点击进入 e g u 零二的模块设置。选择运行模式后会出现如下选项,开关绝缘温度十六、绝缘 十六开关十五、绝缘十五开关选择十六。绝缘十六开关选择后点击确认, 接着点击进入开关之路数,这套系统配有六控六核,所以开关之路数设置为十二, 点击确认后选择下一页绝缘之路数设置为十二,绝缘号手标号为一,接在和母上的之路数设置为六,确认返回。 二、点击进入电池仪设置,电池仪个数设置为一, 检测单体数设置为十八,确认后返回, 点击进入模块设置整流模块,额定电流设置为十安确认返回。 后续操作我们会在下一步进行解说。
 00:40查看AI文稿AI文稿
tracks 通讯器尾号设置,点击设置向导,点击基本设置,点击设备尾号,根据客户要求设置相应尾号, 点击确定,最后别忘了点发送 问号,设置完成。
 05:31查看AI文稿AI文稿
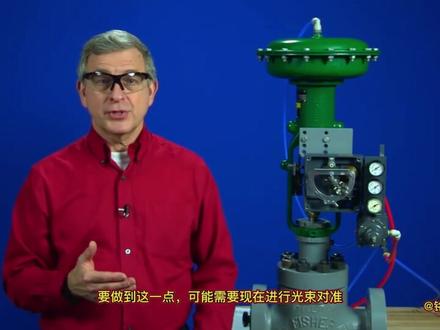
hi, i'm jim jones with emerson in this video i'm going to show you what you may need to do before you calibrate this fissure thirty five eighty two pneumatic positioner of course we want to always make sure we review and are familiar with all of the safety precautions and procedures found in the instruction manual for the thirty five eighty two positioner okay the positioner has already been properly mounted onto this fissure six five seven size forty eye direct acting actuator we've hooked up the air supply and made sure the regulator is set to the proper pressure in this case twenty psi and we've installed the airline from the positioner to the actuator so let's first identify the components of the positioner that we'll be working with the d shaped beam here is the summing beam and is the component this flapper assembly moves around on notice the summing beam is labeled direct over here and reverse over here the cam which is attached to the rotary shaft feedback arm is behind the summing being down here at the bottom this cam labeled a is the linear cam make sure the arrow on the cam points in the direction of actuator stem travel on this dret acting actuator increasing diaphragm pressure drives the stem down so the arrow must point down the nozzle is located right here the bellows is behind the beam and in the upper right corner there are two pins and one screw that we will adjust in this initial setup procedure one pin is directly above the nozzle and it's called the beam pivot pin the other pin is located just in front of the bellows and is called the bellows pivot pin the screw, we will adjust is on the flapper assembly we want to make sure that the beam is totally perpendicular to the nozzle so the flapper approaches the nozzle squarely to do that we may need to do a beam alignment now if you have a brand new thirty five eighty two positioner you shouldn't need to do this beam alignment procedure, but it doesn't hurt to check it commonly you will need to check beam alignment if the positioner has been rebuilt in any components replaced if the positioner is to be split ranged or the positioner is acting in a non standard way, step one is to loosen the lock nut around the nozzle turn the nozzle in all the way and then back it out four complete turns step two increase the input signal to the middle of the input range in other words on a three to fifteen psi input take the pressure to nine psi step three move the flapper assembly to place it over the cam down here at position zero now check the rotary shaft arm if the index marks on the arm are not aligned with the ones on the case adjust the follower ascent assembly screw until the marks are aligned when they are parallel tighten the lock nut on this assembly this will be the only time we will need to adjust this screw now in step four we move the flapper assembly to the number ten on the direct side of the beam check the feedback arms if they are not parallel adjust the bellows pin using an eighth inch wrench until they are go to the reverse side and check the arms again if they are not parallel adjust the bean pivot pin above the nozzle you may need to repeat this direct ten reverse ten procedure a few times until there is no movement in the arms and they stay parallel regardless of where the flapper assembly is placed if the arms don't move when the flapper assembly is on either side of the summing beam beam alignment is complete just make sure all the lock nuts are tightened the only thing left to do now is to zero and span the positioner, but i'll show you how to do that in another video so the first part of calibrating a fisher thirty five eighty two positioner is making sure the beam is aligned with the nozzle and we can do that in just four easy steps first turn the nozzle all the way in and then out four complete turns next set the input signal to the middle of its range then move the flapper assembly over the cam and adjust the flapper assembly screw to align the feedback arms step four is to move the flapper assembly from direct ten and then to reverse ten to align those arms using both the bellows pin and the beam pivot pin finally when you're all done tighten up the lock nuts and that's it visit fisher com to learn more about the fisher thirty five eighty, two position or to contact your local emerson sales representative thanks for watching。
130山东铭鼎阀门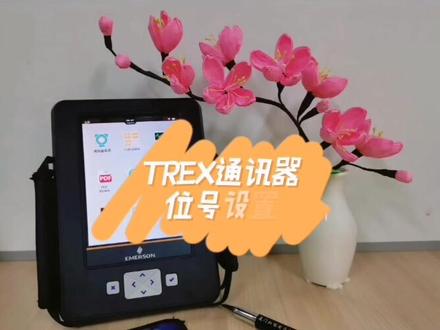 00:27查看AI文稿AI文稿
x 通讯器位号设置,点击组态,点击设置向导,点击基本设置,点击设备位号,根据客户要求设置相应位号, 点击确定。最后别忘了点发送位号设置完成。
59厦门仪表周工 01:13
01:13 01:03查看AI文稿AI文稿
今天跟大家分享的是这个爱莫生二八零八 im 采集这个温度为负四十五度,这一个故障的一个处理办法, 咱们通过这个线槽这根线,找到这个对应的这个端口,是这根线,这根线这个原来是在这个里面这个接口,这个接口插着的, 他采胶的温度为负四十五度,但是实际上是当时安装时的一个失误,需要把这个接到外侧这个口 就能够恢复正常采集。 注意一下这个这两个位置,一个是里侧,一个是外侧。
89鹤岗铁塔 00:26查看AI文稿AI文稿
今天是下雨天,带大家来参观一下山河万里这个小区。看好我们。今天有一个定位,稍后有一个别墅的空调暖气清风净水的一个定位, 是我后面这个厨房后边是吧?对,他不从这个外面过后面。
28然然小宝贝 09:26查看AI文稿AI文稿
大家好,今天我给大家介绍如何创建辈分和恢复派克梅西 a d 选工程,派克梅西 a 选。在后续的介绍中,我将简称 m 一。 首先我们运行 m 一软件, 在弹出的窗口中,我们可以选择 amp。 project 来创建一个空的工程, 也可以选择美新 adc template, 用我们的 me 的版本啊模板来创建一个新的工程。当然我们也可以打开我们本机上的所创建的这样的一个工程。那现在我们以创建 一个空的工程为例来介绍如何创建一个工程。选择 amply project, 在弹出的创口中,我们给我们所创建的这样一个工程取一个名字, 工程名当中不可以包含中文, 一定要是英文,你如果不是英文,你可以用汉语拼音。好,我们取名称叫 chinese。 大家可以看到在来米的来个盖头这样一个窗口当中,他会出现穿领这样的一个工程。明,那这个工程是一个空的工程,他下面没有任何的 tax, 没有任何的。在我们的 amy 当中,一个 tacket 对应着一套 p l c 或者一套 p i c 或者是一套触摸屏。那今天我们以 r x 三 i 是我们一颗 pack 控制器 r x 三 i 为例来介绍 如何创建辈分和恢复一个工程。那我们在圈领上面点一下鼠标,右键选择爱的 tax, 然后在这个弹出紫菜单当中有 ctrl, ctrl 是我们的一个 各种控制器,调戏控制器或者是 ps 控制器的一个紫菜单,这个是我们的一个 混合式控制系统。选择混合式控制系统的一个紫菜蛋,那这个是我们一个远程 l 的紫菜蛋,这是我们触摸 屏,这也是我们冲入屏,这都是我们冲入屏,那下面我们以 ctrl 的里面的 rx 三 i pex system rx 三 i 为你来介绍。选择 pecs system r x 三 i, 那会在我们这个圈里这个工程底下他自动添加一个,他可得一这样的一个对象,那我们给他取一个名称,我们就叫二 x 三,哎,同样这个地方 只能是英文,不可以是中文,当然这个英文名字你是可以随便取的,没有特殊的要求。 那我们来看一下我们一个 target 底下包含哪几部分内容。第一个叫带头 watch list, 这个是我们的一个调试工具,也就是在调试的 时候,可以通过这个带动我去历史的来查看来修改我们变量的值。 第二个是 diaglos technological blocks, 这个是与我们的运动控制相关的一个快一些,快,那这个在后续的运动控制当中会给大家介绍。第三个是哈德维尔 configuration, 那这也是我们的 plc 或者 pic 的一个最重要的组成部分,也就是硬件主态, 那这个上面根据你实际所配置的模块,在这个硬件主态里面加这样,那些模块插到对应的槽上去,对应的插槽上面,然后给他分配相应的 地址,下面地址,这是硬件主态。第四部分是捞其克,捞其克,也就是说哇 x 三癌当中运行的控制逻辑,控制逻辑,那我们所有的 plc 或者是 psc, 他的 lotch 里面都包含了一个 man 这样的一个程序块,在我们的 plc 或者 ps 当中,除了 中断快以外,其他所有的快,如果要执行都必须比没这样的一个程序快,直接调用或者间接调用, 如果你没有被这个麦这个程序快直接掉用或者间接掉,尽管你的快也放在这个 pro 这个 program block 下面,他照样不远行。这个大家要注意一下,当然 中灯快除外。第五个部分是 reference view 太保,这也是我们的一个 调试工具,它里面有一些缺损的一些表格,那对应了我们不同的地址,对同不同地址每个地址都有一个对应的这个表格,在调试的时候可以看不同地址里面的这样的一个值,这个值 最后一款是叫 supplemental 发钥匙,那这里面的话,它是对我们的这个工程文档进行这样的一个,还有一些实则参数进行这样一个汇总,进行这样一个汇总,那我可以把我与这个工程有关的一些工程文档,我可以放到这个 documental 发钥匙 documentation files 底下,当然我也可以把我的文档放在这个 ctrl 了底下,如果放到 ctrl 了这样的一个文件夹底下,你将来把这一套程序下载到 cpu 当中的时候,你如果选择了 supplemental 发钥匙的话,他会把很重要的里面的这个文件夹底下的文件下载到 cpu 里面去,下载到 cpu 里面去。 好,那我们不管是我们的 pic 还是我们的 plc, 它的工程最主要的是包含了三块,第一块是叫哈德维尔肯菲格瑞森, 第二块是 logic, 第三块是 very boss, 是我要根据我给我的一些地址分配一个贝纳米,那在这个 very boss 在一个主创口里面。 好,这个就简单的介绍了我们如何创建一个工程的这样的一个过程?那我一个工程创建好了,我要对他进行备份。怎么备份? 他与我们传统的备份不太一样,传统备份有可能是要到这个文件级夹底下去,把这样的一些文件拷贝出来。那在我们这里面是用我们菜单里面的一个 bacop 这样一个菜单来对他进行备份。我把这个工程保存一下,我在圈里上面点一下鼠标的右键, 选择 sive and backup, 那他就会将我这样的一个工程备份成一个 vip 文件,你可以将其存储到指定的路径下面。那我们就放在桌面上面啊,保存一下, 好,看到了我们这里生成了一个圈里 这样的一个 vip 文件,那如何?如果一个用户他的程序备用好了,他把这样那个 vip 文件给你了以后,你如何将他恢复呢?同样的,在 m e 里面,我们先把我们踹你这样的一个工程性给他给删掉。 关闭,关闭,不是删除啊,只是把这个工程关闭。那我们在这个 money, 在这个纸窗口里面买 computer 底下找到穿。你这样的一个工程底下鼠标的右键里面有个叫 discoy project, 这个是一个删除工程, 在弹出的这个窗口当中敲入 yes 哇, yes, 一定要切敲 yes, 要不然你没有办法删除。删除以后可以看到我这个 miconpue 的 底下,确定在一个工程就没有了,就删除了。那如何?我根据我刚才备份的这样一个 vip, 把它给恢复了。同样的,我们在买 ctrl 的上面点一下鼠标的右键里面有个 restore, 然后在坦出的创作当中,我们浏览到我们刚才的圈里这样的一个 vip 文件,选择欧本,你看他就把圈里这样的一个工程添加进来了,双击一下圈里这个工程, 他就把我们刚才所建的这样的一个工程打开了。好,这就是我们今天要介绍的内容,在下一讲当中,我们将给大家介绍如 如何进行硬件主态,也就是说在哈德维尔肯菲格瑞型底下如何对我们的一套 rx 三 l 进行主态,谢谢大家。


