geneious使用教程

粉丝192获赞1044
相关视频
 06:28查看AI文稿AI文稿
in this getting starter tutorial, i'm going to show you how to add annotations to sequences in genius prime innotations provide descriptive information about the structure and or function of features within dna, rna or protein sequences for this example, i'm viewing a mitochondrian gnome file within genius you can view the annotations by going to the annotations and tricks tab within the document viewer different types of annotations can be toggled on or off on the sequence view by using the chick boxes for example, if i wanted to hide all the coding sequence annotations, i can uncheck the cds option the table underneath also lists each annotation within the sequence and selecting the pop out button will expand the table for easy viewing alternatively, you can select the annotations tab at the top of the viewer to show the table of annotations here you can also filter the table according to the type of annotations and show or hide columns of information you can also make itets to the annotations by selecting the itet annotation button when it comes to importing and creating annotations, there are many ways to do this in genius some files, such as gin bank often already include annotations and these will be added to the sequence after the file is imported for example, if i import a gin bank file, containing part of the human's chromosome seven sequence, you can see that there are annotations imported along with the sequence alternatively you can import annotation files such as bid or gf formats and add the annotations to a sequence file for example, i have a first day file already in my local folder if i import a gff file, which contains a matching region to the fast a file into the folder, genius will add the annotations from this file onto the sequence instead of importing files with annotations into genius, you can also create your own annotations to do this i will select a new file that doesn't contain any annotations then i will highlight the region i'm interested in at the top i will select the add annotation button i will give the annotation a name and select a type from the list it's worth noting here that you can also type in your own type name to create a new one i will keep the annotation in the ford direction and click ok to add this to my sequence now you can see the annotation has been added to my sequence as well as manually adding annotations to sequences there is also the option to detect annotations based on a source of known annotations to demonstrate this i will switch to a different file that doesn't contain any annotations then i will select the live annotate and predict tab by turning the intent from option on you can annotate your sequence with features based on a set of reference files genius comes with a reference features folder which contains over 800 sequence files these files contains in common plasmid features, which genius can use as a reference alternatively you can choose a different source folder to use as a reference i will change mind for folder containing some sequence files that have specific annotations i'm interested in then, i can use the similarity slider to find possible matches moving the slider to the left or reduce the similarity criteria meaning more annotations will be discovered with a lower sequence match whereas moving the slider to the right will reveal annotations with a stronger match to the sequence the annotation results are updated in real time, these annotations are temporarily added to the sequence once i'm happy i can click the apply button to confirm my selections it's also worth noting that you can find open reading frames in the sequence by using the find offs option below another way you can add annotations ingenious is to transfer annotations between files i have a file containing the emu motorcondrane sequence as you can see this file already contains some annotations in another file i have the sequence of the kiwi mitochondrian however, this currently does not contain any annotations what i want to do is to transfer any similar annotations from the emu sequence file to the kiwi file to do this i will first perform a puy's alignment by selecting both files and going to align a symbol and selecting puy's alignment i will use the genius alignment method with the default settings and click ok to run the alignment in the new alignment file i'll set the kiwi sequence which does not contain any annotations as the reference sequence by right clicking on the file in the viewer and selecting set as reference sequence i'll then save the file by pressing the save button when i now go to the live annotate and predict tab, i can see a new option called transfer annotations by selecting this i can use a similarity slider to adjust the stringency as was demonstrated earlier in this tutorial any annotations that match the criteria will then be transferred from the emu mitochondrian sequence to the key wimatocondroin sequence to save these transferred annotations i will select the apply button and then the save button when prompted, i will select the yes option to apply these changes to the original sequence now if i select the original kiwi mitochondrian sequence, you can see that the annotations have been transferred for further tutorials on getting started with genius refer to the other videos in this series。
20北京睿驰科技 02:27查看AI文稿AI文稿
in this getting start of tutorial, i'm going to give you an overview of how to run analyses also known as operations in genius prime within genius analyses are generally performed by first selecting your files of interest and then selecting a desired analysis from the tall bar at the top the tall bar contains shortcuts to common analyses such as blast workflows aligning in assembling tree building primary design and cloning selecting certain icons will also reveal sub analyses for example selecting the cloning option will enable you to select a specific cloning procedure such as restriction cloning to learn how to perform specific analyses such as restriction cloning refer to the other tutorials within the skating started series to demonstrate how a simple analysis works i will perform appear ways alignment i will first select two files these files contain the sequences for two different variants of the same gene i'm interested in with the two sequences selected i will now select the align a symbol button from the tall bar, then select pra's a line when setting up analyses, there are usually various settings you can adjust for example in the alignment settings, there are different methods you can select from and each have their own settings additionally for methods that are based on established algorithms you'll also find cetations that link to their algorithms web page to learn more for this example, i'll just select the genius alignment with the default settings and click ok to run the analysis and here is my new alignment file so that's an overview of performing analyses in genius, it's also worth noting that throughout genius you'll also see question mark buttons especially next to most tools selecting these will reveal helpful guidance and additional information about certain analyses and features of genius prefer the tutorials on getting started with genius refer to the other videos in this series。
11北京睿驰科技 02:12
02:12 02:12查看AI文稿AI文稿
解压前需要关闭杀毒软件, 运行这个安装包进行安装, 安装路径随意,但不要有中文。 安装完成一定要把这个勾去掉, 然后解压压缩包, 然后一定要管理员身份运行激活工具。好了,已经安装成功。 提示,这个是让你们选择文件存放的位置,可以自己选择,也可以默认, 如果提示这个点允许, 如果软件提示更新点跳过更新了用不了。 好了,现在可以体验了。
1win妹 02:36查看AI文稿AI文稿
今天我们来学手机端随机例会与随机属性。首先创一个变量分组,然后创个例会变量以及属性变量,比如美貌、智力、福源等等, 然后使用条件图片添加保存的例会,当例会值等于零的时候出现第一张例会, 当例会值等于一的时候出现第二张例会,例会值等于二的时候出现第三张例会,后面一直以此类推, 然后点击选项创建按钮, 然后在变量里面找到变量,随机例会等于零至四,因为我只弄了这几个,你有几个例会就弄几道几。复制一下刚刚弄的条件图片,复制到随机下面,最后再放一个变量刷新就可以了。接下来我们测试一下, 可以看到没有任何问题。接下来我们制作随机属性,先点击对话,选择文本,输入美貌,然后插入美貌变量, 接下来也是一样, 然后点击选项创建按钮, 然后点击变量,选择变量,随机美貌等于零至一百,智力等于零,以此类推。你想要刷新的最高数值为多少就填多少。 添加一个变量刷新,然后将上面的文本复制到变量刷新下面,最后就完成了测试一下, 今天的教程就到此结束,拜拜。
1135卿柒. 00:58查看AI文稿AI文稿
很多人问我这样的日系电影感写真,怎么后期才能让照片更有氛围感?今天我用一分钟教会大家我必用的一个插件,同你 make 辉光插件,让你轻松调出氛围感。我们打开 ps, 启动辉光插件,插件就会自动生成辉光效果。关闭下效果开关,看一下前后对比。 这里会有比较重要的三个参数,分别是强度、半径、域值,控制着灰光的亮度,散发半径光的邻界值,大家按照喜好去调整。然后这个插件是可以局部调整的,如果想要天空的部分产生灰光,人物不受影响。我们打开这里的 mask 遮罩功能,把需要灰光处理的用画笔涂红, 打开影响范围观察下发绿的地方就是作用的范围,这样的话就可以对自己选择的范围进行参数的调整。我们还可以对灰光的颜色进行调整,选择灰光的色相饱和度,尽量选择看照片实际光源符合的颜色, 这样整体才会更浓下。 ok, 我 们点击保存,看一下对比,感觉灰光过强可以进行二次调整,你学会了吗?
3177红疹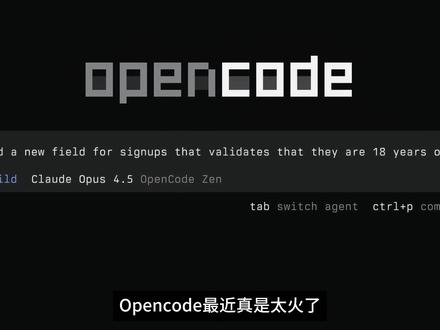 04:22查看AI文稿AI文稿
open code 最近真是太火了, github 上已经有九万多 star, 我 估计全球的大模型厂上都在针对 open code 做测试调优。 open code 是 目前真正能凭借 cloud code 的 工具,也是二零二六年到目前为止最火的 ai 工具。 open code 呢,目前只提供了英文文档,我按照其英文的文档,同时结合了 cloud code 的 学习资料,梳理了一份详细的 open code 的 中文操作手册,包括安装 基础操作、进阶使用等,如果你需要,我也可以发给你。上期呢,根据文档手把手带大家安装了 open code, 相信很多朋友已经感受到了它的强大。本期是 open code 的 第二期,主要带你完成三件事,一、免费进入最强编程模型 gemini 与 cloud。 二、教你安装 skills 与 m c p。 三、安装超级增强插件 all my open code。 话不多说,直接上干货。首先先教大家如何不花一分钱接入 cloud 模型。这里我们要接入一个 google 推出的工具 anti gravity, 中文名是反重力,它本身呢是一个 ai 编程的 ide, 内置了 gem 和 cloud 的 这两个顶级的模型。 在 gethelp 上找到 anti gui 的 这个插件,复制这行安装指令,回到 open code 里粘贴 open code 呢,就会自动下载安装。安装完成后,重新打开终端,复制这行指令回车。 然后我们选择 google, 选择带有 anti gui 字样的这行回车,接着就会跳转到浏览器,登录自己的 google 账号,复制这个 url, 粘贴到终端回车。这样我们就配置完成了。 重新打开一个终端,进入 opencode, 输入 gunmodels, 我 们就能看到 gemini 三 pro 和 cloud 四点五 opus 的 这两个模型了。我们测试一下输入,介绍一下你自己可以看到它正常的输出,证明我们接入成功了。 从现在开始,全是顶级大脑在为你打工,有了顶级大脑呢,还得有强力的四肢。接下来我们要给 opencode 装上它最火的灵魂同版包 oh my opencode, 它内置了七个顶级的编程 agent, 通过多智能体分工协助,帮你自动完成写代码,查 bug, 梳理项目结构的这些开发工作,不用再手动处理很多繁琐的细节。据说呢,是作者花了二点四万美金才搞出来的。安装呢也很简单, 复制 github 上的安装指令丢给 opencode, 它会询问你是否有 cloud 的 gpt 和 jimmy 的 会员啊,你就如实的回答,大概需要一分钟的时间,插件就安装好了。 重启 open code, 可以 使用艾特命令,从七大智能体中挑选一个帮你执行任务。或者呢,直接在提示词里呢输入 u l w, 意思呢就是 ultra work 就 可以使用 oh my open code。 接下来教大家如何在 open code 中使用 scales, open code 呢,可以无缝衔接 cloud code 的 创建的 scales。 首先来到根目录,新建一个文件夹,命名为点 opencode, 再新建一个 scales 的 子文件夹。然后呢,把你的 scale 复制到这个文件夹,就可以在 opencode 中使用了。当然,我们也可以直接在 opencode 中创建 scale, 需要先安装 scale 杠 creator, 有 了它就可以用自然语言来创建 scale。 我 们让 opencode 自己去安装这个 scale 杠 creator。 安装完成后,我们测试一下,让它创建一个翻译功能的 scale, 它会根据你的要求自动执行并创建。创建成功后,重启 open code 就 可以看到这个 skel 已经有了。最后呢是配置 mcp, 我 一般呢都是让它自己来安装 mcp, 比如安装一个浏览器 mcp, 我 会这样在这个 open code 中输入安装 chrome mcp server, 稍等一会它就安装成功了。有些 mcp 呢,需要配置 k, 我 们也可以把 k 给他,让他自己去配置,这样我们就不需要自己去手动去配置了。 然后输入杠 m c p s, 就 能看到所有 m c p。 从白嫖顶级模型到手搓专属 skills, 再到部署全能 m c p, 现在的 open code 应该已经是你的超级 ai 助手。 open code 的 不仅能进行零代码编程,更能帮你处理文件、整理资料,智能写作。下一期我会带大家继续进行进阶的学习,大家点点关注哈,跟着阿亮学 ai!
7568跟着阿亮学AI 01:20查看AI文稿AI文稿
兄弟们,一分钟让你生成 ai skills, skill six 开源神器,能把技术文档 get up, 代码 pdf 自动转成 agent skills, 并且自动化检查冲突,使用场景非常多,根据对应的网站识别内容生成可以给 ai 使用的 skills。 接下来我们就实际操作一下,首先它需要拍摄环境才能使用,目前比较推荐的方式 使用 python 三点一版本。首先复制下面的指令,打开终端,复制粘贴安装 skillseekers, 返回,这样的结果就安装成功了,这里官方推荐也是使用 paper 进行安装,如何使用,这里也有详细的教程,感兴趣的可以学习一下。接下来我们就来实际操作。在我们开发中,比如要使用这个 tailwindx, 我 们想给我们 ai 有 它的 skills 就 可以使用这个开源项目。这个开源项目主要就是帮我们自动生成 skills, 我 首先准备好了 tailwindx 一 些获取的配置信息, jen 文件, 准备好这些信息是因为需要它会根据提供的这些信息自动化识别页面内容,然后生成 agent skills, 能让我们后续提高开发效率。然后复制粘贴这个指令,根据我们的 config 文件夹下的配置文件去生成识别 skills, 这样它就会去根据我们给的配置文件去自动获取内容生成, 最后生成完成,左边会多一个文件夹 skill 点 m d 文件是主进的文件, references 文件夹下的都是详细内容文档,这样你就生成了 tailwinds 的 skills, 你 也可以运用在比如识别 pdf 或者其他的技术文档中生成 skills, 感兴趣的赶紧收藏,防止找不到!
361蓉漂码农


猜你喜欢
- 2760世一