胜家缝纫机6805贴布教程
如何用缝纫机做贴不缝?那就用 hd 六八零五 c 来试试吧。选择五号 c 型线机,设置宽幅二点五,针距零点四,更换开纸压脚,缝纫时记得放下压脚。先来缝制一个轮廓, 选择一号直线就会设置二点零,根据设置三点零,把黑色部分用明天的方式缝上去。 缝制过程随时使用上下停针功能,可以防止移位漏针,针对弧度方便调整。 将编辑储存好的花样缝制关注我, get 更多缝纫技巧!

粉丝21.1万获赞9.5万
相关视频
 15:22查看AI文稿AI文稿
when you turn the machine on it goes directly to straight stitch and mode one let's take a closer look at mode one mode one refers to your basic utility stitches and they're displayed here on the front of the machine next to these direct selection buttons that have numbers on them for example if i want six egg, i just press the button and i have zig zag if i want a multi step six egg, i would go directly to multi step six egg, but we're going to sew this straight stitch, so i'm going to press one for straight stitch and we can start sewing i can see in my screen that my stitch length which is controlled by these buttons here is set at two point five millimeters so let's sew a seam with the stitch at two point five millimeters and see what that looks like this is your needle plate and it has seam allowance markings on it the front is marked in metric measurement and the back is in imperial or fractions of an inch, a really common seam allowance for most projects and commercial patterns is five eighths of an inch let's sew a seam with the edge of our fabric following the five eighths inch seam guideline place the fabric under the presser foot the rodge is lined up against that line lower the presser foot lifter and you can step on the full control to start sewing after sewing forward two or three stitches you can press and hold the reverse button and that will sew in reverse, so that you lock the seam, so it doesn't unravel as you continue working on your project step on the foot control to sell forward again and then press and hold the reverse button again to sew it in reverse once more two or three stitches and then sew forward again to finish now you can use your thread cutter button to quickly and easily trim your thread tails it cuts the top and bottom thread both at the same time which is a great time saver and there's our seam we have our securing stitches at the beginning and end so that our seam won't come undone when we continue working on our project you can use the stitch length control to shorten or lengthen the stitches that you sew in straight stitch mode all the way up to four and a half millimeters let's put this at about a four and sew the straight stitch and see what that looks like i'm going to lower the press of foot lifter and step on the foot control to sew so here you can see my original seam at two and a half millimeters and here is my longer stitch length setting at four so just set the stitch length the way you want for your project you can also change the position of your needle in straight stitch and to do that you would use your width control button now obviously there's no a width on a straight stitch, but you can use the width control buttons to change the needle position and varying degrees from left to right there's a reference for this on your screen because the maximum stitch with the machine is seven millimeters, three and a half indicates center which is where we are right now if i keep pressing this button you can see here in the screen that i can see the needle position moving over and all the way up to seven millimeters which is far right needle position if i press minus, i can bring it down i know what center is or default because it's got this box around the three point five, but i can continue in varying degrees all the way over to zero and that's far left needle position back to three and a half for center or default again mode one is your basic utility stitches that are displayed just to the left of these direct selection buttons another really popular stitch is the zig, zag and it displays right here on the front of your machine next to the direct selection button mark with five when i press it i can see on my screen i go directly to zigzag stitch and it displays my default stitch with a five millimeters and the default stitch length of two millimeters let's see what that looks like press my thread cutter button to trim my threads and here's our default stitch setting for our zigzag if i wanted to i could make those stitches wider using the width control which is right here and go all the way up to seven millimeters press the thread cutter again cuts my top and bottom thread and there's my stitch width at a wider setting we could go the other direction and make it narrower let's try it at about a two point o press the thread cutter and here we have the same stitch, but with three different wood settings so here's an example of what we just sewed five seven and two millimeters and not only can you change the width of your stitch, but you can also adjust the stitch length this is our five point o millimeter default that we just did and here is where we adjusted the stitch length of the machine and we brought the stitches really close together so you don't even see any fabric between the stitches and you might do that for machine applique for example, but here's the same stitch as our original stitch, but with the stitch length set at a much longer stitch length setting and you might use this predecorative sewing so just experiment with different stitch length stitch with and even different threads to get the look you want for your project your singer heavy duty sewing machine has enhanced speed and piercing power you can set the speed control wherever you like depending on where you're comfortable for your project you can sew slow up to fast or anywhere in between by using your speed control lever now i have it set on the slowest speed right now so i'm going to step on the foot control to start sewing and it doesn't matter how hard i step on the foot control this sets the maximum sewing speed for me so let's see how that works and as i sew i'll move it over to the right and show you fast speed and then we'll come back down to slow speed again so you can see how to control that with your speed control lever i had maximum pressure on the foot control but i control the speed with the speed control lever i'm going to cut the thread with my thread cutter button and now i'll show you that you can also unplug the foot control so we're not going to use the foot control at all you can manually control running the machine using the start stop button here at the front of the machine just above the reverse button and again you can use that speed control the same way we did with the foot control bring it down low and press the button here to start sewing it's on controlling it completely manually press the cutter button so you can use it with the foot control or without and this lever sets the maximum sewing speed whether you sell with or without the foot control so now we're going to talk about this button right here this button is my needle up down control when i place my fabric under the presser foot and lower the presser foot whenever, i sew you'll see that the needle stops in its up position so i stopped with my foot control i'm going to step on the foot control again and the needle will stop in the up position again if i want it to go down on demand i can press this button and it will stop in the down position but when i sew again and stop it will go back up in the up position and the reason it does that is because it is programmed to stop in the up position over here you'll see in my settings i have another button that looks like the needle up down button, but this lets me program the position of the button so when i press it now you'll see that now the needless program to always stop in the down position because of this little down arrow that shows on this graphic on the screen so when i sew the needle stops in down position this is great for pivoting like when you sew around appliques around pockets wrong quilt bindings, but every time i stop sewing the needle will stop in down position because i'd programmed it to do so if for any reason right now even though it's programmed to stop down i want to just have the needle come up maybe to remove my fabric from the machine i can press my on demand button to raise it up once, but if i continued sewing it will continue to stop in the down position because it's programmed to stop in the down position if i turn that off now it will stop in the up position when i stop sewing so program it here to continuously stop and either the up or down as you prefer and just touch it one time on demand to go up or down one time with this button here this button here is called your tie off button and when you press that it sews three securing stitches whether you're going to sew a straight stitch or a decorative stitch and that means you could trim the thread once you're done sewing and your threads won't unravel right now i have a tulip stitch one of your decorative stitches programmed in here so when i sew and press the tie off button it will give me an immediate tie off now i didn't finish the tulip as you can see because i chose an immediate tie off and it stopped immediately where i told it to stop sewing but maybe i want to sew a tulip and have the whole tulip sew and then have the machines stop at the end of the tulip and tie off to do that i have a button over here in my settings which is this one right here and when i press that i can see in my screen that it's activated and what that will do is let me sew an entire tulip and then i can choose tie off and it will know to sew the entire tulip and then stop and tie off so let's try that now when i sew the tulip and my tie off settings button is activated as i can see in my screen i'll begin sewing the tulip and while the tulip is stitching i'll press my tie off button and the machine will know to complete the tulip tie off at the end of the tulip and now i can trim my threads and they won't unravel your stitch elongation feature is available for your satin stitches when you sew those make sure you use your satin stitch foot that has that groove at the bottom so that the dense stitches can pass underneath freely, so now we're going to talk about this button right here stitchy elongation button and how i know i have elongation is if i see this icon up here on my screen this times one means normal size if i press it again i see times two i get my stitch twice as long and it's still dense press it again i see times three, press it again times four and press it again i can go all the way up to times five the difference between elongation and stitch length is if i just take my stitch and lengthen out the stitch length the number of stitches remains the same within the stitch they're just spread out over a wider area, but i can see fabric through them and maybe i want the stitch to be very dense but long that's when i would use elongation over stitch length for many of the decorative stitches in your machine there's a mirror image function available and that lets you take stitches and flip them over from left to right to demonstrate we'll show you this stitch that looks like a little spool of thread that's in mode two and that is stitch number one twenty eight i'm going to press the buttons one two eight in quick succession i can see my spool and at the bottom of the spool that starts on the left hand side and swirls around like this and that's what we sewed here just one right after the other, but if we want to flip the stitch from left to right we're going to press the mirror image button and i can see even on screen the image of the stitch has changed the thread is now coming off the spool from right to left and we sewed one after another and i know the mirror image is activated because i can see this icon in the screen so for many of your decorative stitches mirror imaging is a possibility for more creative options。
50耀联机电 01:18查看AI文稿AI文稿
缝纫小技巧之弹力底线快速抽者首先我们来给缩心绕线,弹力线需要手动绕制,大家可以像我这样不拉伸弹力线绕制,也可以拉紧弹力线绕线哦。弹力线比较粗,很快就绕好了, 绕好后放入机器,我用的机型是 h d 六八零五 c 免引底线,非常方便,其他机器请根据需要把底线引上来再操作哦。选择直线针剂,下面是调到四毫米的效果,上线张力也是四哦。先来测试一下 开头和结尾处打结,也可以将线头留长一些手动打结哦。 如果对这个效果不满意,我们可以调节上线张力来调整,一定要先在小步头上做下测试哦。用这个小方法可以轻松做出弹力,木耳边 车几条平行线就可以做出这种缩折效果哦。非常简单的小方法,分享给大家,喜欢记得点赞收藏哦!
 01:15查看AI文稿AI文稿
线迹效果不好如何调整?一看就会当不料正面出现这种猪鼻子。检查缩芯,取出缩芯,重新放置缩芯,逆时针放进去,并将线头划进缩壳金属槽内, 重新车缝即可恢复正常。 当布料反面出现起圈情况,检查面线张力,数字大紧,数字小松,常规四左右即可恢复正常效果。 车缝异响,跳针,反面毛巾状, 检查机器挑线杆是否挂线,重新正确穿上线即可恢复。
 03:22查看AI文稿AI文稿
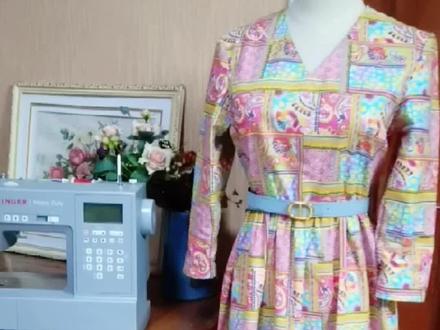
v 领长裙,三八女神节的礼物使用盛家六八零五 c 缝制用料,约二点五米裁剪图,在片尾前片领的贴边烫上无纺衬缝合前后片的省位请忽略抢镜毛孩子。 肩线对齐缝合, 更换左边压角调整到 z 字线计左边前后片贴边,正面相对缝合, 贴边和衣领正面相对用珠针固定,取下附件盒缝合一周, 后领有弧度的地方打剪口。 v 领处距离缝线一毫米处打剪口,贴边整理平顺,再领边车一圈明线针距调整至四点零。沿秀山处车缝抽紧一根线,整理好秀山形状, 秀山中间点和肩缝对齐,用珠针固定,沿秀山弧度缝纫。自动剪线功能太好用了! 缝合好的秀山线。锁边 两个袖口处锁边,袖缝边和前后片侧边合在一起,锁边 两片裙摆正面相对,左边 缝合,锁好边的袖缝边和衣服侧边 缝合裙摆两个侧边。 根据调整到四点五。从群腰边缘车线 缝至另一边时,断线停止,重新起头继续车缝。按以上方法相距零点三毫米,再缝一条线, 抽取一根缝线,均匀抽出细褶, 抽好戏者的琴腰和衣服腰结线处正面相对缝合一周, 沿缝线锁边, 裙子边缘锁边,裙边和袖口折边。零点五寸车线完成。配条适合腰带货,用本色布料缝制腰带。
 10:42查看AI文稿AI文稿
我们今天讲一下这个存储功能,呃,首先呢我们先按一下这个存储键,他像一个那个 u 盘的一个标识,摁下 m, 然后呢我们就可以选择呃不同的花样进行存储了,他这里边会有一个显示,最多是存四十个啊,比如我们可以先存储一个曲折线, 嗯,但是他这个曲线,你看标志是这样子的啊,这是简单的,这样填不出来,那我们就找一个花样比较明显的来给大家来演示, 我们选这些花样多一点的,我们选择 m 二, m 二里边呢,我们选择一个幺幺零吧,幺幺零,你看是这样的一个花样,然后我们再选择一个幺幺四,你看他是一个这样的花型, 然后我们再选择个幺二八,对,他这个存储了四个了已经。然后我们再找一个数字和字母吧,比方说我们选择个 m 四里边的这个四幺五吧, 找一个 m 二, m 三, m 四里边零零四,这不是吗?零零幺,然后零零五, 这样就存储完了,然后这个就可以,你可以翻页来选,你看你选的是哪一个吗?然后我零零五零,这是几个,咱们选的那个, 然后这个点一下就是循环,就是这一组数字啊,我们存储的这一组数字呢是能够循环的,然后点那个删除,就是一个一个删除掉了,让我们看一下它做出来的效果吧, 让人启动,他是把那个咱们存的那一组数字啊,一组花样呢做出来一组一组的来做。 我们当然我们也可以把这个单独的存储这个数字做成电话号码也可以,或者我们存储成其他的单独存储花样也可以,这个都是看自己来决定, 他最多是一组可以存出来啊,四十个,应该存出来四十个, 因为我也没数,我都不知道他做完没做完。 差不多了,咱试一下,看一下效果,拿出来给大家看一下。 你看他这个做出来一个这种线轴状的,然后曲折现在四幺五,然后这个这个这个就是他把它存到一起了吗?我们刚才存的那个花样就是这几个,你看我们存出了这个 一个他一个他,然后一个他一个他,一个四,一个幺一个五,这样就存储出来, 等于把它可以把这个数字啊字母花样存成一组,但是我们可以存成,呃,这个单独的只存储数字也可以,比如我们把它都删掉啊,把它删掉, 我们找这个 m 四里边啊,咱比如说是存个,嗯,零零二二二零 啊,二零啊,随便,咱可以删一个,这个是删除这个就删除了,嗯,然后零零幺零零五零零六,随便咱们再做这个,这是单独的数字的一个成品,然后给大家看一眼, 因为我们没有用那个彩色的花样,如果要彩色的花样呢,出来的效果就会明显一点。 做这些花样或者是数字字母的时候,一定要把这个面料呢做的硬挺一点,软面料他出不来这个效果。 看看啊,拿出来给大家看, 你看二零幺五六,二零幺五六,那六还没做完呢,对吧?二零幺五六,二零幺五六,这个还行吧,因为咱这个颜色呀,太他这个 他这个不明显,反正教给大家方法基本上是这样的。然后我们给大家演示什么呢?演示一下这个常用的功能吧,这几个花样的常用功能,稍微等一下啊,我们接着讲 锁边和锁扣眼吧,这个咱们常用到的,因为我们把所有功能都讲到了,按键也都讲到了,咱们讲两个最常用的功能,一个是锁边,一个锁扣眼,锁边呢我们最好是换上锁边压角,它有一个辅助作用,我们选择的线系呢,就选择哪一个呢?我们先把这个退回去啊, 我们选择 m 一里边的八或者是五,这两个花样呢是做这个是这个做 锁边效果最好的,我们选择八,大家看一下选择八,然后先换压脚,前面我们讲到了更换压脚,就是只需要在这个后面稍微一盖就可以下来了,他是一个 卡的东西,然后你看装上,我们把线呢 就是看一下,把这个线呢顺着这个竖的这个小片呢进到这个眼角里面去,然后放面料的时候啊,就是 布料的边缘和这个小片的边缘贴在一起,这样小片呢起一个,呃参考,呃参照作用,我们选完之后呢,先用手呢转一下手轮,看一下机针落点,因为 他中间有个小片来起支撑作用了,主要他打针一看没问题,那时候我们就可以启动了, 速度可以稍微快一点,让这个小片呢沿着这个布边走, 这是第一种锁面效果, 然后第二种锁面效果我们选择哪一个呢?选择这个五直接就是曲折线也可以做,然后我们选择五日之后呢,也可以直接做, 然后拿出来的时候像机器后面拉面料拉线,这样出来了,大家看一下效果, 第一种锁边效果就是他在锁边的同时还有条直线来做缝合,第二种就是那个五呢,就只有曲折线了,这就是这个缝纫机能够达到的最好的锁边效果了,因为他毕竟不是锁边机吗?锁边机的话他是有这个四个 线呢,三根线,咱们这个就是模仿的三线锁边效果。然后我们再讲一个这个锁扣眼,基本上咱们就把这个机器的常用功能都讲到了,嗯, 我们算讲的就是比较细的了,然后锁扣眼,大家记住啊,就是扣眼的这个呢,像咱们自己,然后后边它是可以推开的,里面是放扣子用的,我现在就不放扣子了啊,它是根据扣子大小出来的,扣眼有多大? 先把这个线呢穿到这个压脚孔里面去, 因为他不像别的眼角,他有个豁口吗?咱们就只可以戴进去,所以我们就只能穿进去,然后把它也放好。锁扣眼也同样就是我们要选择一个硬挺的料子,如果你这个料子效太 软,他做出来的效果也不好。然后我们开始选择献祭了,选择哪个献祭呢?我们就可以选择零,这是普通的扣眼,选完献祭之后我们需要做什么呢?需要把这个拉下来大家再看啊,就是这个 在这个自动传真器后面有一个扣眼标识,你看把它拉到底,拉到底,放到这两个框中间,因为扣眼中间它是凸起来两个地方,然后就可以正常操作了,速度快一点,他前后一碰就往回走, 速度快一点, 到最后它自动打结,然后我们把这个快拉杆拉上去,提压角拿下来给大家看扣眼, 看做出来了吧?他除了这个方形扣眼,他也可以做其他的这种扣眼我们可以看他这个线地图里边他有的。嗯,你看他可以做这种, 嗯,普通的方形呢,之外包括这种秃头眼呀,凤眼啊啊这种,还有这种,其实他的扣眼模式还真的挺多的, 还可以做编织,做圆孔,其实挺好的。行,那我们今天呢就把基本上把这咱们整个这个六八零五的机器啊讲了一个遍,呃,最基础的都讲完了,除了穿线也没讲,因为穿线它有穿线图啊,大家自己随便就能看得了了。我主要是讲一些大家,呃 平时呢自己用不上的,或者说是那个很少用到的,我们把这些功能都给大家展示出来,给大家提供一些思路。总体来说这个盛家的六八零五是我比较喜欢的一款机器。嗯,我们整体来讲,我们对盛家,我们做盛家做很久嘛,这款机器是我最满意的一款,嗯, 是值得选择的,而且在这个两千块钱左右这个预算范围内啊,他真的是性价比最高的一款机器。呃,希望我们的介绍呢能够给大家一些帮助。然后 如果选择呢,我们自己在这个淘宝上也有店铺名字,就和我们这个呃短视频平台的名字是一模一样的,大家可以在里边来搜到。好,那今天就讲这么多吧。
181风马牛专业店缝纫机 01:06查看AI文稿AI文稿
h 六八零五 c 有九种扣眼样式可选,面板上能看到基础扣眼,拉开现机选择卡能看到其他八种扣眼样式。下面给大家演示所基础扣眼,按数字零就能在屏幕上看到所需要的压角。 拿出锁扣眼压胶,打开滑块,将纽扣放到位并卡住,这一步能让机器锁住于纽扣大小一致的扣眼。按下压胶释放杆,取下现有压胶,将压胶的金属杆对准压胶冰的凹槽放下,压脚杆卡住, 然后将面先放到鸭脚下面,再放好布料,剥虾拉到底即可缝纫。 扣眼完成后,机器会原地进行三针加固,确保不会脱线。太贴心了!小贴士,开扣眼前将助针别在尾端,能避免意外隔断线哦!
 00:40查看AI文稿AI文稿
将拼接好的九块三角形布块摆好,把缝缝导向交叉,用珠针定位,然后车缝直线中间加三点五厘米的白色浮水印花布, 在四周加上十厘米的宽边条,加上铺棉和底部中间部分用同步塑料压脚做落针压线, 其他边条用自由行缝压脚,推自由绣花。再把抱枕的后背部车缝好翻过来。这样一个快速积缝的抱枕只需要几个小时就完成了,你学会了吗?


