AE Diffusae 插件教程
这绝对是最激烈的插件,没有之一。当我在 ae 里使用 store debution, 首先需要安装 local debution 这个插件,在 ae 里新建一个纯色层,添加 local debution 这个效果。模型,选择这个效果比较好,但是时间长。这两个分别是纹身图和涂身图。我们先来看纹身图, 这里的种子不支持负一的随机种子,最高支持一万,意思是同样的描述词和参数,可以生成一万张不同的图片。 步数这里可以大胆调高,低于四十的步数基本没法看,这里选择比例,这里是提示词的影响权重。先看内存,低于八 g 的同学可以勾选低显存优化,这里是高清放大。最后在这里点击添加文本,可以看到图层多了一个蒙版,我们在蒙版这里输入描述词,要用英文输入,用翻译软件把中文翻译一下就可以, 输入完后就会开始生成,这里看不到进度条,耐心等就可以了。画面抽象模糊,可以调高负数。 我们再来看图深图,导入照片,隐藏照片,把模式改为图深图。图层这里选择照片,图层可以看到没有什么太大的变化,我们适当加点重绘幅度即可。 那可不可以生成视频呢?也不是不行,不直接识别视频格式是没办法生成视频的,你需要先将视频导出的序列针再导进来再识别就可以生成了,但是特别的慢,可以继续几针试试效果。今天效果一般,而且不支持导入自己的模型,个人建议尝鲜即可。

粉丝17.0万获赞408.4万
相关视频
 10:29查看AI文稿AI文稿
就做一个 ae 的 ae 的插件脚本和预设的安装教程和使用方法。首先和各位说一下我们这个插件插电脚本普拉给脚本 spa 和预设 pss 差异插件,我们插件的格式,这个图标也就是第一个我们这个图标的样子,大家以为插件都是外,都是有外部之位的对吧?其实插件分为内部插件和外部插件, 泼面也是这个道理,内部插件就是编程人员在做这个软件的时候,直接植入我们这个 ae 软件的这个安装程序。而外部插件就是由第三方网络上第三方公司或者个人开发的一个插件,他可以导入到我们的 ae ae 软件里面,需要 手动装到我们的 ae 或者 pro 面里。那么第二个这种文件格式呢?就是脚本格式 g s x, 有时候我们看到 g s s 边这个格式,那个格式也是我们的 sk f 的脚本格式,所有的脚本都需要连上网才能使用,脚本通常能够帮你解决一些繁琐的过程,把一些 过程写成一系列的步骤,形成脚本,在这个脚本用这个脚本你可以点一个按钮就能完成需要你花半个小时 完成的工作。第三个呢就是我们的预设预设我们平时使用特效之类的,你可以在特效时窗找到预设用法也和一般的特效一样,而且制作门槛也是非常低的,你可以自己在 ae 里 设定好特效之后,将它储存在预设里。先进行我们的第一个步骤。先进行第我们第一个步骤, 阿健的一个讲解吧, 我们先要找到我们插件的资料夹, 也就是我安装我们插放到我们放完插件的这个文件夹在哪里,我们点击我们的 ae 这个属性,然后 找到他的所在位置,文件所在位置,然后找需要找到我们的 sops far, 然后找到我的帕拉给,也就是这个,也就是这个文件夹, 一般我们插件就放在我们这个文件夹里面,然后还有一种情况,就是我们比较高的版本,可能呃, ae 我们锐意会较高的版本会有两种,就是放我们这个插件的位置,一个是我们这个 plplaking, 一个是我们 plaking 七点零里面还有一个文件,就是七点零, 然后卖掉扣那个文件夹里面这个文件,我我这个版本没有其他的版本,可能就就在那个七点零那个里面。新下载的 插件,我们放到这个文件夹里面,我们需要把 ae 重新重启一下,然后我们这个插件才会生效。需要我们在 ae 里面提前设置一个东西, 也就是设置我们提前可以访问,设置我们脚本可以访问网络,那么在哪里设置呢?我们点编辑,然后在我们的首选项脚本和表达室里面 有点卡,大家等一下 电脑有些卡,然后这里面点允许脚本写入文件和访问网络,然后我们点击确定脚本,也很简单,我们需要找到我们这个 spax 这个文件夹,然后我们把脚本文件放到这个 ccolip, ccolixu i 拍脑这个放到这个文件夹里面, 我们脚本放到这个文件夹里面,就代表我们已经安装上,一,一定我们一定也是需要重启,然后我们这个脚本才能生效,我们的脚本 本之后,也就是放到我们这个脚本文案夹里面有文件之后呢,我们重协议之后,然后我们点击窗口看到最下面这两个文件, gss 这两个文件就是叫脚本,他会, 他不会在我们的这个窗口下面,这这里显示,他会在我们的合成,在 vr 下面,他会在 vr 的下面会显示, 那是比较特殊的一个插件,特殊的脚本预设的单装呢,也是放到文人夹里面,我们需要放到我们这个,我们回到 sao, 我们找到我们的预设文件夹,预设叫 perfess, 就是这个文件夹,嗯,这里面就是放到我们的预设,嗯, 下载了一个别人的预设,那么我们就可以把它自己创建一个文件夹,然后把预设放到文件夹里,也可以, 这每个文件夹都是自定义的预设,我们可以放到文件夹里面,然后我们一样可以调用这文件夹 里面的许多预设启动音之后,我们会在这个右边这个效果和预设里边,然后看到我们那个所有文件夹里面的预设内容。如果你要存储一个自己的预设的话,然后我们首先我们这里面举一个例子, 新建合成,然后这里面 我们新建一个纯色,这边我们调整一下,随便调整一下这个数值, 调整好之后呢,然后我们比如说我们这个发光,这个发光的这个效果,我们想设置为预设,那么我们点击右键 需要点 以及我们这个动画,然后保存动画预设,比如说因为这个预设是我随便定义的,我不想要,所以说我 先把这个预设放到桌面吧,就未命名,然后点击保存, 然后他会弹出警告说我们的预设必须要放到这个文件夹里面才行,那么现在我先不管他,因为这个预设我不想要,所以说我把它放到桌面那个,我们如果是需要这个预设的话,我们需要把它放到这个刚才我们那个 pxspexs 那个文件夹里面, 他他才能生效,放到桌面是不会生效的,然后我们点击确定这个预设已经倒出来了,他就是未未未明这个关键, f f f f fx, 我们先把它删除掉吧,因为我们不要是有效的一个我们有效的一个预设吧,那么我们一样需要把它 保存一下,我们需要把它保存到那个我们刚才那个文件夹里面, 那我们先导出吧,先导出吧,先保存完完之后呢? 先关掉,然后我们把我们导出的这个预设,我们剪切到我们那个预设文件夹里面, 我们给他放到这里为美名。然后我们重新打开 ae, 在我们的动画预设里面,这里面我们就可以看到我们刚才那个威名就在我们的这这里面了。好了,这就是我们关于插件预设和脚本的一些讲解, 之后之后我还会推出一些其他艺的一些小知识和小窍门,希望大家关注我和订阅我,谢谢大家。
565BAD CAT VFX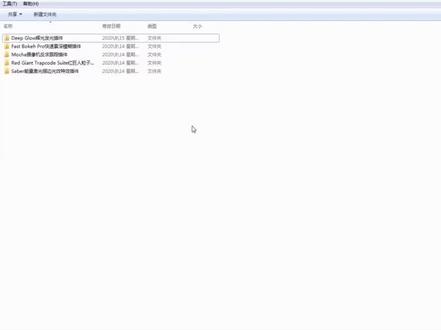 07:50查看AI文稿AI文稿
这次给大家带来五个在 ae 中常用的插件,并且给大家带来一个安装教程。首先第一款插件是我们的 de pro 灰光发光插件, 他比 a 一自带的 glow 灰光插件呢更加的真实,可以让过度更加的漂亮自然。我们点开,我给大家整理了有 v 版和苹果版,大家只需要按照自己的电脑系统来下载安装就可以。我们点开无音版,然后点开压缩包, 在安装包内有一个安装方法, 然后我们可以看到他出的是将这个文件放入到我们的 ae 安装包文件目录下,那么我们就要来到 ae 的安装目录, 然后打开我们的 ae 软件。好的打开了 ae 之后呢,我们先新建一个合成, 然后我们输入一个文本, 我们在效果里呢找到我们刚才安装的 defglow, 将它添加到我们的文字上,然后我们要给它点击重置旁边的这个,之后将我们安装方法里的这个序列号呢给它 复制过来,然后点击确定好,就可以看到我们的这个插件呢就要安装完成了。 下面一个插件呢是我们的快速紧身模糊插件,它可以使用深度贴图创建平滑的紧身散紧模糊效果,渲染速度处理非常的快,并且能够正确的处理边缘,方便我们使用。 同样我们点开之后会有两个版本,我们点开无音版,点开我们的压缩包,然后这里我们会有个中文版和英文版,我们点击中文版,然后点开安装方法, 我们可以看到他是将我们的这个文件安装到这个目录下, 我们新建一个文件夹, 然后将我们安装,然后将我们压缩包里的这个文件呢直接给他拖过来, 在之后我们来到 app data 这个文件夹里, 再将我们压缩包里的这个文件夹直接拖过来, ok, 这样一来我们就破解完成了,我们打开 a 一来看一下,打开 a 一之后呢,我们在效果里直接找到我们的插件,然后在这 这里就可以看到我们的插件了。然后第三个插件是我们的摩卡插件,它是一款独立的二 d 跟踪软件, 他可以产生二维立体跟踪能力,即使在很艰难的短片拍摄中,他也可以节省大量的时间。我们点开我们的文件,然后找到 v 版,找到我们的压缩包, 同样点开文件,打开我们的安装方法,可以看到他的安装步骤,我们直接点开安装程序,等他安装完成 好的。安装完成了之后,我们来到安装方法里的这三个文件, 假的, 然后接下来是我们的第二个, 在接下来是我们的第三个, ok, 安装完成了。好了,在全部安装完了之后呢,我们打开 a 一再检查一下。打开 a 一之后呢,我们在效果里找到摩卡, 然后就可以看到我们的 moco pro 已经安装上了。接下来呢我们来安装红巨人的粒子插件,这款插件里面呢包含了我们最出名的 p 粒子 particular, 但是这个插件男装呢就不能帮到大家,因为我的电脑已经装了批离子,他不允许我再覆盖安装,大家只需要点开这个插件里面的按钮,然后应用程序就一直继续下去就可以,然后到了中间某个地方,他会让你输入序列号, 然后我会把序列号呢也放到文件夹里,大家只需要输入随便的一个一个序列号就可以破解所有的插件,然后点击继续完成安装就可以了。最后一个就是我们的 c 本插件, 也同样是一个描边光效插件,我们点开 c 位,然后直接点开我们的应用程序, 好,当我们显示成功安装之后了呢,就把我们的破解文件呢放到我们的插件目录下,我们来到插件,然后找到 v 六这个项目, 然后将我们的 c 本呢直接替换过来, ok, 这样一来我们所有的插件就安装完成了。打开我们的 ae, 我们在效果里呢搜索 sater 也可以看到我们的 c 位是安装上来的,我们新建一个河神,然后我们新建一个纯色, 将我们的霹雳子呢放上来, 大家可以看到我们的 p 粒子呢是正常显示的,这次的插件呢 我都会打包放在我们的公众号下,大家只需要去公众号里回复相应的关键字就可以拿到下载连接了。分享不易,所以请大家多多一键三连支持一下我们下次分享教程,再见。拜拜。
164🌈🌈 05:56查看AI文稿AI文稿
hey, i'm davie welcome to the freak react overview video in the coming videos, i'll be showing countless ways to use freak react to get the most out of your audio visualizers and motion graphics, but first we're gonna keep it simple with a circle, a circle may seem like a boring place to start but there's actually a headed world of reacting waiting for us we could react a scale we could react the position or maybe the stroke thickness the color and the opacity there's so many options and that's only while using two of the reactor types so enough preamble let's begin this is our audio layer and this is how it sounds we'll start by selecting it and creating a profile in this example, we'll be reacting to the kick drum, so let's name the profile kick if we wanted to create a profile that was only the duration of our current work area we would select work area however, in this case we want to react the entire duration of our audio layer so let's select full layer and hit create we've now entered into the profiles of spectrum view this is where we'll select frequencies in the audio spectrum that will end up driving our reacting effects it's worth taking a moment to explain exactly what an audio spectrum represents an audio spectrum is nothing more than a graphical representation of sound the x axis displays the frequency it hurts from low to high, while the y axis displays the ant multitude or loudness of the frequency bands the spectrum can be broken up into three main sections base in trouble, it's important to keep this in mind when you're trying to find sounds that you wish to react freak react has a selection of frequency presets so we can quickly find our sound let's change it back to base lower the frequency height and hit play right away, it's very easy to see the bulk of the kick drum frequencies let's grab the range box and place it roughly over top when placing the range box we want to make sure we position it in a way that makes the preview bar go all the way up and all the way down certain reactors might not function properly if this bar isn't reaching the top most of the time it's good to try to extend it as much as possible, but it can also be useful to squash it in certain situations this looks good, let's bake it now we're ready to react as we've seen just about any property inside of after effects is reactable it can react let's select our profile choose the scale property for our circle and hit react free c react now prompts us to choose one of the eight reactor types we'll start with pulse the reactor is added to the effects pane on the layer where the property is located for our scale reactor if we turn off only the x intensity, we get a warped effect only on the x scale value, but we want it to be uniform so let's match the x and y intensities since we gave the intensity slider a positive value it's adding to the original property value if we give it a negative value, it will take away from the original value let's keep it positive all right this is getting close to how we want, but i think we can spruce it up a bit with mods each reactor has a unique set of mods and some mods can only be found on certain reactors such as the elasticity mod on the elastic reactor we'll be doing a full rundown of each reactor and their accompanying mods in the next video for now let's just add some decay the decay mod essentially cushions the pulse effect when it is returning to the base value very nice freak react also makes it really easy to stack reactors let's reselect the scale property and hit react once again this time let's check out the wiggle reactor let's turn it up go into the mods and crank the wiggle speed so now we have weird wiggly circle thing this is kind of neat but not exactly what we're going for so let's delete this reactor we can accomplish this by selecting the reactor hitting delete and then hitting refresh in the freak react ui okay so let's quickly add some more reactors let's throw a pulse on the stroke thickness and you know let's get a little fancy let's react the color of the circle the steps color reactor is extra special each time time the snare hits it will step into a new color and we can choose how many steps to cycle through for instance if we select four steps, we can see it cycled between the first four colors let's keep it at two and set the colors to the signature okay with that i think we've covered the basics the next video is all about the different reactors and what they're each good for see you then。
11风花雪月 07:25
07:25 01:28
01:28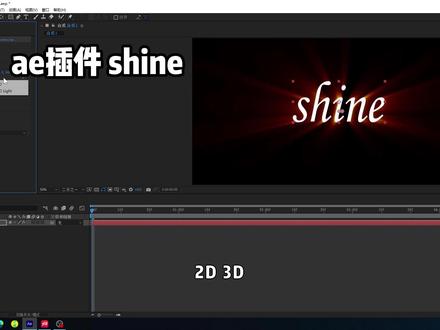 00:52查看AI文稿AI文稿
今天我们学习一下 a 一插件,下一我们新建一个文字图层,效果里面找到下一,然后可以看一下他的参数原点, 控制他的方向的二 d, 三 d, 有三 d 灯光,有二 d 灯光。看一下我们单词是啥意思, 色线长度用的最多的可能就是这个 colorad, 我们改成单色光,是白光一个,我们可以改,改成三个光,随便改一个看看, 看见没有一些细微的变化。一般的电影开场的就会用到这种效果。扫射原不透明度就是原图层的透透明度,这个就是光线的透明度。
420程序员会AE


猜你喜欢
最新视频
- 227可为