blender怎么做流线型线条
你有多少次坐在电脑前,幻想设计你的下一个头盔、机器人、宇宙飞船或未来盔甲?使用吃 conna 专门打造的流线型硬面模型建模工具,您可以快速轻松的进行设计,快速制作流线科幻风格硬面模型,以绒球的方式进行建模,更加方便快捷,提高工作效率。
粉丝9172获赞20.2万
相关视频
 02:11查看AI文稿AI文稿
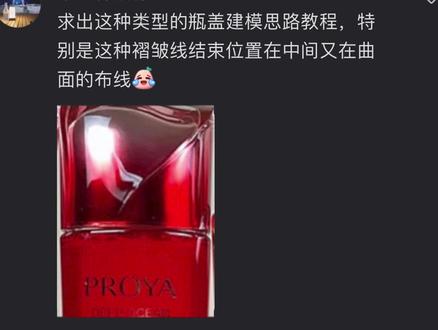
粉丝提问,这种瓶盖咋做?兄弟你这图也太糊了,我又找了些参考,你看是这样的吧,这个好整,点赞关注教程,巴巴适适的开始 分析下特征。这个模型的基本体是个圆柱,然后顶面这里有点小复杂,需要改一下布线的走向才能做出目前这个效果。 操作开始。第一步,建立圆柱顶点十六,删掉顶面与底面,进入边模式,选中顶部循环边面山格填充, 调整布线方向。第二步,面模式, alt 加 z 透显,选中这些面。 h 隐藏面点模式,进入前视图,开启衰减编辑,滑动鼠标滚轮可以调整衰减范围, gz 向上移动位置 out, h 恢复面显示。第三步,选中这些点, gz 向上移动, s 放大 选重点 g g 滑动位置也可以 g z 调整下高度, k 切刀,重新调整下布线,选中不要的边, x 熔并边, 下面可以 ctrl 加 r 卡一条边, s z 零打平,保持一下这里的结构。 第四步,添加表面细分,修改器物体模式,右击模型,选择自动平化着色编辑模式,选中这条边, ctrl b 倒角调整下参数,大功告成! 如果你也有剑魔相关的问题,可以在评论区给我留言,我会搞一个投票,来挑一些大家比较感兴趣的内容做后续更新,不要忘记关注和三连哦,下班!
366Blender地势坤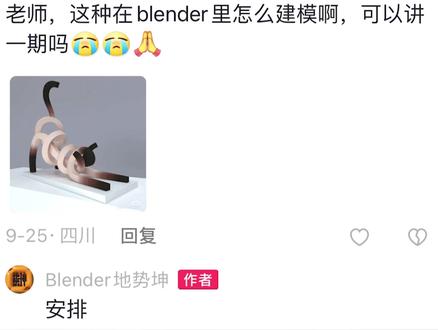 02:42查看AI文稿AI文稿
这种模型怎么做?我在网上找到了原作者的作品,他的作品里面大部分都是用线条去概括各种各样的这种动物啊,这种风格还是挺有特点的。那要怎么做呢?点赞关注我们巴巴适适的开始。 首先在前述图中载入参考图, shift 加 a, 新建路径曲线, 点击数据几何数据,倒角轮廓,调整下深度参数,记得勾选封盖。选中曲线上的点,将模式改为适量,拖到右上角, 进入编辑模式。选择曲线上的点,调整位置,调整的时候可以多试图进行观察,在前视图调整位置贴合 得到参考图。在透视式图窗口选中点, g y 移动位置,这样可以让曲线拉开空间感。 e 挤出顶点可以让路径变长, 可以多次调整一下视图的角度,看一下曲线是否合理。 选中做好的线条, shift 加 d, 复制一层,进入编辑模式。删掉大部分点,只留三个点就可以。这样做的好处呢,是可以不 再次调整曲线的粗细以及形状,接着重复上面的操作就可以了。这个案例唯一的难点就是需要将曲线的空间感营造出来, 曲线调整时注意不要与其他的曲线产生重叠效果, 看一下现在就做好了。 如果有剑魔的问题可以在评论区给我留言,我会挑些大家比较感兴趣的内容做后续更新,不要忘记关注和三连哦,下班!
521Blender地势坤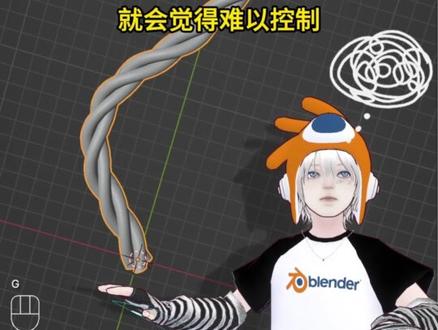 01:21查看AI文稿AI文稿
曲线是非常强大的工具,可以让你轻松创建各种复杂形状,但如果不了解曲线的原理和操作方法,就会觉得难以控制。不要再浪费时间了,今天姊妹就用一分钟向你展示如何使用曲线。 曲线有两种主要类型,贝塞尔和 nervous 曲线。进入编辑后可以发现,贝塞尔曲线在控制点上,而 nervous 曲线在控制点外。他们的控制方式都是一样的,点选控制点,按 g 移动、 二旋转 e 挤出或者选中笔工具直接进行绘制。曲线属性处可以调整曲线分辨率,结合数据处可以增加挤出和倒角,增加分盖 活动样条线处可以让曲线首尾相接或者延伸至断点。 ctrl t 对曲线进 扭转。 outs 用于修改粗细。右键里可以对曲线进行类型切换以及控制柄切换。如果想把曲线转化为网格,只需要点击物体转换网格,就能方便进行进一步编辑。怎么样都记住了吗? 这还只是曲线知识的冰山一角呦!如果你是一名布兰德初学者,想学习更多基础知识,不妨查看一下这本布兰德三 d 保姆级基础入门教程呦!感谢你的观看,我们下一集见!
2271zimon3d 01:46
01:46 03:18查看AI文稿AI文稿
样条线在不蓝的软件里面的用法很多人不习惯,比如这个贝塞曲线,点击一下,哎,一个弯弯扭扭的线,感觉控制起来就很不方便。 其实是可以拿任意一个物体的边线来当做样条线的,就拿这个吧, shift 加 d 就复制出来了。甚至于啊,连线都不需要,可以选择任意一个点,按意见就可以拉出一根线的,就是这个 e x q 就是挤出的意思,然后用这根挤出的线 来当做样条线来制作啊,你可以继续啊,选择他的点啊,再按一下 e 键,哦,又拉出一根线了,再按一下 e 键,中间锁定一个方向, e 键鼠标锁定一个方向, 异键鼠标锁定一个方向啊,最后你甚至可以吸附到这个点上,按一下 f 键,就可以连成一个墙体了啊。再最后, 你还可以选择任意几根线,比如就这几根线吧。意见,然后又可以挤出一个墙体的,当然可以选择所有的线啊。 好,如果你觉得这种锁定方向不方便,你还可以这样子,比如说这个点,意见拉出这根线啊,你可以意见拉出线的时候直接按 esc 取消,这个时候他就在原位置上面得到一个点 线了。你是可以直接按照这种呃坐标的这个横平竖直的方向拉出去,就可以拉出这种横平竖直的线了。意见 esc 取消啊,你如果手速快一点,左手速度快一点,你看啊, e esc, 然后鼠标闪了一下,对吧?那你直接拉过来,然后这个点 f 键,哎,就可以连接到一起了啊,这里还可以吸附,呃,对齐一下,再选择任意几个面吧。那我们就选择任意几个面意见 挤出一个墙体,让大家演示一下。选择,再选择一个面意见,又可以挤出一个墙体的厚度了,这样节目是不是很方便呢?你也可以几个墙体一起选择 hot 加一键,这样子可以挤出一样厚度的厚度啊,当然了,也可以用修改器来增加厚度啊。这个我在那个展台设计的这些课程里面,大量的应用到了这种,呃,叫做厚度的修改器。 三 d max 软件里面这个厚度的修改器的名字啊,叫做壳那个修改器,在这个软件里面呢,它叫做实力化这样的一个修改器,但一般我也不会这样去建模的,在我的课程当中,我大量的应用到了直接用平面来建模, 比如说就这个墙体吧,咱就可以拿这个平面啊,选择这个线啊,选择任意一根线拉出来, 选择这根线一键挤出一个长度,中间可以锁定方向哦,选择这个线一键挤出来,假如你想在这里挤出,你可以哎切一刀,然后再来选择这里一键挤出啊。如果你觉得鼠标的中间锁定方向还是不方便,你仍然可以在 挤出的时候 esc 就取消它,然后你再用这个坐标的方向横平竖直的来切。嗯,选择全部外面的一圈标,可以按住 alt 键点选一下,他就选择了外面一圈,按下 e 键就可以向上再挤出了。 然后你可以选择几个任意几个面啊,挤出他的一个厚度,当然了,可以直接用修改器来挤出厚度,这样是这样是更方便你去修改的,不知道这样的操作对你有没有帮助?
652朱小橙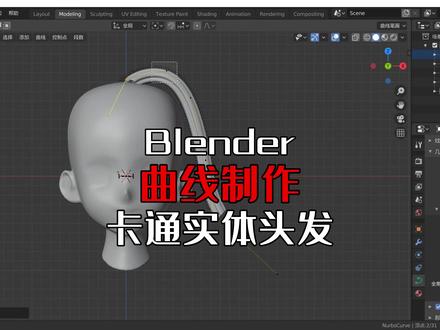 08:19查看AI文稿AI文稿
下面我们来说一下在 band 软件当中如何去制作长卷发,那制作长卷发它需要有两类线条,一个是路径线,一个是抛面线。 好,我们先把头部模型给他,在大杠试穿中关闭他的显示,然后到添加菜单这里取线,这里给他去添加一根 novas 这个路径线,然后呢再给他去添加一个贝塞尔下面的这个圆环,这个呢调节起来比较方便。 现在我们需要把这个泡面线给它竖的稍微小点,按一下 s 键,好直接把它拖的比较的小, 然后再把头部模型给它显示出来,再选择住这个路径线。选择路径线以后,首先我们先把它 移动到他的边上,按一下键盘上的机键,再按小半小键盘上的数字键。七,可以给他切换到顶式窗,再按机给他去进行这个 移动啊,移动到这里以后,我们再选择他按一下键盘上的 r 键,给他去进行一个旋转啊,再给他切换到比如说前视窗,再去给他, 好,再按。二,进行旋转的时候,我们再按一下 x 键,让他呢去呃朝到这个轴线上去进行旋转,那这样子的话就可以把它竖过来,然后再按小键盘上的 这个数字键九十,再按下小灰车就行了,那这样的话这个路径线呢其实就已经竖起来了,然后我们再按击,把它放到他的这个头的这个附近,再给他去进行稍微旋 转一下,这样的话呢,大部分的这个位置呢,其实就已经可以了,我们再按下小键盘上的数字键。三,把它 转到唇侧面,再按几给他移过来啊,这样子就已经是可以了,就说准备的差不多了,然后接下来我们还是要把头部模型给他隐藏掉,那我们需要给他呢直接按照这个 路径线,然后呢再把它的抛面给它挤出来啊,那我们首先先要选择住这根路径线,选择住这根路径线以后, 我们再到属性面板的这一个地方啊,物体属性这个地方,然后呢把他的几何数据给他全栏打开,打开来以后再倒角这个地方其实是可以去进行选择,或者说拾取,可以使用他的 吸管去吸取你的这个想要呃这个深层的这个泡面线的这个效果啊,单击一下,或者说你直接在这个地方去进行点选,点选以后,那这里呢就可以去进行选择了, 好,我们选择它,然后使用吸管到这里来去进行吸取一下,看一下, 好吸去以后没有什么反应,我们再到大钢丝窗这里单击,先选择住路径线,然后再到这里去进行选择,或者说再使用吸管去吸应该就可以了,这样的话呢一根这个管子就行了,但是呢它上面没有什么造型, 那在接下来要调节的就是他的抛面线的造型,还有你的路径线的上的这个造型。首先呢我们先把抛面线上的造型给他 来调一下好了,我们选择住这个啊圆圈,然后呢给他进入到他的这个编辑模式,我们按空气键加推广键啊,进入到他的编辑模式,现在呢他的这个点呢就有点少,所以说你不太调节的出他的这个造型 啊,调是可以调,比如说你看我们现在给他把这个点给他选的住啊,给他按击去进行调节一下, 移动一下啊,他就可以调节出稍微扁一点的这种造型,但是这个呢太简单,我们可以这样啊,直接选择住所有的点,然后呢给他找到段数细分,这样子的话点就多起来了,我们再选择住这个 它的几个角点上的这些点,给它按一下 s 键,让它往中间去进行收缩啊,然后这些地方呢,你可以把它 稍微把它拖的大一点点好,按击键就拖的稍微平一些,或者说直接给他去进行一个放大 好,再按下 x 键向两边去进行放大,这样的话更简单。你看这样子,一下子我们这个呃路径线上的这个实体模型啊,他就变得比较有细节了,当然我们还可以再做的稍微复杂一点点啊,把它做些尖锐的角啊,或者是怎么样都行,这里呢就不再演示。 好,再接下来我们把这个头部模型给他显示出来,再看一下,那你要做出长卷发,对吧?那你肯定这个线呢,或者说路径线太短了,我们就选择住前面这个点,按一下键盘 上的字母键一,让它再去变得长一些。然后呢你再给它去进行这个位置上的调整。好,我们这里给它切换到正前方,按 g, 这里上来点好,下面呢还可以再去挤,可以多挤一点。 好,这里你再给他移上去,移上去好,不停的按击键,让他去进行这个移动嘛,这些地方 啊,稍微去匹配一下他的头型,这个地方 好,再往下其实就可以稍微让它卷起来一点点 啊,这是正前方的这么一个调整,其实这里啊还可以再给他再挤一次的 啊,大家想看快捷键的话,在这个整个屏幕的左下角,其实有啊,大致就调成这样。 好,那这只是这个正前方,然后还有这些角度上他也都是需要去进行调节的,他并不是说都是在同一个平面上的嘛, 这样的话呢,这个地方我们就继续去可以调节了,比如说他这个向后去微卷,这个力呢,把它往前啊顶上呢,这里也稍微调节一下, 往前。好,这样的一个 s 型曲线效果去调一下。好,那再还有一个需要调的就是它的粗细变化,对吧?我们可以选择,比如说它上面的某个点,然后呢按下 alt 加 s 键,你可以再直接使用鼠标左键拖拉,把它变得这个细一点点。 好,这里呢也一样,稍微粗一些,上面的这里最粗一点点。好,到了顶端再把它变得稍微细一点点。好,按 alt 加 s 就行。 好,那有些时候可能还需要有一点点这种旋转吗?他一般来说这种卷发他都会卷起来啊,自身旋转,所以说到了这里呢,我们可以按 ctrl 加 t, 选择这个点以后再推拉啊,不要转过了,往这边 添加 t 啊,这个转的有点方向不对。 好,这样子呢,就有了一个这种一束的这种卷发效果,那其他的这种头发卷发的这个发梳呢,也都是这样子去进行制作,我们可以退到这个物体模式下面,然后呢选择这根曲线啊,你给他 ctrl c, ctrl v 啊,它就复制出来一份,然后再给它移出来,然后移出来以后,那我们再进入到这个编辑模式,照样 可以继续去进行这个调节,所以说就非常方便啊,使用这种方法去制作这种长卷发,特别是,呃,这种实体的卡通头发。
5923D建模 01:49
01:49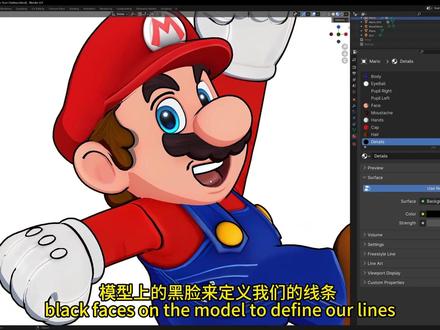 16:34查看AI文稿AI文稿
creating line art in 3d is essential if you want to create stylized renders more and more 3d studios are creating stylized movies and they all use line art in some way to enhance the visuals so today i'll walk you through seven different ways of making line art in blender let's start off with one of the most common ones and this is called the inverted hull technique the basic concept is that we expand our mesh then give it a black material then we can invert this expanded mesh and give it a special material so that instead of blocking the main mesh it will show up behind it we can do this in blender by adding a solidify modifier if we change the offset to one you'll see your mesh inflate now let's go to the materials tab make a new material and change it to a background shader this is just a shader that doesn't react to any lighting in our scene now make it whatever color you want the most important part here is to enable back face culling in 3d software your model will have a front and a back face we can see this on blender by enabling the face orientation overlay anything that is blue is a front face and red is a back face so when we enable back face calling we're telling blender that we want to see through any faces that are backwards now go back to the solidify modifier we can invert the mesh we can do this by flipping the normals under the normal's tab now we just need to assign our material blender does this with slots so just increase both of these numbers until your outline shows up in my case i have nine materials so i'm using the ninth slot you should now see your outline and you can change the size of it if you need to we have a pretty nice outline but you'll see that there are some areas that don't look right because we're expanding the mesh this expanded mesh is actually intersecting other parts of our model so you need to go into edit mode and move parts of your model so that the outline isn't intersecting anymore we can also get creative with the outlines by defining the thickness of them using a vertex group instead of having a constant thickness i'm going to create a new vertex group called thickness and in weight paint mode i'm just going to use the gradient tool and draw a gradient on the model now back in the solidify modifier, we can use this vertex group and you'll see that the outline changes based on our weight painting you can also control the influence of this vertex group using the factor input this is great for removing certain areas that don't look good or making certain lines thicker all you have to do is paint the thickness using weight painting this method is great for getting outlined it's not so good at doing details but the great thing about this is that we can export this directly into a game engine and it works perfectly if we do however want to add some details to our character we can do this by simply using materials using a black material we can go in and start setting the materials on certain faces of our mesh to add lines this is as simple as it gets all we're doing is making black faces on the model to define our lines we can then go into edit mode and if we press g twice, we can slide the vertices to change the thickness of our lines if you want some specific shapes we can use the knife tool k and cut whatever shape we want then we just assign the material to these new faces this method is great for getting sharp detail but it does rely on the topology so you may have to change your model for the lines to work correctly this next method uses something called vertex colors most game engines of 3d softwares can use vertex colors in interesting ways for example some older games use vertex colors to act as lighting for the scene before game engines were powerful enough to have lighting systems and ray traced lighting an artist could go in and paint the shadows and light using vertex color to give the illusion of more detailed lighting so back in blender instead of going to edit mode or sculpt mode there's another one called vertex paint blender four of window has made this process very easy so everything's already set up for you if you want, we can also enable the wireframe overlay to allow us to see our wireframe now you can start drawing in the model to see our lines on our original texture we can go to the shader editor in here we can add a color attribute node and select the vertex colors that we just created now if i mix these with our base texture, we can see our line art by default all the lines are quite blurry, but we can fix this by selecting faces in edit mode and then in vertex paint mode we can enable the face selection paint mask now we can draw and it will stay within the faces alternatively if we press ctrl x we can set the vertex colors for the selected faces until they sharp this way now you can start modifying the topology to suit your lines you might need to move some vertices or cut them with a knife tool and then you can select these faces and invertex paint fill in the lines alternatively if you didn't want to have to select the faces each time you could just paint your vertex colors with the brush and then in the shader editor you could add a math node change it to greater than zero and this will give you sharp lines based on your drawing you would still have to adjust your tepology to suit, but it's quicker than selecting faces each time the benefit to this method over the materials method is that this is non destructive so instead of changing the material for certain faces our material stays the same, but we can go in and just change the vertex colors in certain areas to create our line art it's not useful for every model, but it's a valid approach and it's flexible next up is a more creative way making linear and that's just drawing on a texture you'll have seen this method using games like borderlands and the telltale games and all we're doing here is drawing the detailed directly onto the models texture we can switch over to the texture paint tab and at the top of the window find the texture slots button change it from material to single image and if you have an existing image select it from the drop down menu or you can create a new one now all we have to do is start painting on our model to create sharp lines we can change the fall off of our brush to the square one and this will make the brush sharp depending on the resolution of your texture you might end up seeing the individual pixels and that's one of the downsized this method it's very quick and easy to create the line details but to get plain lines you might have to create a 4k or 8k texture which can lead to memory problems eventually also if you try and close blender it will give you a warning telling you you that you've some unsaved images just make sure to save these otherwise you lose your progress a lot of games have used hand painted textures to create some very stylized results so, if that's what you're after the texture painting is perfect for you the next method uses floating planes that sit just on top of the mesh you can see here that i have some mesh planes for the eyebrows and mouth these are actually just hidden inside the model and when i animate the face i just move them outside so they're visible this is one of the better ways to do lineart because these lines will be very sharp we're not changing the main model and we also have the freedom to manipulate and move these mesh planes however, we want you can create these planes very easily by selecting some faces of your model we can then duplicate them with shift d and inflate them with alt s this will push them out slightly now we can shape this like any other mesh you can make it thinner by pressing using g twice to slide vertices you can merge points together with m and if there's not enough detail you can select your edges and bevel them with control b to smooth out any harsh angles then just give them your lineart material and you're done this is one of my favorite ways to do line art because it's so expressive and if you animate your face you can see these lines appearing and disappearing which gives it a really nice effect also all of this transfers over to game engines so you can have these really expressive lines in your games and they're very efficient because they don't add too any vertices to your model and they don't require any high resolution textures or special materials these last two methods are both blender specific so they won't work in any other software the first being the grease pencil the grease pencil allows us to paint on the model similar to texture painting, but this time we're not painting on a texture we're painting virtual strokes on the model and these strokes don't exist as a mesh the simple way of drawing of the model is by creating a new blank grease pencil object and with this object selected in the top left you'll see there's a new draw mode button that specific to grease pencil objects now with the draw brush selected you can start drawing in your scene you can change the brush of the top left to get some different looks you'll notice that the lines are floating in space so to fix this we can change the stroke placement at the top of the screen to surface and now we can draw on the model you might need to change the stroke offset if the lines are intersecting with the mesh or if they're too far off the mesh, but we can now start drawing our details one cool thing about the grease pencil is that we can apply modifiers to the lines in the modifier style of the grease pencil object we can choose from a number of different effects to make the lines more dynamic and stylized i'll keep this simple and just add some thickness variation to the lines with the thickness modifier we have to do here is enable the uniform thickness checkbox and then go to the custom curve section you'll already see the lines changing, but if we make the curve into a hill like this then we can see that the ends of the line are thitter the cool thing is that these modifiers will apply to any lines you draw from now on one other modifier that we can add is the line art modifier and this will be the most useful modifier for most people because by adding the line art modifier and changing the source type to scene assigning about the layer and material you'll see that your whole scene now has line art if you don't see any lines that's because this is all based off of the camera view so, if your object was seen isn't in view of a camera then it won't work if we move this modifier above the thickness modifier you'll see that all these new lines now use the same thickness curve i'll walk you through a few of these settings for the line out modifier because some of them are very useful underneath edge types you'll see a bunch of checkboxes and these determine how and when the lines will show up let's just disable everything and go one by one at the top we can change what way the lines are detected are they detected based on the contours of the model or do they only show up on the silhouette of the model in certain use cases you might only want an outline along the silhouette of your character the crease threshold doesn't really do anything you can try changing it on sometimes it might help the big one is intersections in blender as far as i know the line art modifier is the only way to detect and draw lines where two objects intersect material borders is fairly self explanatory it just draws a line where two materials meet the next one is my most used and i think the most versatile and this is the edge marks to see how this works we need to go back into edit mode i'm just going to select a few edges and now if i press ctrl e and go all the way down to the bottom there's two options that you probably never noticed before mark freestyle edges and clear freestyle edges let's mark these edges and they'll turn green and then if we go back to object mode you'll see that we now have lines showing up where we mark those edges if any of the other methods don't draw lines where you want you can go and mark the manually this is great for getting fine control over what you want your lines to show up the grease pencil is one of the easier methods because of the line out modifier and because we can see exactly what we're drawing but the big downside to this is that lines that are drawn manually are not attached to the mesh so when we move our character these lines won't move you compare them to the object and then the lines will move with it, but if you try to animate your character with the rake or shape keys the lines won't follow so play around with the grease pads of modifiers because you can get some pretty cool effects, but now we'll move on to to the last and my favorite method of drawing vine art freestyle ever since greece pencil came out a couple years ago people have forgotten about freestyle, but i think it's the best way to do line art it doesn't do everything like intersections, but you can get some really cool results with it let's start off with just enabled freestyle and we can do this in the render tab all the way at the bottom of this menu there's a checkbox called freestyle click it and then press f12 to render your scene rendering is the only way to see freestyle as it's a post process effect so it won't show up in the viewport you can already see that we have some lines, but it's not perfect, but we can delve deeper into the settings under the view layers tab again at the bottom of this menu we have all the freestyle settings the first one that we're going to change is the crease angle we can turn this up or down see the effect that it makes turning it down will show fewer lines because fewer lines will be above the threshold and turning it up will mean that every line will get rendered you have to find a balance but anywhere between 100 and 140 is always a good starting point then we can scroll down to the edge type settings you'll recognize most of these from the greasepencil lineart settings, but again just play around with them go through them one by one and see what effect they have that's the best way to figure out what each setting does i think the most useful one similar to the grease pencil is the edge mark setting if you're ever not seeing a line where you want to you can go in and press ctrl e and mark them as freesaw edges i'm going to leave everything at the default settings from now and skip a few sections and go down to free style geometry the geometry section is where we can manipulate the image before the lines are drawn and it will determine how and when to draw the lines by default it's set to sampling which just samples the original render image, but we can add modifiers to this let's just do something simple by adding the pearl and noise 2d modifier render your image and you can see the effect it's had so now we've taken the original image and added some noise to it, but let's say i want something more sketchy i want my lines to be a bit more rough and not follow the render exactly so instead of using the sampling modifier remove it and add the guiding lines modifier make sure to put it at the top of the list like regular modifiers they operate from top to bottom now you can see that instead of sampling the original image the guiding lines modifier is just detecting some of the points from our image and drawing straight lines between them this doesn't look great, but we can change how long these lines are back in the free style stroke section change the chaining type to sketchy and then under the splitting section we can sell freestyle how long we want the lines to be using the 2d length off now if we render, we can see some sketchy lines go ahead and change the length of the lines to change how rough and sketchy they look we can make these lines look even more sketchy by changing the thickness under the freestyle thickness section you'll see once again that we can add modifiers to this and we're going to add an a long stroke modifier and i'm sure you can imagine this will allow us to change the thickness of the line along the stroke, but instead of just using linear mapping we can change this to a curve this curve represents the stroke length on the x axis and the stroke thickness on the y axis, so if we make our curve into a hill like this we can make the ends of the lines thin and the center of the lines thicker we can also change the opacity of these lines under the freestyle alpha section to make them a bit more see through and then we can also add a noise modifier to the opacity to have some variation now we get something that looks a lot like sketchy pencil one of my favorite features is under the freestyle color section the material modifier will allow us to change the outline color for different materials so we could get some cool colored pencil effects where different parts of the mesh have different outline colors we can do this by going to the objects material properties and once again hidden at the bottom of this menu is the freestyle line section i have a few materials so i'm just going to change the freestyle color for all of them and now you'll see when we render all of these sections now have different colors so now we have some cool sketchy lines but i also want to add a nice thick outline to my character so another great thing about freestyle is that we can have multiple types of lines using line sets i'm going to rename this one to sketchy and add a new one with the plus icon now we can control all the settings of this new line set without changing the sketchy one i'm just going to make this an outline by enabling only the contour checkbox and making it a bit thicker now if we render you'll see that we have our sketchy lines and our thick outline you can also reorder the line sets because they're drawn from bottom to top so if something isn't showing up correctly you can move them around so that they're drawn in the right order this is one of the really powerful things about freestyle that you can have multiple sets of lines so you could get some cool effects where different parts of your scene have different line art maybe you want the edge marks of your model to be thin and sketchy, but you want a really strong outliner on your character or even have a character with completely different line art style you can do all of that with line sets the last thing i want to mention about freestyle is that if we enable the freestyle lines as a renderpass we can actually do compositing and the lines will be completely separate so if you wanted to generate sketchy outlines group characters you can do that with render renderpasses or if you wanted the lines to blow or maybe you wanted the main image to have the new blender forp until coohara filter will keep the lineart clean you can do that with freestyle and renderpasses so there you have it seven ways to generate lineart and blender, but keep in mind you don't just have to use one of these methods mix them together solidify is good at outlines grease basil can do intersections mesh planes can give you nice detail and textures are quick and easy to draw you'll see at all of these examples that i'd use multiple methods to achieve the final result and hopefully now you know what the different methods can be used for so play around with lineart have fun and thanks for watching。
115CG99设计网


