blender静帧怎么合成
粉丝15获赞216
相关视频
 00:26查看AI文稿AI文稿
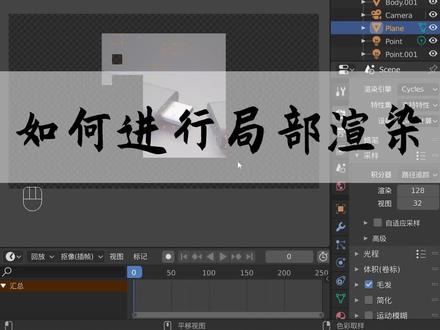
整张竞争渲染出来的时间会比较长,当我们只需要看到局部效果的时候,我们可以使用快捷键 ctrl b 来框选一个区域,这个时候再按 f 十,他只会渲染这一个局部的效果,这样可以节省不少的时间。 取消这个局部券,只需要按 ctrl out 加 b, 这样就取消了。
1296坚果OL的Blender笔记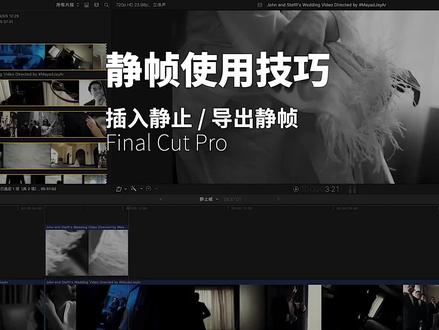 00:39查看AI文稿AI文稿
今天分享三个竞争的操作技巧,一、选择视线线某一针画面,按快捷键 open 加 f, 插入当前针,会自动生成一个静止的画面,可以根据需要在编号设置里调整静止图像的持续时长。 你可以选择事件中浏览条位置的竞争,按 opert 加 f 就可以覆盖到第二时间线上方。二、按 shift 加 h, 可以创建一个两秒钟禁止分段,选择此数,可以根据需要调整禁止分段的时长。三、导出竞争,选择需要导出的画面,右上角导出,添加目的位置, 双击存储当前帧,选择需要导出的格式,然后就可以输出单个画面了。如果觉得太麻烦,也可以直接截屏。
1369N12影像创作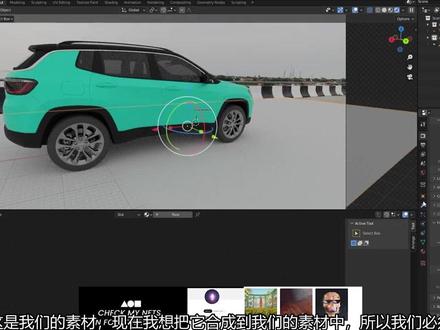 19:08查看AI文稿AI文稿
if you're really interested to learn blender and want to create some amazing modern cz art then check out our core speeches modern cz ad it's available now the link will be in my video description thank you so hey guys what's up in pc here and welcome back to another excited blender tutorial by the end of this tutorial you have your first vfx video i will share all the decorate to make a visual effect short so makes how the people who are watching this video right now, i'm sure they are going to create their first visual effect short, so i will guide you how you can easily do it without more hustle we will go stay by step so if you stuck any time in future you can come back on this video and it will help you i will also say a worn up my pro tape, which i mostly use in my all the visual effect short let's give this video so let's get started with part one how to suit just grab your smartphone or your camera and find a empty place? because i don't want to make you trouble in the beginning that's why just find a empty place and try to capture a footage with a slow moment don't move your camera or smartphone too much a record attend to 22nd clip and that's it let's move to the part two which is how to track your footage dragging is very necessary whenever, you are going to make a visual effect short but a moving scene because this way we will extract the same camera motion inside 3d and the 3d camera motion allows you to currently compose 3d elements over your 2d footage so this is the step which you have to take care of so we have two options either we can use blender itself to track our scene which is absolutely amazing but what is the better than this we can use after it because after effect has a effect which take a few seconds to you know just recovers in so we will use after effects so let's jump inside after effect in both here for this right click and interpret for this and make sure to check the frame rate and if require you can change it like in this case i have 30 fps which is then just simply drag and drop your footage onto this icon and it will help us to create the exactly same regulation and also the frame rate so after this just by pressing controllier as you can save this project file because we need it in further steps after that you can just simply go to the effect and preset and just search a 3d camera effect, breaker effect and just apply this onto our foot days and wait few seconds until the process has been completed and after that you will see some of the clients stick onto our foot days so just select few points and make it set ground plan and origin and this will help to decide where our floor is in 3d space after that select a few points again and create solid and camera you can select few more and do the same step and this way we have a 3d solid into our scene and also our 3d camera which we talked earlier to extract it from our clip so now if you want to see our motion and our camera is correct or not you can simply select any foot taste and apply a grated effect onto that foot taste and just preview it and now you can see so now we've done the second step we are going to use blender to make our 3d stuff so we have to transport this tracking data inside blender we'll use a add on call a to blend i will put the link in my visual recipient so you can go and check this add on it's amazing tool, so first open blender and delete all the steps by selecting and clicking on the delete button and go to the idit preferences add on and here you can just simply click on the install menu and install your add on i already installed in my pc so this is the interface of a to blend add on so now we have to select our camera inside after effect let's see you to reveal the prop forties with sift or with control you can just copy and come back inside the blender and there is an option called create camera you just click on that button and it will create a 3d camera now you can see camera animations start from 0 which we don't want so i can select pressing by pressing ai can select all the keyframe and just drag one step further so now it will start from frame 1 and go to the end and just change the frame output properties and here we can change the resolution and make sure to change the frame rate according to a need in this case this is party and after that you can just click on this camera button and it will show you the viewport through the camera and you can see there is a motion now we have to transfer this ground so i can select the ground and reveal the transfer form and just select the four parameters from the beginning and copy it and go insert the blender and click on this button called create plane and it will create a plane so this looks good and let's save your blender project now select your camera and let's load our footage here so that we have a proper visuals where our 3d scene will be how it will look etc so we'll select the camera go to the camera menu inhale background, mss add ms and movie clip and open click on the open and now let's loaded for this year and make the opposite to one hundred percent i mean one and make it fit and let's play it and now you can see the motion is not amazing this is happening because our focal length inside blender is different from our original focal length which we use so we'll go back again entirely after double tap on the camera and here you can see that is a focal length of 18.28mm, so we'll copy this and come here and paste it and now if i'll play you can see it's perfect so now there is a few issues about the orientation this is this is good, but i want to make it more good orientation of our scenes so create a cube and place it on the lane first select lane and then press shift and select your camera transform and in the end select cube with the shift control and just control p and choose object and now if i will select our cube and if i will rotate scale you can see our 3d grade is also be having according to this so this way we will not just make our 3d orientation perfect you can also scale your plane so now the second part is done complete so the part three is how to place your cz car or cz of opposite so i am using sketch fabrics amazing it form which provides us a lot of amazing 3d models so i will find one 3d car model and i will download it i will put the link in my video description and by the way i will also set this present file on my patreon pace so if you are interested you can just go there and download it and thanks the people who are supporting me there are a lot of reserves file already available and there is a bunch of more benefits which you can get so after downloading just extract it and go to the file import and be careful so whenever you download any 3d model there are a lot of 3d format just like fbx obz so you must have to choose the correct one which your model has so in this case our model has gltf so we'll just click on gltf click on the import now, just wait don't touch anywhere and just place aim and it will help us to create a separate collection with the selected object, just click on the new collection and just rename it to card and so now our card is transferred into the card collection so now we can easily select it by right click and select objects and it will select everything and we can scale it by pressing s and i can press r z to rotate it into z direction and we can also select it and press r y to rotate and make it perfectly ever the plan and that's it let's play and check if it's working or not this is an amazing feeling whenever you drag your scene correctly and if you place anything it will look amazing so in vfx dragging is everything because if you have a bad drag it will not look good doesn't matter if you have a good model, good lighting, good exiting so adjust the size location and once you think it's done let's move to the lighting part and for the lighting what i did here is a prototype guys you can also use a hdri, which help us to light up or 36 in with 360 degrees so we suit this clip so whenever you suit your clip you must have to capture a 360 environment of dead place that will help us to blend more realistic you can use a google street view i think this is a application for android application and i hope it is also available for iphone so you can use that application to capture a 360 i use google camera you can see on the screen we captured a 360 environment just click on this icon and it will this is a rendered view and i will go to the render mode and i will change the render injured from ev to cycle because cycle is the real part of tracing render which need to render ours in the realistically, which bounce or light realistically, so we'll choose the cycles and we'll choose the device from cpu to gpu so first down the sample if you work sample to 32 and click here and go to the seder editor go to the environment tab and here i will load an environment click on the color and choose environment texture and click on the open and load our 360 environment and now you can see instantly it's looking like its place on the same location will make it more good change this object to wild and here i can select it and press ctrl 3 and it will only work if you have enabled node wrangler into add on so, and you can rotate the g direction to find a perfect frame where your car is and just leave the environment there this is a 360 environment, but we want to see our footage so we'll go to the render mode and go to the trim and enable transparent and now this is our footage and now i want to composer this into our foot taste, so we must have to disable our plane, but we want to catch our ambient acclusion and shadow so we'll select a plan go to the object properties and go to the visibility and enable saddle catcher and it will only work i think in cycles, so make sure you enable cycles i hope you are enjoying this tutorial and please hit the like button if you are really enjoying this let's move on guys let's select our card model and just change the color from this color to black and you can also play with the roughness and metallic because i want to make our card look metallic, so i will increase the metallic value and i will down the roughness it will make our reflections start not blurry and if you want you can also play even more and and then i will also say one more trick to make it even more good and same thing i will do with other part just like the car wills alloy rings just make them more glossy and let's take it hope it's looking good this looks really good so this is a pro tip which i'm going to say now so listen carefully so now let's select our ground plane and create a new material for that and just import or foot taste and plug it as a base color for that increase the frame and enable cycle and outdoor refresh i'm doing this because i want to make the same reflection same color, which is available onto our deal ground which is there so that way our c z pads same light bounds, which our extra futez has i hope it makes sense guys let's pen torti and here you can see there is a texture coordinate just change it from uv to the window and that will help us to you know just basically whenever camera move to a different frame it will take a different frame and it will project it there, so it will update all of it just like our video, so it will not it will look good basically if i will use our ground plan only white and i will make the sandal creature enable sandal creature, so it will catch the sandal and a mint a glues, but it will not cast the same light bounce and it will not cash the same color on two other footage which is very necessary to make things more real so i hope this prototype will help you guys so before moving to the rendering part i have few things which i adjusted after the tutorial which i am going to include into this part so for making it more good or here it is some of my more tips which will help you a lot so you can select your car model or car paint material just like you just need to select it in this material the same and here if you'll see this is the default one which does not look good but if you're down the roughness it will look good also, but what i did i just simply downloaded a texture control sift and click here you can see this is a surface imperfection texture which has some you know some cracks or some lines you can see some dirt in all and with the color ramp i can you know just make it like i can cross it and make it look good whatever, i want and just pat it into this into a roughness and it will help us to get more realism like here you can see which we commonly see into our real life footage and also with the tire what i did i simply here you can see use a downloaded or dirt texture online and i mix with a blacker color here you can see with a blacker color and with the factor with noise so some part will be a dark texture and some part will have a black and with the mix and i plug this into the base color so this is the two things and in the last you can go to the world and here i also added a gamma so by default it's one but if in your case you want to do few things just like i'll come back here if i want to make it two so let's make it two and you can see this is chanzing environment gum actually so it it is very you know just beneficial in some cases if you want, so you can definitely try it so this is it let's move on to the next part so this is part five how to render so for rendering go inside the render settings and change the render regulation to 256 because 256 is more than enough if you want more, you can just increase it let's go to the output you can also change the frame range from start to indefinite wired and go to the output and decide a location where you want to export it and you can also change the high format so here i'm going to use png because i hope you are making the first visual effect short so i don't want to complex this process, but there is another way to export these things with more freedom, but this is very good if you are trying first time, so make sure to choose png and if you want you can just down the comparison and change the color depth from 8 to 16 but i'm going to render with this default settings just go to the render and you can render animation and it will take some time to render out your entire sequence as a png once, you've done just open your same after effect composition which we tracked earlier and press double tape or simply right click import file and import your siguance by selecting the first frame make sure png sequence is inable and click on the import button and it will import it go to the integrate footage and men and reach it if the frame rate is exactly the same and just drag and drop into our comb and now you can see we don't have to do anything and this is looking absolutely amazing but we'll do some minor tweak to make it even more like our cz shorter alloys surper than our extra footage so we will use a fast bucks blur effect and make the blood release to one and it direction to one and use a sarpan effect to make it sarp you don't have to use sarpan in your footage because i am using because in my footage, my camera has a little bit of issues which he always try to make or for this more crease or sarp i think so so that's why i'm going to use a sarpan and i will increase that effect until i will satisfy it's not a huge thing, but it will make a such a difference and this will make your shot looks even more good i'll increase the serpening amount even more and once you think it's looking good just you can also add a chord's effect to play a little bit more this is the final result i hope you really enjoyed it and once this is complete you can come back inside blender again save your save as your footage with a new name and we can import a new model just like a car, a sport car or a buy and we can render it and everything is same so we don't have to change anything we just have to take care of of text sharing and that's it so i hope you really enjoyed this video and i hope now you can easily create your first riso effect short, which is absolutely amazing and please whenever you do whenever you make something tag me on instagram using as did it or hashtag mps3d i would love to watch your result and if i like it i will definitely sear it with our community thank you so so much for watching this tutorial and i hope it is informative so this is it for now guys please i'll see you next time bye bye。
3赛过人 08:25查看AI文稿AI文稿
终于来到了最后一张渲染合成片,在本章呢,我们会了解一些 blender 的合成器的基础用法, 然后我们最后再一起把我们之前做的这个小场景渲染成一张张的图像序列,最后用 blinder 把它合成一个视频。首先这节课呢,我们先了解一下 blinder 合成器的基础, 那什么是合成器呢?通俗来讲就是给你这个视频加视觉特效,你就这么理解吧,他是一个给视频做美颜,做 ps 的一个工具,他不光是降个噪,调个色这么简单,他可以加非常多天马行空的特效。其实不是所有东西都需要自己去建模,自己去做的哈,比如说下个雪啦,放个火啦, 还有我们这个场景里面那个小萤火虫乱飞,你完全可以用现成的素材,然后合成到你这个视频里面去,就不需要自己做了,而且还省资源。 一般做合成我们有单独的软件,比如说 after effect, nuke feeling 这些,但 blender 为了省去你在各个软件之间转换的麻烦,它也集成了一个合成器,可以满足你大部分的基础特效需求。那我们来看看 blender 合成器是怎么用的吧。首先我们打开我们之前做好的那个文件。 好,那合成器在哪里呢?如果你想找到合成器的话,你可以找这个右上角把这个窗口切换成合成器,或者你也不用转换,直接点这个合成的标签,如果你是英文版的话,这个叫 compositing。 我们之前讲了,在不论这里面万物都是一个节点系统,合成器其实也是一个节点系统,那怎么没有看到它节点呢? 把这个窗口往下拉一点啊?好,打开合成器,没有看到节点的话,你需要勾选这个使用节点,那你就看到这个背后的节点系统了。那这个合成器的节点系统到底应该怎么理解呢?有同学可能就说,那我不学这个合成器,我不是一样 可以渲染出来吗?你为什么要搞的这么复杂?道理是这个道理,就是如果你不需要什么调色,也不需要加什么特效的话,其实你完全可以直接忽略这个功能,就直接输出就好了。但是我觉得一个基础入门课程,这个合成记还是要给你提一下的,就是你以后肯定会有这个需求的。 这个其实很好理解,合成就是一个输出节点,就是合成这个输出节点呢?他接受到什么样的东西,你 f 十二渲染出来结果就是什么样子的。那这个渲染层呢?就相当于你做了这个东西的星图, 有什么东西都没加,什么滤镜啊,美颜都没加,就是现在我们看到这个节点的样子,就是你中间什么都没有,那合成器是干啥呢?合成器干这个活就是在你这两个中间加各种美颜滤镜,然后把你美美的包装出去。 那你现在应该能够理解这个合成器的节点系统是什么个逻辑了啊?很简单。好,我们来看一下这个合成器的使用步骤。首先第一步你要找到一个位置,选出 一张图来,就是一张圣图出来,你都要给他一个东西吧。好,我们就选这一针吧,这一针挺漂亮的,我们 f 十二渲染一下, ok, 渲染出来了,我们回到咱们那个合成器吧。哎,怎么什么都没有啊?这是因为我们还少一个东西啊,如果你要看到咱们渲染的预览的话,你要给他连接一个预览层。好,我们 shift a 选择输出,然后选择一个预览器。 好,我们把咱们这个星图的信号呢给一份这个预览器,然后你就能在背景里面看到刚才你选出来这张图了。那怎么去缩小咱们背景这张图呢?你可以按着 v, 然后他就会不断的缩小。对,然后怎么放大呢? alt v 就是放大,然后就这样放大了。啊, 好,那这个时候呢,我们就可以给咱们这个声图也就这个渲染层和这个输出中间加各种的特效了。为了方便预览呢,我们可以按着 shift, 然后右键在这边划一刀,划出来一个连接点,然后我们把这个连接点点到咱们 这个预览器上,那这个时候你在这边加任何东西话,就预览器上也能看得到,然后输出也能看得到,这边可以添加很多特效哈,比如说你想调节他的对比度,你可以到这个颜色里面添加一个亮度对比度,对吧?你就可以添。哎,更改这个颜色,然后他可以马上就显示出来。 好,我们靠这 x 删掉。好,其实你用 r g b 曲线其实更容易点,我们给它添加一个 r g b 曲线,然后把它拉到中间, 然后这个时候你就可以通过更改这个曲线的去更改他的这个对比度了。你可以点击 m, 可以暂时预览没有这个节点的效果,再按一下 m 就恢复了。好,我们考虑 x 把它删掉。好,除了这种曲线条件呢,你还有很多滤镜可以选择,比如说我们在这边 shift a 新建一个灰光的滤镜。 好,加上去之后,你这边所有亮的地方呢,就变成这种小星星。当然你可以调整各种不同的灰光的一种风格哈,我们考虑 把它删掉。好,刚刚我只是举了几个简单的例子,让大家理解一下合成器是怎么回事,它其实还可以通过更复杂的节点结构去实现更复杂的特效。感兴趣同学呢,可以在这一个方向继续深挖一下。好,接下来我们来讲一下 blender 合成器的一个降噪效果。 好,因为我们现在当前用的是 ev 渲染器嘛,这边自动勾选了石头降噪,所以看的不明显,我们切换成腮 cose 来讲,这个降噪 好,赛克的渲染器,这边采样,这边有一个视图的采样和一个渲染的采样,他现在当前的渲染的最大采样是二百五十六,然后降噪是打开的状态。好,我们可以 f 十二渲染看一下。 好,塞口子渲染会比 ev 渲染要慢很多哈,我这边还是那视频加速的状态,我现在是用的是一台幺零八零 p 的一台电脑。好,你看他慢慢的越来越清楚,他可能到最后的时候呢,他会再给他加上这个降噪,你看, 那他最后是这样一个效果,这一张图渲染两分钟。好,为了对比呢,我们这个 store 一,我们先不用了,我们换一个 store 啊,我们换了 store 二。哎,这个 store 二是我刚才用那个 ev 渲染过的哈,你的 store 二如果之前没有用过,应该就是空的。这个没有关系啊,等会我们重新渲染的时候,会把这个 store 二给冲掉。 好,我们回到这个渲染设置,我把这个渲染采样调成五十。好,我们 f 十二渲染看一下。好,刚才我们二百五十六采样的时候,我们渲染大概两分钟,然后这个五十呢?我们看看多少哈。好,大家注意这个画面哈,他现在还是在比较低的采样,现在只采样了二十六,然后到四十级,然后最后几件时候突然 啪便清晰了。哎,你看他这个只用了三十秒,我们可以比较一下 slow 一跟 slow 二的区别啊。好,现在的 slow 二它的采用率是五十,我渲染花费了三十秒,那我们切换 看到四道一采用率二百五十六,你能看出来区别吗?根本看不到区别对不对?所以你明白为什么我们要把这个降到构学上了吧?你的采用率设成五十还是设成二百五十六,其实在最终结果上区别不大,但是速度上快了四倍。所以以后你不要再傻傻的把这个采用率设的越高越好哈, 哪怕你的电脑很好,你要大概试一下,比如说我三百确实很清晰,那我修成五十能不能达到跟三百差不多的,那这样一下子可以省五六倍的时间,那不是更划算吗? 就无论你用 ev 还是 cycles, 这边的渲染降噪一般都是默认勾选上的,但有时候的项目呢,我们需要就是拿到生图,就是我需要他没有降噪的图, 所以这个时候你可以把这个降噪的勾选去掉。然后呢,你可以渲染看一下啊,我们把这个渲染的这个最大太阳改成故事哈,你不要改到上面去了,下面是试图它,你改它没用,你要改 下面这个。好,改完之后我们 f 十二看一下哦,你看他这个就渲染完了,他就没有那么清晰,他最后也不会做降噪,他其实有很多的这种噪点,看到没有?好,我们把它给关掉。好,你看你的合成器窗口,他会自动刷新,就是你最新的一个渲染效果, 没有关系,你要生图吗?我就直接给你一个生图,然后你自己加降噪器。好,我们 shift a 新建一个滤镜降噪。好,我们把这个降噪拉到中间,你等一下啊,注意看这下面 降到跟其他不一样,他有一个过程啊,你看马上就清晰了,对不对?好,这个时候你还可以加其他的一些效果啊,比如说我给他新建一个 shift, 新建一个镜头的奇变吧。 好,你要等一下的哈,没有那么快,因为你这边有一个降噪,他会做一个降噪处理,喏,他才会显示出来,因为 m 先把这个降噪暂时没有的掉,这个时候呢,你随机 改这个镜头级别呢,他会同步显示,他就不会有这种延迟,因为降噪是花时间计算的吗?所以你带着这个降噪节点的话,他就会有这种延迟,你可以等你这所有参数全部调好之后,等最后再把这个降噪节点打开,点击这个 m 把打开,然后让他做一个降噪, 等一下啊,哎,做好了,好,这堂课呢,主要就给大家介绍一下咱们的合成器的用法,让你对这个工具大概有一个了解,以后你可以往这个方向上继续去深挖, 伦德的这个合成器呢,也做的相当的细,比如说你可以到这个水珠层里面,你可以看到这里面有非常非常多不同的通道,这就意味着你可以通过这些通道做一些非常非常细致的这种视觉特效,如果你对这个 v fx 视觉特效很感兴趣的话,你可以在这方面研究一下。 好,这堂课我们就先讲到这里,下堂课我们就可以输出杰克啦,我们下堂课见 cut chips。
400KurTips 14:43
14:43 01:34
01:34 02:56
02:56


