斑马ZT610打印机裁切线怎么调

粉丝111获赞537
相关视频
 04:33
04:33 04:31查看AI文稿AI文稿
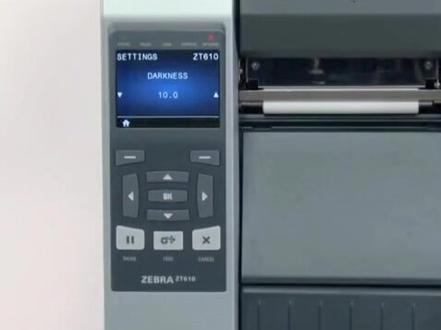
手动戒指校准 手动校准 ct 六幺零和 ct 六二零 dange ziber 建议您在更改戒指类型后校准打印机对于大多数戒指类型,自动校准就足够了。 为了使图像位于戒指上的正确位置,我们必须先识别出戒指中打印机要检测到的特征,然后确保打印机中的传感器以配置为检测这些特征。如果戒指有间隙,也称为网纹、孔眼或凹口,请在菜单中选择间隙凹口。 如果戒指底部有黑色标记,请在菜单中选择标记。如果戒指是连续成卷,戒指没有起始位置特征,请在菜单中选择连续。请注意连续戒指上的标签长度由 正在打印的文件控制。在菜单中设置传感器类型对于黑色标记戒指,将传感器类型设置为反射式。对于所有其他戒指类型,将传感器类型设置为透射式。装入戒指和色袋,确保戒指和色袋已完全插入。 如果打印机使用了任何戒指处理选配件,如玻璃或切纸器,请在以下模式下进行校准。如果戒指有间隙,也称为网纹、孔眼或凹口,请确保传感器处于能够识别该特征的最佳位置。将传感器一致光穿过凹口或孔眼的位置, 尽量避免将传感器置于孔眼或凹口半径范围内。如果戒指不是简单的矩形,如圆形,请将传感器置于标签前部的上方。如果您正在另一侧使用戒指进行打印,请尝试让传感器远离打印位置,以免传感器出 线读取错误。选择菜单选择 dange 选择传感器,选择手动校准选择开始校准。 打开戒指门, 轻触下一步。打开打印头总成,轻触下一步,取出色带 轻触下一步,找到并调整戒指传感器, 轻触下一步。从打印机中拉出大约二百毫米八英寸的标签, 从被称上撕下大约一百五十毫米六英寸的标签, 轻触下一步,移动被称直至其位于戒指传感器下方。 轻触下一步,关闭打印头总成,轻触下一步。 取下多余的被称轻触下一步,按下校准。开始戒指校准。 开始色带校准。打开打印头总成,轻触下一步,装入戒指 轻触下一步,装入色袋, 轻触下一步。关闭打印头总成。按校准, 撕下多余的戒指,关闭戒指门, 按暂停按钮,已恢复打印。按禁止按钮,已测试校准。
22斑马技术支持 01:30查看AI文稿AI文稿
更换色袋,更换 z t 六幺零或 z t 六二零打印机上的色袋。当前面板显示屏上出现色袋用尽消息时,请从打印机中取出用过的色袋。打开戒指门。 如有必要可以切断或折断色带。打开打印头总成,逆时针旋转色带拾取轴,已卷绕用过的色带。将用过的色带从色带拾取轴上拉出并丢弃。 将空拾取卷从色带供应轴上拉出并丢弃。将新的色带卷装到色带供应轴上, 色带朝打印机背面悬挂。将色带置于打印头下方,然后将其卷绕到色带拾取轴上。 转动色带拾取轴,以收紧色带松弛的部分。 关闭打印头总成,关闭戒指门。
11斑马技术支持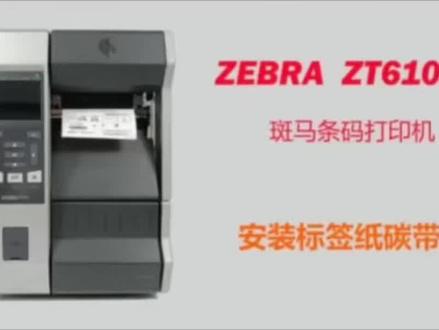 05:23查看AI文稿AI文稿
斑马 ct 六幺零条码打印机安装标签纸,碳袋安装标签纸,标签纸装入纸卷架并推到最里面,打开打印头,根据穿纸路径指引纸张从后往前,从打印头底下穿出 旋钮调整导纸器到纸张边缘安装碳袋,碳袋供应轴装入碳袋,注意碳袋的转向和穿越路径,碳袋从下往上包住打印头,然后回收轴回卷, 关闭打印头,开启电源, 打印机默认会自动校准感应器, 没有报标签纸,探代错误的话,标签纸和探代就装对了。给大家讲一下我们斑马 j t 六幺零屏幕上的一些简单设置。首先我们开机之后,他的状态呢?是英文状态,那我们给他设置成中文,更加直观的可以进行看了解,那点击这个语言, 选中我们的锦鲤中文,然后返回,返回到主页面就可以了。接下来我们再点菜单进去,我们先看一下这个打印机符号设置这里我们可以点打印字样进去, 这里我们看到我们可以设置他的一个打印浓度,以打印的一个速度,包括一些纸张类型等等,在这里设置。接下来跟大家讲一下如何打印自检页,在第一个 菜单这里我们点设置进去,拉到最下面,这里有一个打印系统设置这里我们就可以打印质检页了, 可以看到我们之前已经打印出来了。接下来我们跟大家讲一下如何恢复出厂设置,在这个系统设置打印制营业这里上面,这里有一个恢复默认值,我们点进去啊,点光源打印机,你确定就行了, 走两张空白纸之后,打印机就恢复到出厂设置了,可以看到他现在已经恢复到之前的一个英文状态了。给大家讲一下我们斑马 j t 六幺零是如何通过按键来给大家做一个打印自检液以及恢复出厂设置的操作的。首先我们将打印机关机,我们打印个自检液呢,我们就按住这个取消键 不放手,然后再打开单机电源,等到纸张动的时候,我们再放开我们的手, 可以看到我们的自营液已经打印出来了,接下来给大家操作一下如何恢复出厂设置,同样的我们先将打印机关机, 在关机的状态下,我们两个手指同时按住这个暂停键与静止键不放手,同时按住,再打开打印机电源, 同样的等纸张动物之后,我们再翻开我们的手, 打印机会做几张空白纸,然后就完成了一个恢复出厂的设置, 可以看到我们现在打印出来的标签,右边这里呢是比较清晰的,而左边这里呢是比较模糊的,那这种左右两边清晰度不一样的效果呢?一般是因为我们打印头压力不平衡造成的,那这时候我们就检查下打印头压力,我们打开我们的打印机侧盖,然后拨开我们探袋, 这里呢就是我们调节打印头压力两个旋钮,我们调节打印头压力可以给他调大一点,因为我们是右边,呃,左边这里不清晰, 我们调节左边这个打印头 可以操作。之后呢我们再把探探弄回去, 然后再打印几张看一下, 可以看到他现在两边都可以打印的清楚了,给他讲一下我们斑马 j t 六幺零提示借制用完这个问题的解决方法, 首先如果有这个提示的话,我们检查一下我们的后台安装,看一下我们的纸张是否已经用尽,可以看到我们的纸张还剩下很多,那检查完之后我们再检查他的标点纸类型有没有选错,我们现在呢是一个连续纸的, 那么点进菜单这里,点击第三个打印机符号,第一个打印质量这里进去,我们看一下我们的纸张类型, 找到纸张类型这里可以看到他现在选择的是间隙者类型,跟我们现在实际这个连续者类型是不符合了,所以说我们要修改一下我们的纸张类型,我们点进去纸张类型这里选择连续,然后再返回主界面,然后再打开 关闭我们打印头,按一下暂停键,他就恢复到一个正常的代替状态。
102── 人间日落🌇⌵ 01:48查看AI文稿AI文稿
lift the media door open the printhead place the ribbon on the ribbon supply spindle and push it back bring the ribbon under the printhead and wrap it around the ribbon take up spindle turn this findle to remove any ribbon slack turn the media guide adjustment, knob counterclockwise place the roll of media on the media supply spindle push it back feed the media under the dancer simply through the media sensor and under the printhead feed the media through the cutter turn the media guide knock clockwise until the media guide touches the edge of the media close the printhead adjust the optional cutter tray rail and stops for your media size close the media door set the printer to cutter mode select menu settings print mode cutter press pause to start printing。
9乐动川河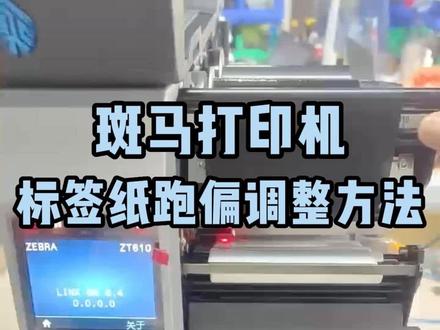 00:42查看AI文稿AI文稿
我讲一下 jt 六二零标签纸,标签纸跑偏啊,一般是向右这样子跑啊,往右这样子跑的原因啊。 他的走的过程中会往右跑,那么你就注意他这个两个压力阀啊,这两个压力杆, 他的这个力度一般就我们调在稍微偏中一点的位置,稍微要有一点压力压住他,然后他的注意他的重心要稍微靠左啊,像这样子调,他的重心是靠左的, 他重心靠左,他的表现只会往左边啊,他不会往右边跑,你如果两个都在这边,他表现只会往右边跑,所以他的重心要靠左跑偏,就是这个原因。
102立象条码 01:55查看AI文稿AI文稿
安装切纸器, 在 z t 五幺零、 z t 六幺零和 z t 六二零打印机上安装切纸器。在本视频中,我们以 z t 六幺零打印机作为视力,但 z t 五幺零和 z t 六二零打印机的操作过程是相同的。关闭打印机电源,并断开电源线和数据缆线。 从打印机中取出所有戒指和色带。请自行佩戴防静电设备。将打印机放置在接地的防静电垫上。打开戒指门,拧下打印滚下方的螺钉。 拧下前面板,直拧螺母, 提起前面版。 将切纸器的安装支架划到安装螺柱上。安装安装螺母, 将切纸器蓝线连接至打印机。 将切纸器与卡舌对齐,然后将其划入打印机 安装切纸器的安装螺钉。 将接盘放入安装槽中。关闭戒指门, 切纸器安装完成。
 04:04查看AI文稿AI文稿
it's recommended to calibrate the printer whenever you're changing your media type for most media types auto calibration is adequate please look in the comments section for a link to the auto calibration video in order to place the image in the correct position on the media you must first identify the features in the media, you'd like the printer to detect second, you must make sure the sensors in your printer are set up to detect those features most media contains features that identify the start position first select your media sensing feature in the menu, if your media has a gap, also referred to as a web or has holes or notches select gap notch in the menu if your media has a black select mark on the underside of the media select mark in the menu if your media is a continuous roll with no start position features select continuous in the menu please note that the label length on continuous media is controlled by the file you're printing second set the sensor type in the menu for black mark media set the sensor type to reflective for all other types of media set the sensor to transmissive now load the media and ribbon make sure the media and ribbon are fully inserted if you have any media handling operations, such as a peel line or take up cutter or rewind, please calibrate in those print modes if you're using media with the gap, also referred to as a web or hole or notch you'll want to make sure your sensor is in the optimal position identify that feature move the sensor to a location where the light passes through the notcher hole try to avoid locating the sensor under the hole or notch radius if your media is not a simple rectangle such as a circular shape locate the sensor over the leading part of the label if you're using media with print on the underside try to locate the sensor away from that print, so the sensor does not get a false reading after you have the sensor properly located select media ribbon calibration in the menu press the right select button under the display to start be careful not to press the button more than once if your media has a gap, also referred to as a web remove labels and rewind the role to ensure only liners under the media sensors if your media has holes or notches or is a continuous role with no start position features remove the media entirely if your media has a black mark on the underside of the media, please ensure the black mark is not under the mark sensor if you're using ribbon, the ribbon must be removed from the ribbon sensor location on the inboard side of the printer close the printhead when you've completed these steps press the pause button to continue when the printer has learned the correct settings, the display will show a reload all message when reloading the media and ribbon make sure the media and ribbon are fully inserted be sure that the ribbon is located under the ribbon sensor if your media has a gap hole or notch be sure that the media and not the gap or whole or notch is under the media sensor if your media has a black mark, the black mark position does not matter be sure that the media is installed correctly reloaded the supplies close the printhead and press the pause button to continue the printer is now calibrating media will begin exiting the printer when calibration is complete, the label should stop in the correct location you can check that your calibration was successful by pressing the feed button and ensuring media feeds to the correct location if you were using special or custom media and having issues calibrating make sure it meets the media specification if this video is helpful and you'd like to see more videos please like this video。
23乐动川河


