r9-290怎么安装dx12
你知道目前 diy 市场显卡工号最高的是哪一张吗? rtx 三零九零泰坦? rtx 四? no! no! no, 都不是这张所在。铝合金保险箱里的 amd 二九二九五叉二 了解一下?官方标称 tdp 为五百瓦,但实际运行工号可达七百瓦,相比较而言啊,满载四百瓦不到的三零九零就是小弟弟了。而这么高的工号来源就是这张独特的双芯芯片,两颗二九二九零叉的芯片合金,且制成为二十八纳米,成为了最大的发热工号来源。 虽然一张二零一四年就发布的显卡,但其性能放到现在也能有略强于 gts 一零七零的水平,但是这个工号已经完全不和性能成正比,一百一十五瓦工号的笔记本 rts 二零六零游戏体验即可吊打之。

粉丝118.0万获赞3409.8万
相关视频
 07:38查看AI文稿AI文稿
welcome to shamano technical education upon completion of this module you will know how to install and adjust the twelve speed road front and rear di two derailers always refer to the appropriate dealer manuals they can be found at semono com required tools can also be found in the manual and remember always wear safety glasses before installing the derailers perform the chain measurement and route all wires from the location of the battery to the derailer mount locations on the frame install the derailer either directly to the braze on on the frame or to the smad ninety one band clap find the correct location for the support plate if required if the support screw will contact the frame install the plate remove the derailer install the support plate and then reinstall the derailler install the derailler and band clamp to the frame position the outer plate one two three millimeters above the tallest tooth of the large chain ring and the rear edge zero point five to one millimeter inwards from alignment to the ring tighten the fixing screw and if necessary the band clamp two five to seven newton meters connect the wire to the derailer with the plug cover set the wire in the cover like this and then push the plug into the derailleur turn the support screw until it touches the support plate or band clamp then turn it until the rear edge of the outer plate is aligned with the large chain ring install the derailer to the derailer hanger by the standard method or direct mount the bracket axle plate must be removed for direct mount check that the stopper plate is in contact with the v tension stop tighten the fixing screw to eight to ten newton meters slide the rubber cover over the wire and use the tl e w three hundred to install the wire into the derailer set the cover firmly against the derailer if the cable guide is used route the wire like this then install the chain following the dealer manual and chain installation module after pairing with the shifters place the rear derailer in the largest sprocket adjust the distance between the sprocket and guide pulley using the b screw set the distance to fourteen millimeters for an eleven twenty eight and eleven thirty tooth cassette or six millimeters four and eleven thirty four tooth cassette if available the gg adjustment gauge can be used to set the distance place the chain in the fifth gear position from the largest sprocket while watching the led light on the derailer press the function button for two to five seconds until it turns yellow it is ready for adjustment while turning the crank use the up shift lever switch designated as x here to move the chain inwards until it lightly touches the fourth sprocket and makes noise press the down shift switch designated as y here five times to move the chain outwards the driller is now in the target position press the function button for more than zero point five seconds or until the led turns blue to move back into normal mode shift through all gears checking four noise in each position readjust the derailer if noise can be heard shift the derailleur to the largest sprocket use a two millimeter hex wrench to tighten the low limit screw until it just touches the stopper shift down a few gears and then back to the largest sprocket if there is hesitation in the shift the limits screw may be too tight readjust if necessary shift to the large chain ring and smallest sprocket use a two millimeter hex wrench to tighten the high limit screw until it just touches the stopper then counterclockwise one full turn to allow the overstroke in the shift shift up a few gears and then back to the smallest sprocket if the derailer does not slightly over shift and come back over the sprocket, the limit screw may be too tight readjust if necessary there are two adjustments for the high limit, one performed in the smallest sprocket and the other in the largest sprocket there is one adjustment in the low limit, it is performed in the smallest chain ring and largest sprocket place the chain in the largest chain ring and smallest sprocket while watching the led on the derailer press the function button until the light turns yellow it is ready for front derailleur adjustment press the switches as needed to place the inside of the outer plate zero point five to one millimeter from the chain press the function button for more than zero point five seconds or until the led turns blue to move back into normal mode place the chain in the largest sprocket press the function button until the light turns yellow press the switch as needed to place the inside of the inner plate, zero point, five millimeters from the chain press the function button longer than zero point five seconds to go back to normal mode place the chain in the smallest chain ring and largest sprocket press the function button until the light turns yellow press the switch as needed to place the inside of the inner plate zero point five millimeters from the chain press the function button longer than zero point five seconds to go back to normal mode shift through all the gears and readjust if needed and that's it。
251北京顺义美利达自行车 12:22查看AI文稿AI文稿
对不起, 没有 see you later 啊 啊。
770蓝图变速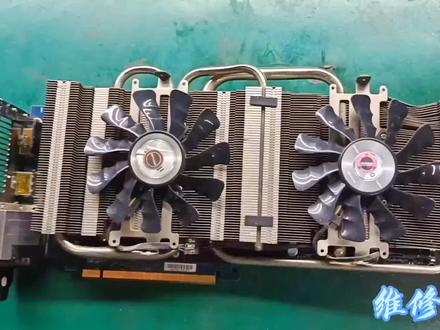 04:19查看AI文稿AI文稿
大家好啊,咱们今天来看一下这一张显卡,这张显卡呢是 r 九二九零,是一张 h i s 的,我也没有听说过这张显卡,第一次修这张卡,客户描述呢是花瓶,那么测试显存呢,是 b 一报错。 那咱们接下来就进入正规的操作流程,先把显卡拆开,然后换一颗显存上去。这个卡里面还是可以的啊,显存都是有散热贴的,那咱们把这一条散热贴拆掉,嗯,方便咱们操作。 拆掉以后,咱们先给坏的这一颗显存做一个标记,免得待会搞忘了是哪一颗。 接下来呢,咱们就拿出加热台,把显卡进行一个加热,再用风枪加热,把 显存拆下来,拆下来之后咱们就换一个新的上去。这张卡也是一张多灾多难的卡,耽搁了不少时间,那么具体的维修呢,咱们在后面就可以完整的看到的了。 接下来咱们先把这一颗新的显唇装好,装好之后等温度冷却下来,冷却下来之后呢,咱们就把它装起来,装起来之后上机试一下显唇有没有爆错。 这里可以看到啊,显存是已经不报错了的,不报错了的话,咱们就进系统跑一下甜甜圈和三 d 还有鲁大师,看一下具体情况。 那么可以看到啊,这里一进鲁大师之后就黑屏了。黑屏之后呢,咱们又跑到显存测试这里来,他逼又爆错了,又爆错之后呢,我一开始怀疑是我这个显存换的不好,然后我就又换了一颗新的显存上去。 好,这里已经上好了。上好之后呢,咱们等他温度冷却下来。冷却了之后,咱们就把显卡装好,装好之后再上机跑一下显存测试,看一下还会不会爆错。 好了,激动人心的时刻就要到了,咱们看一下结果, 结果还是报错还是报错,那就没办法了,那就怎么办呢?就只能怀疑核心了, 这种情况的话,就还有一种可能就是核心虚害,核心虚幻的话呢,因为涉及到动核心,所以呢需要先跟客户商量一下, 那么经过跟客户探讨之后,客户也也是同意咱们对核心进行一个加焊,那么加焊的过程呢?我就没有拍视频了,因为在另外一个位置,那加焊完之后,咱们就对焊盘进行一下清洗, 清洗完了之后再用万用表测量一下电杆的组织,看一下加焊完有没有造成短路啊,或者是其他的情况都没有。 那么就可以把显卡装起来,再上机再跑一下显存测试,看一下测试结果 又来了。好,这一次可以看到显存测试是通过了的,那么咱们就进系统跑一下鲁大师,鲁大师这里可以看到十八万分,鲁大师没问题了, 那么咱们再跑一下三 d, 三 d 的话呢,看情况也是没问题的,那么三 d 跑完就可以跑一下甜甜圈,看一下显卡的散热怎么样,温度有没有超高,那么这里三 d 是已经跑完了,接下来就是甜甜圈, 甜甜圈的话呢,温度是有七十二度的,然后客户跟我说他自己买了好的散热硅脂,就他自己收到卡之后再自己更换散热硅脂,那么本期视频就到这里了,咱们下期见,拜拜。
17抽焊烟的老宋 06:56查看AI文稿AI文稿
during this course, you'll learn the bleeding procedure for twelve speed drop bar hydraulic disc brakes free stroke and reach adjustment always refer to the drop bar disc brake dealer manuals they can be found at s i dot shimano dot com wear safety glasses and protective gloves when bleeding a shimano brake system when servicing the brake use only clean genuine shimano mineral oil secure the bicycle in the bike stand parallel to the ground the calipers do not need to be removed from the bike remove the brake pads by removing the retaining clip and unscrewing the pad axle push the pistons gently and straight back with a flat shaped tool install the yellow bleed spacer if the bleed spacer doesn't fit the pistons are not completely pushed back push the pistons back as far as they will go install the pad axle to secure the bleed spacer if the system already has oil in it operate the lever ten times to stabilize the position of the piston pull back the bracket cover from the back side place the lever in the position where the top surface of the bleed screw is parallel with the ground this can be done by adjusting the angle of the bike in the work stand or rotating the handlebar the correct initial position for the lever is important to effectively move air out of the master cylinder and into the funnel remove the bleed screw and o ring and install the funnel prepare a syringe by filling it with shamano mineral oil pull the oil out of the bottle slowly to avoid creating micro bubbles in the syringe remove the bleed boss cap and bleed screw cap from the caliper connect the tube to the bleed boss loosen the bleed screw by one half of a turn and slowly push oil into the caliper watch the oil come into the funnel and stop pushing when you no longer see air bubbles coming through temporarily close the bleed screw operate the brake lever ten times now place the lever in the position where the top of the funnel is twenty degrees to the ground this helps move trapped air from the reservoir to the funnel operate the lever slowly to help air bubbles rise to the funnel watch the funnel and stop operating the lever when you no longer see air bubbles coming through loosen the bleed screw by one half of a turn slowly push oil into the caliper for a second time make sure the wrench as half full otherwise refill the syringe first watch the oil come into the funnel and stop pushing when you no longer see air bubbles coming through close the bleed screw and remove the syringe operate the lever a few times until it feels firm if the lever doesn't become firm there is still air in the system reattach the full bleed syringe and repeat the process when the lever feels firm continue with the next step place the lever in the position where the funnel top is parallel with the ground attach the bottle or plastic bag with a tube to the bleed boss loosen the bleed screw by one half of a turn let the oil flow naturally from the funnel to the bottle or plastic bag gently tapping the shifter brake hose and caliper can help move oil down be careful not to damage these components do not operate the brake lever during this process add oil to the funnel as needed so that air does not get pulled into the lever close the bleed screw when you no longer see air bubbles coming out of the caliper and tighten to four to six newton meters remove the bottle or bag and clean the caliper with a rag and isopropyl alcohol and install the bleed boss cap and bleed screw cap search the oil stopper and remove the funnel install the bleed screw and o ring and tighten to zero point five to zero point seven newton meters wipe off any oil with a rag and isopropyl, alcohol and pull back the bracket cover install the brake pads and the red pad spacer operate the lever ten times to center the pistons install the wheel and center the caliper operate the lever to assure correct brake function adjusting the freestroke will change the levers travel between the initial position and the point where the brake pads contact the disc brake rotor by adjusting the free stroke the feeling of the lever will change pull back the bracket cover from the front side of the shifter tightening the freestroke adjustment screw clockwise narrows the range of travel while loosening the screw counterclockwise widens it stop turning the screw when the free stroke stops increasing loosening too much can cause the screw to fall out or noise in the shifter because of a loose nut adjusting the reach will move the brake lever closer to or further from the handlebar the adjustment screw can be found on the inside of the lever insert a two millimeter hex key and turn clockwise to move the lever further away and counterclockwise to bring it closer to the handlebar。
174北京顺义美利达自行车 01:14
01:14 03:56查看AI文稿AI文稿
hello, 大家好,这里是 cyclone 有 期运动,那么近期呢,我们收到很多博主的测评,还有我们粉丝企友的一些反馈,都是关于我们这一款 spa t 偏心导轮的啊一些问题, 主要的一个问题呢就是我们的导轮出现一个掉链或者是一个卡链的一个情况, 那么其实在我们的详情页呢,都是有提到的,目前我们的导轮呢只支持九速,十速,十一速的一个变速,那么如果说你是用到十二速的话,会出什么情况呢?会在我们一个 小飞还有小盘的时候会出现一个掉链的情况,那么这是一个呃十二速后拨他的一个导板的一个问题, 以及使用单盘的,我们的前面的一个大盘如果说使用单盘的话,目前也是不适配的 小盘,还有小飞的情况下,它也没有出现说一个卡链的一个问题的,那我们再变速看一下小盘带其他飞 也是没有任何问题的,你变为大盘也是没有问题的,变为小盘 再变大盘搭配其他的一个飞飞轮 可以看到也是没有任何问题的。 前后各一个,那么两个都需要装上带我们赛克拉米的,还有英文的是正面捏着两个垫片,然后我们需要掰一下我们的一个导板,然后把我们的导轮卡上去, 这一步也是需要一直捏着垫片的,然后把导板伸过来之后顺势就把导轮和垫片一起塞进去,然后对准孔位, 然后捏紧,再把我们配的一个螺丝给它塞进去,这里的话 螺丝先别扭紧拧过了,然后之后我们需要有一个下拉的动作去回正他的一个位置,然后再去把螺丝给拧紧,固定好他的一个位置,用到扭力扳手设置到六牛去打一个扭力,六牛的扭力就够了。 针对目前现有的一个问题,我们会 重新对我们导轮进行一个升级优化,首先肯定是会将我们的一个导齿做成一个正负齿的,也会去做到是更多的一个套件的一个适配,比如十二数的,或者是说数数连的这一些套件后面也会相 出品。如果已经购买的一个粉丝朋友,还有各位广大的一个用户,你的车不是配我们的导轮的话,也是做出了一个免费退换货的一个政策。感谢各位粉丝朋友 对我们有其运动的支持,最后我相信我们有其运动,会用心守护每一位棋友的安全。
 01:06查看AI文稿AI文稿
雅紫宸安装维罗根,这个是我们的 r 九云台版哈,等一下我们去给大家看一下安装上门的效果。 好趁着师傅在安装哈,给大家去介绍一下我们的这个 r 九的云台版,我们的这个 r 九的云台版它首先还是带有一个 ai 智能管家的,然后其次呢它这里有一个娃娃头, 这个娃娃头是可以上下左右的这种移动的,然后我们这款锁呢,它好同时还是带有哨兵监控的,就相当于它是带有监控模式的。然后还有这款锁哈,它是搭载我们的 g t finger 指纹,并且是有人脸识别,有指纹有密码, 总共呢是十多种解锁方式的这样一款锁啊,如果说你喜欢的话可以私信我们哦。 上门效果来啦,给大家去看一下我们的这个后置摄像头哈,我们这个是四百万像素,非常高清的哈,非常高清的,大家可以看一下。 好,我们的 r 九云台版已经上门安装成功了,大家喜欢这表锁吗?怎么样?喜欢的话可以私信我哦。
 21:305567葫芦军师


