超新星6代滞空纸飞机折法

粉丝2622获赞1.4万
相关视频
 03:43查看AI文稿AI文稿
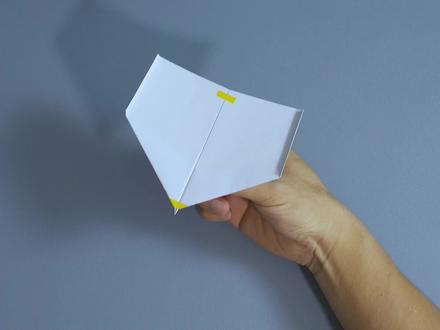
狂飞二十九秒,国榜第六鞋修制空纸飞机能有多离谱?让纯折党和数据党都沉默了!教你折一款能飞很久的鞋!内塞制空短机超新星六 a 五指竖向对折后打开, 再上下对折,将这里的侧边向上翻折至顶边压出,与中线交点。打开标记交点与水平中线中点折出一段水平折痕。 整体打开,使山折面向上,将右上角折向左下角,压出右侧机翼前缘折痕。对称折法折出另一侧, 打开机翼面倒置,将上层立体撑开,向下做沉压折压平旋转倒置,沿上层标记线折痕向下翻折,同时将两侧之翼稍边缘向下翻折压平, 沿下层基翼前缘向上翻折,然后将这个尖角或角分线回折至基翼前缘打开,另一侧相同, 将两边的三角部分裁掉。翻面 这两段折痕裁开,再将这里向中线翻开,将上层两侧同时向中间合起,向两边分别压出折痕后打开,将上方的五边形部分裁掉,再次合起到这个状态,整体打开 翻面,将记忆前缘折痕反折, 整体合起,恢复折叠并塞入内部 压平机身翻面对折机头零点五厘米,机尾一厘米开翼, 打开,机身 粘贴两翼,机头与机尾 一稍,折出约零点四厘米小翼。检查并整理机身 即为起升降座至可平稳滑行完成 使用夹板定型,能飞得更久,赶快折一只挑战一下吧!
1145纸飞君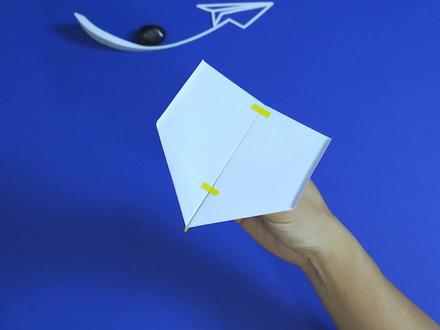 03:15查看AI文稿AI文稿
手感超绝,充放利器,教你折一款飞得很久的风行者!布局是空纸飞机 a 五指才短一厘米,触向对折后打开山折面,向上 两角向中间翻折,中线惯例留空一毫米,上方三角形向下翻折,这里留空一毫米。机头零点六五厘米一稍嫌长,六点三厘米,两点连线向下翻折,对称折法折出另一侧,打开 顶边这里三点二厘米之一,稍向内卷折,然后打开这两点连线,将上层向内翻折,改卷向下压平, 然后将上方这一段新折痕裁开,然后打开外侧向内做双卷折,把上方这个尖角裁掉,另一边相同打开,将中间部分向上翻开,两侧三角反折, 顶角向下翻折至这里折痕交点上方零点九厘米,然后再恢复向下翻折。翻面对折,机身合起,机翼翻折,在机头折出臀锁, 将两翼卷折,塞入口袋 机头至机尾一点一厘米高。开翼 打开压平机身, 粘贴两翼机柄、机背气道与机尾。机头也可以加强粘贴以下,防止开裂。两侧折出约零点四厘米一稍小翼。最后检查并整理机身 机尾,挤少许升降舵至可平稳滑翔完成。 使用纸飞机夹板定型,可以飞得更久哦!赶快折一句试试,看你能不能冲进国宝吧!
1061纸飞君 01:30查看AI文稿AI文稿
五月的北京,云淡风轻,正式测试制空纸飞机的好天气。今天要测试的机型是鞋内塞制空短机超新新六。我怎么感觉自从打开了裁剪封印,制空纸飞机的鞋修之路就再也回不去了。只有敢于突破限制,才能让设计永无止境。你就说它飞起来香不香 吧, 低一头就轻轻松松。先看一下飞行姿态, 稍稍调整一下,看我的真正实力, 不接妥妥三十秒!还不赶快折一只试一试你能飞多久?
753纸飞君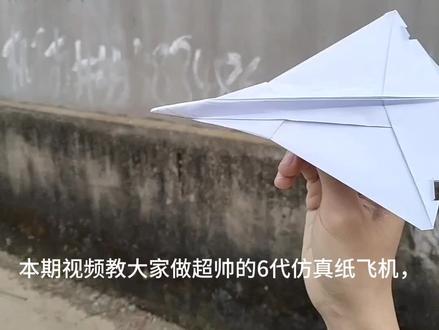 03:52查看AI文稿AI文稿
本期视频教大家做超帅的六代仿真纸飞机,这期的是详细教程,增加了之前漏掉的步骤,如果感觉速度快的话,可以用零点五倍速。
4386靈风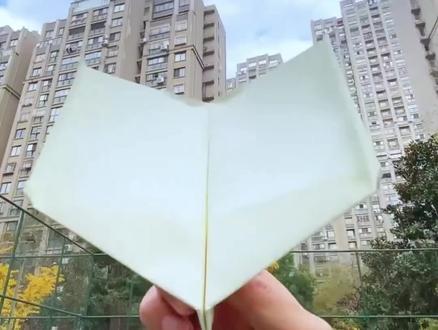 00:48查看AI文稿AI文稿
教你折制空天花板的纸飞机,轻轻一头续航直接拉满 a, 四指左右对折打开,上下对折出点上面,向中间点折 转过来上面其刚刚的点对折两边,其中线折出尖头,尖头向下,边线斜折, 其线条向内挤压上面向下压平多余三角形向内折翻过来对折翻折出翅膀, 翻折尾翼撑开调整尾翼就完成了。
108小强爱折纸 14:27查看AI文稿AI文稿
while competing in red bull paper wings i've been working on a lot of gliders for the airtime category and in the airtime category your basic objective is to stay in the air for as long as possible once you throw the plane and this is easily the best plane that i've ever published for that kind of competition with a good throw and a well folded plane this can fly in the air for up to fifteen seconds which is a very very competitive score in that kind of competition and even better this thing looks like a bird i think it's just absolutely beautiful so perform as well it looks great and i have designed a template for raven that i absolutely love if you support me on patreon com foldable flight you can download and print off this template as well as over sixty others at this point and it's an ever growing library honestly it's just a really really good deal so if you're interested head over there and check that out with all of that said let's see this plane in flight and then i'll teach you how to fold it all you'll need in order to fold raven is an eight and a half by eleven inch or a four sheet of paper and we're going to begin by folding this top edge here to the bottom edge you can see i've already placed my crease so that's nice and easy for me and i'm going to open the paper back up and keep your left edge, the left edge and flip the paper over like so so now this is a mountain crease and we're going to fold the top edge here to our left edge my crease should go right through the top left corner and i'm only creasing to this point here along that center crease and now i'll unfold and i'm going to do the same thing taking this bottom edge to the left edge and again i'm just creasing to that point on my center crease just like so and now i can fold the paper in half along that center crease right, like that and stand this whole section up and now squash fold it landing this spine here along that edge right there and then i will open the paper back up and rotate it into this orientation here and now i'm going to fold the top edge into the center and do that on both sides i'll open that up up and fold the top edge to this point right here and now when i open this up notice that these outer diagonals are valley creases currently and the inner ones are mountain creases i'm going to flip my paper over, so that the opposite is true and i'm ready to make an important fold here basically i'm folding from this point right here where this inner diagonal crease intersects that crease there and i didn't quite get the intersection so this is my point there i'm going to crease from that point up to where this center crease intersects the top edge and i'm going to actually mark those on the other side of the paper as well really quickly, so you can see as i make this fold i'm looking for this reference point right here where my center creases intersecting the top edge and that point there which is the opposite side of that point right there and i can open that up and now i'm going to do the same exact crease on this side okay and now we have what is kind of our set of precreases preparing us to make a collapse here if you have followed meat exactly, so far your creases should be mountain creases along this outer square or diamond here valley creases along the inner diamond and then this whole center crease or not center crease horizontal crease right now is a mountain crease we're going to need to change that into mountain crease along this section here between your outer diamond and the inner diamond this needs to be a valley a mountain again through this section here valley mountain okay so let's prepare those creases and i actually want this section down here on my center crease to be mountain as well, oh, that's not true i need that to be a valley sorry for confusing you so i'm popping these in and you can kind of see the shape on creating the basic thing that i'm going to be doing here let me flip the paper over i'm folding this top point to that point right there and as i do that watch what the paper does it's going to collapse into this shape here so i'll show you that from the other side as well, so as i pull that down let's make sure that this crease is doing exactly what it should do going all the way to that point right like so it kind of pulls in just like that as i bring those two points together and it creates this shape and then when you have it like this you're just folding your plane in half so that these layers go on the outside i know that was complicated that's why this plan is considered an advanced model but hopefully you were able to follow that with me and now we're going to open this up along this existing crease that's in here just like so, and you can see that doesn't lie flat just by doing that so now you find this edge right there and you're going to pull this layer down right along that allowing a new crease to form from that point to that point there and this whole thing to open outward as you do that land this edge right along that edge and you can flatten like so, and we're going to flip the paper over and do the whole thing on this side as well, so i'm opening up along this existing crease right there and then i can pull down right along the top edge of that layer creating a crease there and a crease from that point to there, as i flatten that and book match it to my other wing just like so okay so now this is going to become the nose of our playing here on the left side, i'm going to fold from this point where this edge is intersecting the top layer of my paper i'm going to fold up to that corner there just like so, and then i'm going to open that up and reverse the crease, i just made and then tuck all of this tab here behind all of the other layers, locks, everything together and i'll flip the plane over here's my nose and do the same thing on this side so i'm folding from this point here to this point out here opening that up and reversing this crease and tucking this tab behind everything else okay and now here's our nose i'm folding from our nose to about a centimeter or half an inch above this corner there, so this is the wing crease folding just like so that can be an estimation at the back it doesn't have to be an exact measurement and i'll do the same exact thing on the other side flipping the paper over folding this wing to match and we have one more kind of tricky step left in the plane you can see we are almost done but the wings aren't quite shaped correctly yet this step depends on whether you are using a four or eight and a half by eleven paper basically we're going to be folding this nose grabbing both layers at the same time to a point along this wind, this wind crease here and the way we determine which point we're folding to is whether you're using a four or even half by eleven so if you're using a four find this crease that's running right along here and just kind of imaginary imagine continuing that crease to this point right there that is the point you fold your nose to and actually you want aim just below it slightly under this wing crease so basically i would fold to about that point right there and since i'm using a four that is where i fold to if i was using eight and a half by eleven i would fold basically to this point right here the junction between this edge and that edge and that would be kind of my target for folding these layers it needs to be a bigger front section so here using a four i fold right to that point just below this intersection and now i have kind of these two mirrored creases you can see ones of mountain, ones of valley from this perspective the one that is a valley so the mountain over here is the one i want to work with basically, i'm going to go ahead and fold in along that crease that already exists from that last step and then i want to try and mirror that by reversing this crease on the other side and you can kind of do that, but the layers are so thick that it's hard to reverse that really precisely, so make sure as you close this that your wings match up and you can see mine don't quite match up, so i'm going to adjust this crease just a little bit until my wings are more similar just like so, and now i'm ready to fold again on my wing crease here, so i'm not making any new crease, i'm just folding right along that and you can see we've got this kind of elbow locking things together now once, i do one side i gently do the other side being careful not to tear that center section right there that's kind of like a lafast lock, right at the front of the plane okay and now all that we have left to do is curve the wings and the way we're going to do that is kind of just roll these really thick layers to start right at the front of the plane, but basically you are working and you want to roll these two wings symmetrically, so that they look just alike and you want to bring it really down and let your wings droop below the plane and come down so the outer edges of your wings are basically level with this lowest point of the plane that's really going to help its stability when you bring the outer edges of the wings down so this left wing is about the way i want it curved and i would just continue to curve this right wing until i get it in that same orientation now with the eight half by eleven version of this plane you will probably need to add just a little bit of up elevator to the plane and that just improves its balance, but with the a four version you're not going to need that probably the other thing to note is that you don't really tune this plane the way you tune most planes so if it's rolling to the left that basically means your right wing is generating more lift than the left wing, you can curve your right wing, a little bit more so if it's rolling counter clockwise you curve the right wing, a bit more if it's rolling clockwise you curve your left wing, a bit more and if it's just erratic and not seeming like it's well balanced make sure that the outer edges of your wings go lower than they currently are and that's basically the key to balancing this paper airplane so thank you so much for watching this tutorial and good luck flying。
427手工创意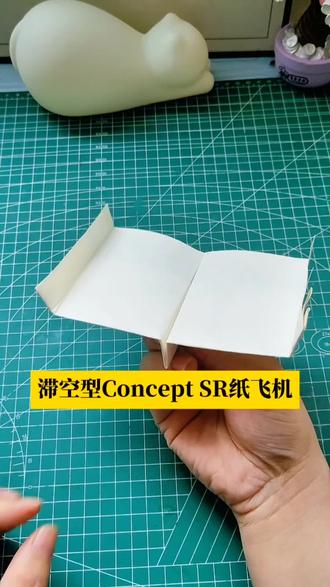 00:50查看AI文稿AI文稿
今天咱们折 concept s 二纸飞机,把 a 四纸短边对折三次, 把下面对准最上侧折痕,沿着中间折痕向上折叠, 再把底边对准下侧折痕折叠,再折叠出机翼和一稍小翼。 学会了帮我点赞、关注和推荐吧!
60悦爱折纸 10:03查看AI文稿AI文稿
找老师最快的方法就是点纸飞机,今天我就给你们盘点一下一款制空纸飞机。好的,我们先准备张 a 四纸的一半大小 中线对折, 要是我用 a 四的话容易折废。然后这样对折,看到这里停止, 然后这个再翻面这样,然后按照刚才你折的那一面一样, 这样对折, 再展开这里也是一样。 再翻到这里,然后这里再压下去, 这样我们先再展开 这里这样对折, 然后再像刚才你的那个焦点珠笔踩点, 拿出来切割器,然后把刚才对折的地方给裁剪下来, 拿出来剩下几张像刚才那个重复折,再再翻面正对折, 另外一边其实也是一样, 折好之后再向,然后我们这里往上对着,要和刚才我们的大理一样, 或者一折就能折到那里也可以的。 折成这样之后展开这里再向下再折, 同一步同折, 折成这样后,应该是从往后吧, 这样之后再展开,再这样对折, 而且是两角向中间对折, 然后再到刚才的折痕,折到刚才那个一点, 折断以后再打开, 这都像这样对折, 然后这边往里面推, 就折成了, 另外一边也是一样, 然后这里再这样对折。记住是我们刚才折的这一步,这里再向上对折一次,展开到这里,把这里塞进去,这样 另外一边也是一样, 整体展开。 不对,现在不用整体展开,再这样。好, 整体展开,现在是 翻过来,然后这里恢复钢材的折叠器, 然后再这样,刚才我们看到这里再向正面对折, 折好之后再检查一下,这时候就和那个机身有点相似。好,我们再这样对折, 这里留一厘米,和这里一样, 再这样一次拿出胶,然后在这里粘上,防止这里开 两边也是一样,粘上胶翻过来,它开 我们头部用的胶要小一点, 这里粘那一点透明胶, 然后这旁边折出小鸡眼,记住折出来的要是零点四厘米, 折好之后等你积分, 这也起风波。我们拥有了一架制空子飞机。是不是很帅?要关注小老弟呦。
100机智小老弟(一年级版)


