普兰德电动连续分液器使用方法

粉丝92获赞414
相关视频
 02:17
02:17 06:24
06:24 01:42查看AI文稿AI文稿
the pipetting mode is available on both the handy step touch and the handy step touch s the pipetting mode allows e set volume to be aspirated than dispensed this mode is ideal for dispensing large volumes or more viscous solutions swipe left or right until the pipetting mode is displayed then tap to confirm insert a pd tip two and press the step key to confirm the pd tip volume is automatically recognized the handy step touches compatible with high quality tips from other manufacturers however, you will need to enter the volume manually to set the desired aspirating and dispensing speeds tap the speedometer icon set the desired aspirating and dispensing speeds by swiping vertically up or down then tap to confirm to set the desire dispensing volume tap the water droplet icon type in the desire dispensing volume using the keypad then tap to confirm press the step key to aspirate the pipette screen menu or the operating screen displays the dispensing volume and approximate volume in the pd tip press the step key to dispense to purge or empty the pd tip first tap the up and down arrows in the bottom right corner of the menu next press and hold the step key to purge the remaining liquid in the pd tip tap, the tip ejection icon and press the step key to eject the tip。
7波澜不惊 02:55查看AI文稿AI文稿
here in use of your dispense s bottlecock dispenser this video highlights the proper use and care of the dispense s and dispense s organic this is not a substitute for reading your manual users must read and understand all aspects of your manual before using your dispenser models are available for most laboratory reagents the dispense s and dispense s organic both have forty five millimeter threads they are also supplied with the selection of thread adapters to fit most common laboratory bottles select the appropriate adapter and apply it to your bottle adjust the length of the telescoping filling tube to the height of your bottle and attach if your dispenser uses a discharge tube with a recirculation valve the recirculation tube must also be installed insert the tube with the opening pointing outward the dispense s has a rotating valve block which allows you to position the dispenser with a bottle label facing you at all times to primer dispense s unscrew the screw cap of the dispensing tube and rotate the recirculation valve to the recirculate position gently pull up on the piston and push down to the lower stop repeat this process at least five times rotate the resurculation valve to dispense to avoid splashing hold the discharge tube against the inner wall of a suitable waist vessel and dispense discard the first dispensing make sure no bubbles appear in the viewing window on the discharge tube to adjust the volume setting for the analog adjustable model loosen the volume selector thumb screw slide the pointer to the desired volume and retighten the thumb screw for digital models rotate the volume setting wheel until the desired volume is indicated in the display window to dispense hold the discharge tube against the inner wall of a suitable vessel and gently lift the piston to the upper stop and push down gently and steadily to the lower stop when finished reattach the screw cap to the discharge tube spending is finished never leave the cylinder full return the recirculation valve to the recirculation position and empty the cylinder the dispense set as completely disassembles for cleaning cleaning instructions can be found in your operating manual refer to the operating manual for additional care of maintenance instructions to ensure that your dispense set stays in proper working order。
2波澜不惊 00:41查看AI文稿AI文稿
一页气怎么叫准?你会吗?跟着小吉一起来了解一下吧!把这个东西先拆下来,把这个摁下去,然后倒过来,这个提前这个这是现在,现在调的话就可以,就就就这个样子, 折完以后再把它放回去,必须要把它摁上去就可以了。怎样降水?你学会了吗? 记得点击关注哦!
68集思仪器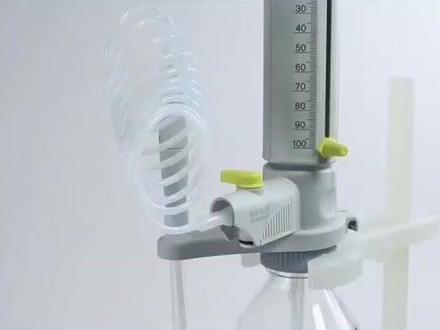 02:42查看AI文稿AI文稿
bronde offers a number of dispense at s accessories to make dispensing safe and easy one of the accessories is the flexible discharge tube it makes it easy to dispense liquids from an unpressurized bulk container into a series of tubes such as microcentrifuge tubes or sinillation vials with the dispense at s and dispense at s organic the low operating forces of the floating piston design allows new to operate the dispenser with one hand freeing up the other to move the dish charge tube from tube to tube the use of a bottle stand is recommended for all dispense set as models to stabilize the bottle during one handed operations remember the flexible discharge tube must never be used with hydrofluoric acid the brond flexible dish charge tube is made of the ptf tubing so it says chemically compatible as your dispense sets it also features a textured safety handle to ensure that the tube remains firmly in your hand the handle is weighted to minimize the tube recoiling if dropped before installing the flexible discharge tube first select the correct flexible discharge tube for your instrument for larger dispense set as models those with a nominal capacity of twenty five milliliter or larger choose catalog number seven zero eight, one three four for smaller dispensette models including the trace analysis version with the nominal capacity of ten milliliter or smaller choose catalog number seven zero, eight, one three two to install the flexible discharge tube simply take an empty clean dispense set s if the dispenser has a recirculation valve turn it to the recirculation position then remove the colored valve cap if the dispenser does not have a recirculation valve simply lift the discharge tube up and pull from the housing mount a flexible discharge tube holder to the bottom of the housing and tighten until secure remove the flexible discharge tube from the bag and remove any packing materials remove the colored valve cap prior to mounting the flexible discharge tube push the recirculation valve plug down then push the tube onto the valve block of the instrument slide down the housing and snap into place select the correct color valve cap for the instrument you are using and install onto the valve mounting plug then take the holder tube and screw it into the flexible just charged tube holder。
2波澜不惊


猜你喜欢
- 1584九尾狐狸