comfy ui出图流程
粉丝318获赞1425
相关视频
 06:13查看AI文稿AI文稿
s d 的开发团队又在搞事情了,前不久才出的 l c m 采样器加 low 模型,大大提高了 c o d q 上的出图速度,实现了时时绘图的强大能力。 这 l c m 采样器还没在我电脑里捂热呢, s c 开发团队又又又又上大招了, 太酷了!这回出的这款 sd xl turbo, 据说出图更快更凶猛,真正实现不到一秒钟出图啊兄弟们!我在这光看着他蹭蹭蹭的出图,我提示词都来不及说了。 这次 stability ai 除了可以在线测试 sd xl turbo, 也一如既往的放出了 sd xl turbo 的开源大模型,简直是业界良心,牛逼!那这回我可是坐不住了,上网一通搜,不但下载到了 sd xl turbo 模型,还有其他的很多干货,这次就一定分享给大家,这回绝对属于手把手了。今天这条视频主要是教大家在 comfortui 里面部署 s t x l turber 的工作流,那准备的工作呢,有点多,首先我们需要下载 s t x l turber 的底模型, 在这里选择这个六点九四 g 的 f p 十六就可以了。下载好以后呢,把它放到 cover ui 的根目录下面的 models checkpoints 目录里面。呃,顺便说一句,视频中所有的网址呢,我都会分享在评论区里面。接下来我们需要下载 s d x l turbo 的工作流。我们来到康慧 u i 的下载界面,往下拉,找到 s d x l turbo, 看到这个小狐狸的图片了吧,我们右键保存它,这玩意就是 s d x october 的官方工作流。 接下来我们还需要下载一个绘图用的扩展插件。这次我们来到 comfort 约跟目录下的 custom notes 自定义节点这个文件夹,在这里启动 cmd, 输入 get clam 加绘图扩展的下载链接,回车稍等就可以了。 我这里因为已经下过了,就会出现这样的提示,最后的最后千万别忘了把 comfort u i 更新到最新的版本, 那么好,经过这一顿猛如虎的操作,我们终于可以来到 cover ui 的界面了,点击清除,找到刚才下载的小狐狸图片, 直接拖到 comfortui 的界面里面,这样 sdx october 的工作流我们就有了,但还不算完,为了实现实时绘图,我们还需要进一步的部署。可以看到这边底模型 默认就是 s d x l table, 鼠标右键点击新建节点,点击 i like 节点图像绘画来添加绘图的插件。鼠标拖动节点右上角的图像到空白处放开, 选择 ve 编码, ve 编码的 ve 连接到底模型的 ve 上,在 ve 编码节点拖动输出端到空白处 选择 latin 缩放,设置宽高尺寸。如果是 s, d, x, l 的底模型呢,要在这里设置成一零二四乘以一零二四,那么这里呢,我们就设置五幺二乘五幺二默认。 再把 later 缩放的 later 和采样器的这个 later 的连接,改变采样器为 l c, m, 点击运行后操作,选择固定种子。接下来再和大家介绍一下绘图插件的各个功能,这个 be 呢,其实就是画笔, e 呢就是这个橡皮擦擦除。接着可以看到这里都是这个圈圈叉叉啊,这个圈代表圆形,我们来绘制一个圆形,这个自然就是矩形,哎,一个矩形 出来了,接着就是三角,那么在这个呢就是直线了,这个 p 是什么呢?这个是上传本地的图片,那么 t 呢?就是输入文字,好,接下来我们看这个 for 填充 实际演示一下,我们调高二法的参数,调整颜色,画一个圆,可以看到圆的里面填充的是我们设置好的这里的颜色外圈边缘呢?还是白色 rush with 调整画笔的粗细,那么这个呢,就是改变背景的颜色,如果对画的东西不满意,我们也可以点击右上角的撤销导上一步,或者是直接清除画布。我们这里可以直接跑 跑一张看一下效果,可以看到跑图的速度呢是非常的快,我这里完全没有做视频的加速。最后为了实现实事绘图,我们在提示词对列下面勾选更多选项, 再勾选这个自动对列,这样准备工作就完成了,我们试着改变提示词来出图,首先清除官方的提示词,输入一个苹果 iphone blue 蓝色,出图的速度呢和效果可以看到都很惊艳。接着我们重新输入一只猫, 再输入风格,这里来一个皮克斯的风格,好,再输入一只狗,一只猪,天空,月亮,星空,我们可以看到图像以离谱他妈给离谱开门的速 速度在我们眼前疯狂的刷新。哦买噶,那么我们刚才装的这个绘图插件呢,也不是吃素的,这里我们先把背景调成白色,调整画笔颜色和大小,调粗一些。提示词只留下一只猫,卡通,皮克斯,月亮这几个 好的雷丁森,安德砖头们。接下来就让大家见识一下我这个美术学院毕业学了几十年绘画的功底到底有多深厚? 好,那么通过我这个十级残废的画工,先不论质量如何,大家可以看到, s t x l turbo 和先前的 s t x l 模型相比,在出图的速度上绝对是吊打呀!我们可以展望一下, s t x l turbo 的出现,标志着人工智能在图像生成领域的右 一次巨大飞跃啊有没有?这可能预示着他的后续版本在视频生成方面会提供更加强大的支持?这样的话,也许今后我们在做电影短片、短视频以及广告制作等方面也会更加的高效和经济, 甚至能够实时生成定制化的视频内容。其实我也只是想到了这么多,那后面就让我们拭目以待吧!
43Well AI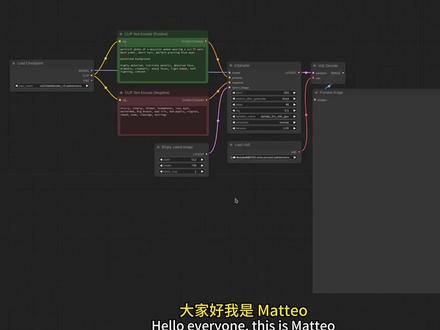 09:34查看AI文稿AI文稿
hello, everyone, this is matteo and today i'm going to play a little with comfy ui the goal is to create this kind of anime like realistic illustrations without the need of laura or checkpoint specifically trained for that and the cool thing is that you can set the realism factor from cartoonish to very realistic, so everything starts from a good checkpoint you need a generic model and i find deliberate to be a good one for what we are going to do today the prompt is very simple i like to split it into three parts the first is the main subject then we have the settings of the scene and finally keywords like cinematic, highly detailed and so on, and also all these will serve only as a scuffled in for the illustration that we are going to do later, so i'm not worried about the fine details i just want that the composition is fine let's see what we've got okay this is a good start already the image is a little bit burnt, but it is not important because we are going for an anima style so high contrast is good, but what i don't like is that there's a lot of bleeding between the tokens that are given in the positive prompt you can see that in the prompt, i have perfect piercing blue eyes and the scene became all blue not only the eyes, but also the armor and the big ground too so to fix that we can split our positive prompt into two vectors and merge them with a conditioning concat note like so the order is not important now in the first prompt, i will only have the main subject so portrait photo of a muscular woman wearing a sci fi or mac armor now, there are a couple of important keywords here one is muscular and the other is sci fi muscular helps to bring the attention back to the body of the woman otherwise, we will very likely get only the face and the sci fi keeps the attention away from fantasy because we used armor we only want futuristic armors and not fantasy ones now we can remove from the second prompt the main subject and keep everything else this way we have two separate vectors that do not bleed too much into each other so let's see the difference as you can see now the scene is less blue the armor is still bluish, but better than before and overall we have more brown tones which is nice so i think this is a good start for our illustration let's go to the next step that is adding a touch of ip adapters just for curiosity say let me try to remove muscular and write like strong and see if we get a portrait instead of a body shot you can see the attention is not on the body anymore, but only on the face because we have portrait as first token in our prompt, so let's put muscular back and go to the next step so the easiest way to add the ip adapter is by starting with the apply ip adapter node and then you can simply drag all the inputs and select the node this is the ip adapter model loader then the clip vision loader and we have to load an image then we connect the model and back to the case sample now we have essentially three options for the ip adapter model one is the base model, the other is the plus model and the last one is the light model you have to experiment a little, but if you want just a hint of the reference image you either pick the light model or the base model the plus would be too strong so i'm starting with the base model and as for the reference image i have this very nice scene you can pick actually whatever you want, but it has to be very simple and very cartoonish there should be not too many elements otherwise the scene is going to be contaminated too much of course we want to lower the weight i'm starting with point 35 and it's always a good practice to prepare the image for the clip vision so i'm going also to add a prep image for clip vision node the crop position is in the center and let's see the result and now we have a strong comic book graphic novel kind of illustration it's not exactly what i was aiming for also the eye is a little bit crooked and so i'm going to first of all lower the weight and i'm also adding a bit of noise that often helps with a generation now it's closer to what i want, but i think i'm going to add a little weight to get some anima style back and this is pretty good now the face is a little vanilla i wanted to have a stronger character so i'm going to try to add some famous art actress to the positive prompt we need someone who played some strong character and we can try with michelle rodriguettes now it is certainly more interesting we can try with like lucy flawless zoe salgana and i'm about to or this are your tools on now this is a good one now let's try to change the reference image and see if we get more interesting result as you can see the reference image doesn't need to be of the same kind of the image that we want to generate in this case this is not a sci fi scene, but of course if it is close it is better so let me see what i have here okay this is closer to what we want let's see what happens now since the reference is closer to our subject now we can set a higher weight let's try with and of course this is the portrait, so we lost part of the body, but but it's fine it's very nice illustration, very well lit and a good candidate for the next step which is upscaling so there are many ways we can upscal an image aka hires fix if the upscaled image can be very different from the original, we can upscale the latent directly and probably one one of the best method is with the an an latent upscale, but we want to use a low denois, so i'm not going to use this one on the other side of the spectrum we have upscaling with tile control net and that we grant an upscaled image that is very close to the original, but i want a certain grade of freedom when i'm scaling so what i'm actually going to use is a model upscaling in the pixel space so i add an image upscale with model then i grab the inputs and select the upscale model loader i like the full handy remarkry model, but you can use whatever you want we connect the image so this is a four times up scaler and it is a little too much so i'm going to scale the image down note with image scale by note by point five so the resulting image will be two times the original then we need to convert the pixel image into the latin space with vade and code we need the v model and finally we can connect a second k sample i can copy this and with ctrl shift v we'll pass the k sample keeping all the pipe connections course any delayton from the upscaled image now for the model i don't want the one that comes from the ip adapter, but i'm going to connect directly from the regional model because i want to be able to get back some realists out of this image when i'm scaling i like to use dpm plus plus 2m with kara scheduler and we change the seed we don't need many steps 20 are usually more than enough and of course we need to lower the denials, the lower, the denials, the closer will be to the original image。
50喜好儿网 11:5049星河AIGC
 00:26查看AI文稿AI文稿
confid ai 出图生产力继续提升。 toxis 大佬出手,将三 d 骨骼模型节点内置到软件当中,目前项目刚刚开源,如果你的电脑能跑清华的 lcm 模型或者 sdxl turbo 这两个高速出图的 ai 模型, 那就能体验三 d 模型节点带来的快乐。在界面中打好提示词,我们负责让人物摆 poseii 负责骚,体验秒级互动的快感。
244AI科技评论 01:37查看AI文稿AI文稿
今天我们来实验一下,用可以打加抗威 ui 进行一个实时的人物动作姿态的一个变化。随着人物动作的变化,我们的人物呢,不会进行重绘,而只是一个姿势的一个改变,在默认情况下呢,我们上次讲的抗威 ui 实施绘图的那个视频教程呢? 我们的姿势只要改变,那么我们人物的穿着和打扮,还有还有面部表情都会进行一个随机的一个变化。 但是今天呢,我们只需要改变姿势,其他的都是固定一致性不会去改变的。我们是也可以实时的对同一个角色进行头发颜色的改变和眼睛颜色的改变,这里改变呢,只需要更改提示词就可以了, 比如说像这样,我们将粉色的头发呢,给他改为蓝色的头发,而我们的穿着基本上只有很微妙变化,我们还 可以通过改变他的骨骼形状来改变我们人物的一个姿势,我们可以将他的头部这部分让他稍微低一些,那么在右边生成的新的图像呢,那我们的头像就会往下低一些,那么想保持这样的一致性实时绘画的, 我们最好是选择一致性比较高的这个 pose 模型,比如说这个麦菊写实类的,然后呢,你再配上一个一致性比较高的一个 lora, 就比如说这个金克斯的 单独一个角色的一个 lora, 这样的话,这个 pose 模型配合 lora 模型都是一致性的模型进行实时绘画呢,就能够保持更好的一致性。好了,那么今天的分享就到这里,如果大家觉得这个方法还可以的话,那么请帮我点击关注加三连,我们下期再见。
249旭狗与金咪


